I working on a SHO project with M27 and just hit the 10 hour mark so I peeked at my progress to date by integrating the three NB channels. I increased my subs to 300sec for the SII filter since the 120sec ones were looking weak as they were coming in the previous night so now I have both 120sec and 300 sec subs for SII (the Ha and OIII are 120sec subs). My integrated stack for the OII is looking pretty blown out but the Ha and SII look good. Two questions. Short of re-integrating the OIII with a reduced number of subs at the expense of SNR, how do I reduce the blown out effects of the OIII? Secondly, how do I combine the 300sec and 120sec SII subs into one final integrated stacked image? I'd like the capture the data from both exposure lengths. Thx!

You are using an out of date browser. It may not display this or other websites correctly.
You should upgrade or use an alternative browser.
You should upgrade or use an alternative browser.
How to reduce blown out OIII core on M27 NB image
- Thread starter Takman120
- Start date
Short of re-integrating the OIII with a reduced number of subs at the expense of SNR, how do I reduce the blown out effects of the OIII?
i don't think this would help... integrating doesn't really cause blowouts because the input images are averaged, not summed. while the two operations are equivalent, dividing by the number of subs prevents overflows (and even if you didn't average, if working with 32b floating point numbers you probably would not overflow anyway.)
can you post the integrated image? maybe something else has gone wrong.
for the 300/120s stuff you can actually just integrate them all together. by default PI's ImageIntegration weights images by SNR so just combining them will work fine.
rob
Rob and Geoff - Thanks much for both of your fast responses! I’m a newbie to PI so bear with me on a couple of questions.
First, re integrating different exposures, after loading and running my 300 and 120 sec SII subs through WBPP, PI generated 2 masters - one each for 300 and 120 secs - not one. Why not one? I’ll see about posting the integrated image.
Good suggestion, Geoff. I’ll follow up.
Paul
First, re integrating different exposures, after loading and running my 300 and 120 sec SII subs through WBPP, PI generated 2 masters - one each for 300 and 120 secs - not one. Why not one? I’ll see about posting the integrated image.
Good suggestion, Geoff. I’ll follow up.
Paul
Hi Paul,
a probable cause for weak calibrated OIII frames might be clipping. Please check the calibrated OIII frames (and the other calibrated NB frames as well) for pixels with zero values. Histogram and Statistics are great tools for this task.
If clipping is detected, you will have to use an output pedestal in ImageCalibration. WBPP 2.1.2 does support the application of an output pedestal as well.
Bernd
Rob and Geoff - Thanks much for both of your fast responses! I’m a newbie to PI so bear with me on a couple of questions.
First, re integrating different exposures, after loading and running my 300 and 120 sec SII subs through WBPP, PI generated 2 masters - one each for 300 and 120 secs - not one. Why not one? I’ll see about posting the integrated image.
Good suggestion, Geoff. I’ll follow up.
Paul
WBPP is a little different than plain ImageIntegration - WBPP has an exposure tolerance control at the top of the lights pane which controls how the subexposures are split into groups. you can increase this tolerance until you see the lights all get grouped into one group over on the left hand side.
rob
Hi Bernd - Thanks for your response. Given that I just started diving into PI, could you provide a little more specific procedure I would use to follow up on your suggestion? I have no idea of what a pedestal is and not sure how to check clipping with HT and Statistics.
Paul
Paul
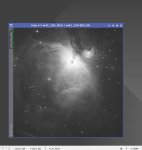
Just run your cursor over the image and read the value of K that shows up at the bottom (See attachment). It will be between 0 and 1, with a value of 0 denoting black and a value of 1 denoting white. In the attachment you can see that the image looks blown out, but the value of 0,36 for K indicates that it still has a long way to go before being saturated. FWIW you can see the finished image here https://www.astrobin.com/291646/B/
Attachments
Last edited:
I will cite a section of my guide about this topic:Hi Bernd - Thanks for your response. Given that I just started diving into PI, could you provide a little more specific procedure I would use to follow up on your suggestion? I have no idea of what a pedestal is and not sure how to check clipping with HT and Statistics.
--------------------------------------------------------------
8 Checking the Calibration Result
8.1 Checking for clipping in the low range, Output pedestal
After following the above suggestions, you should test some of the resulting calibrated light frames for clipping in the low range
- with HistogramTransformation:
check the histogram (adjust horizontal zoom that the histogram region around intensity 0 can be inspected carefully, this might be the case at a horizontal zoom of about 50 - 100) and
- with ImageStatistics (option 'Unclipped' disabled):
check count (%), it should be very near 100 %. The fraction of clipped pixels equals (100 % - count (%)).
Following the calibration approach recommended in this guide, the calibrated light frames normally should not be clipped. If you nevertheless detect clipping, the calibration result is not correct, so please check the following conditions carefully: acquisition of calibration frames, preparation of the master calibration files and settings for the calibration of the light frames. If you cannot find a cause for it, clipping is possibly caused by a too low signal in the light frames (e.g. due to very short exposure time or the usage of narrowband filters and short exposure time). If the noise in the background exceeds the median of the background in the calibrated frame, some pixels will have negative values after image calibration.
When this is the case, things cannot be put right by increasing the offset setting in the camera driver, because this would affect light frames and all calibration frames in the same way. The purpose of offset [2] is to prevent clipping of individual subframes during A/D conversion.
Clipping due to the subtraction (light - MD) performed in the calibration process is prevented by applying an output pedestal in the calibration of the light frames. If needed, the value of 'Output pedestal (DN)' has to be set in the 'Output Files' section of the ImageCalibration process. Usually a value in the range of 100 - 200 DN is sufficient. It doesn't hurt if the value is a little bit larger than necessary for avoiding clipping though. Again the new calibration results should be checked as described above in order to make sure that the value of the output pedestal was sufficient.
--------------------------------------------------------------
Bernd