Hi all,
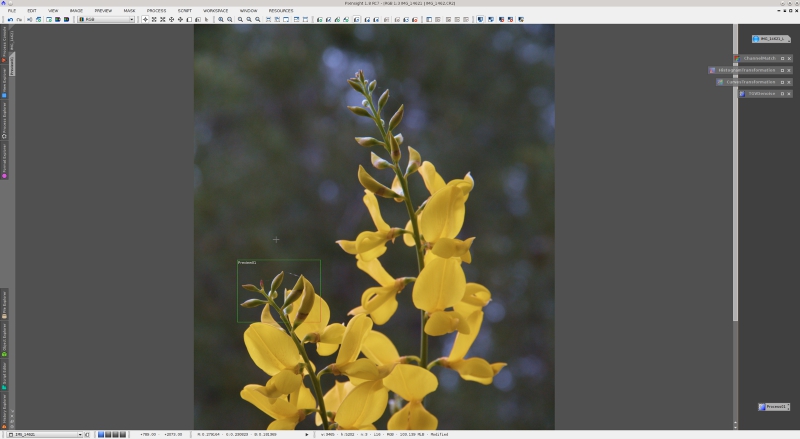
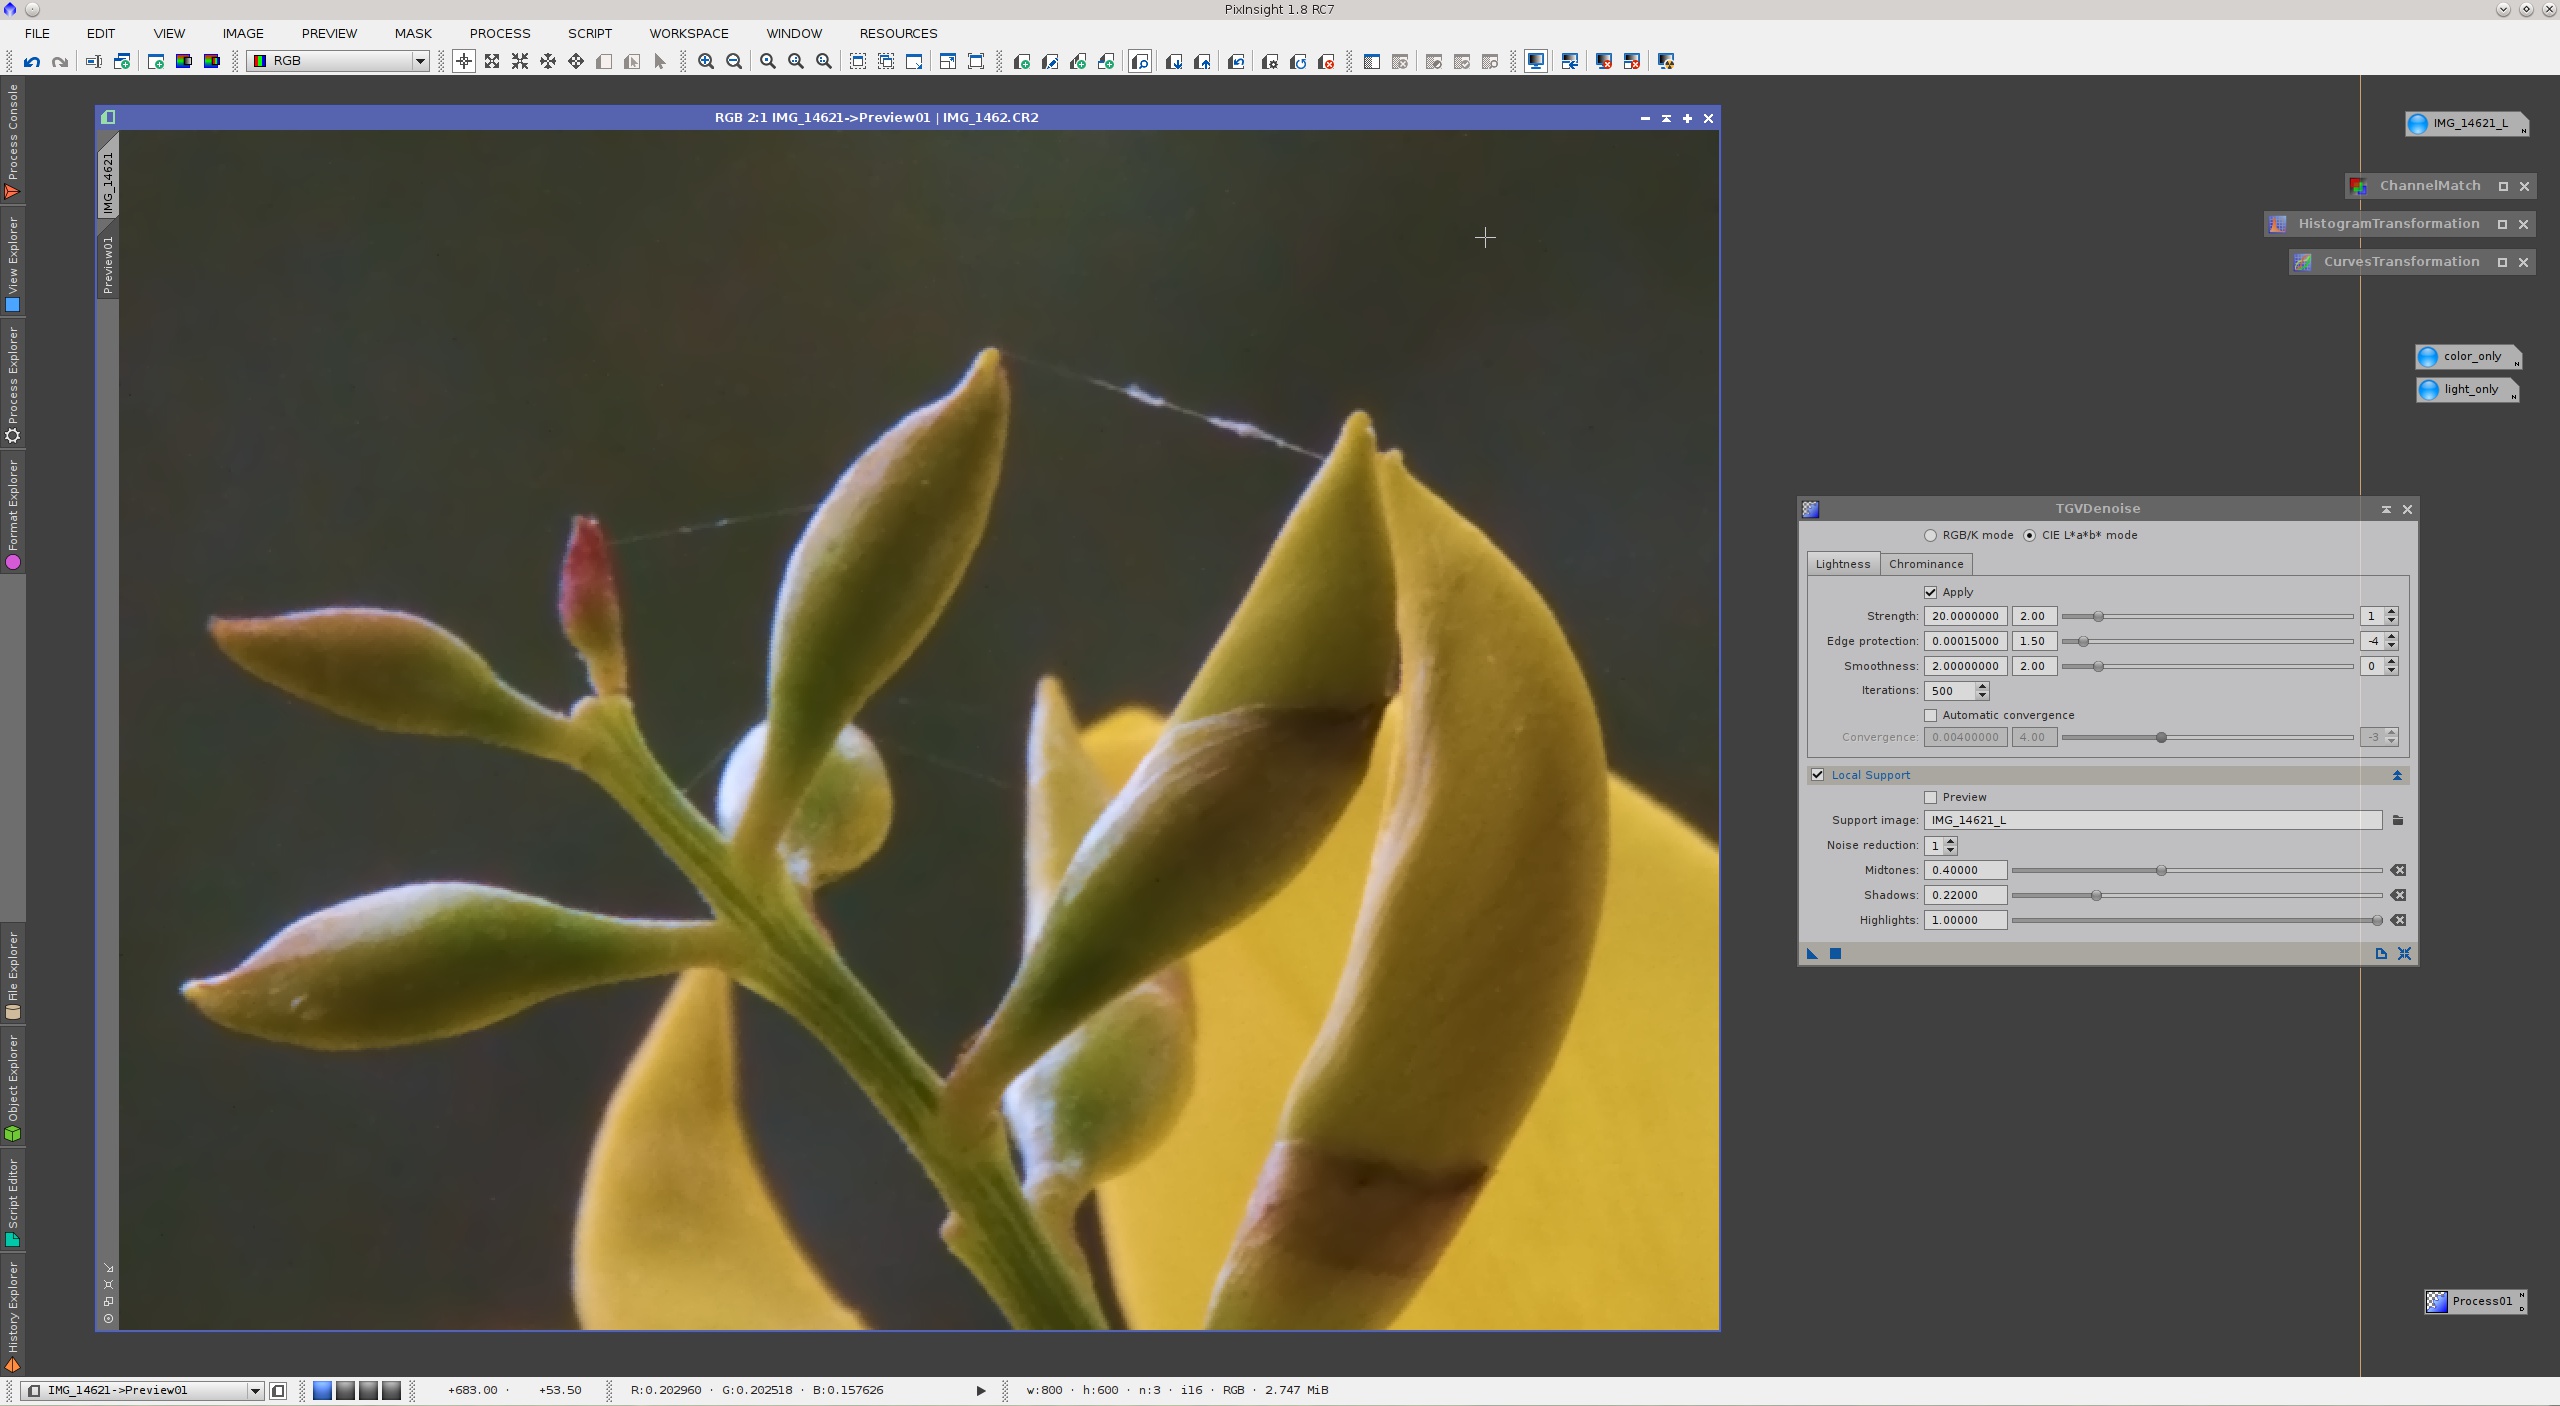
As promised, here is a first noise reduction example with the new TGVDenoise tool. To show a complete workflow with color data, I have chosen an image that poses a relatively difficult problem for noise reduction. It is a Canon EOS 7D raw image that has already been stretched and saturated with the HistogramTransformation and CurvesTransformation tools in PixInsight.
A strong color saturation curve has been applied directly after the initial stretch, which has been an obvious mistake: A side effect of this uncontrolled color saturation boost is generation of severe noise in the chrominance. We know that color saturation enhancements must be applied with some control (with protection masks, and/or after noise reduction, etc.), in order to prevent chrominance noise intensification. But this is just an example, where I have taken the liberty to make some things difficult on purpose.
The resulting image is an interesting noise reduction problem, mainly due to the following factors:
(1) Severe chrominance noise, for the reasons explained above.
(2) Fine details at scales dominated by the noise.
(3) Low-contrast structures that can be problematic for edge protection.
(4) Extended background areas with strong noise and no significant detail.
Reason (1) is why we have implemented a special CIE Lab working mode in the TGVDenoise tool. When the noise is very different (in its distribution and intensity) for the lightness and chroma components, applying two separate noise reductions seems the most logical option. Reasons (2) and (3), and the fact that they are plainly opposite to (4), suggest the need for a local support image to drive the TGV regularization algorithm.
As usual, we'll work on a small preview covering a region of special interest. Recall that as long as we don't enable its automatic convergence parameter, TGVDenoise is a fully previewable process, so what we'll get on the preview will be consistent with the result obtained on the whole image.

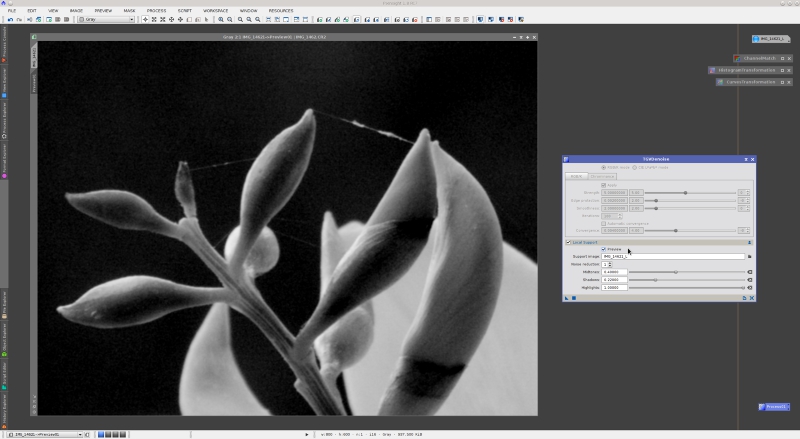
The screenshot above will give you an idea of the severity of the noise in our working image, especially color noise.
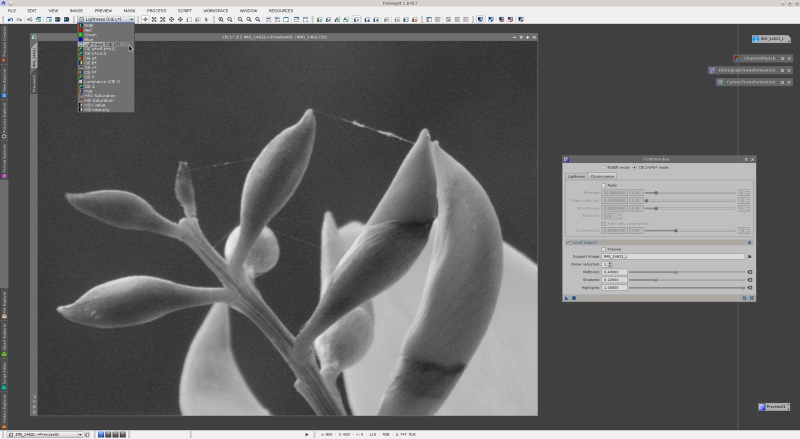
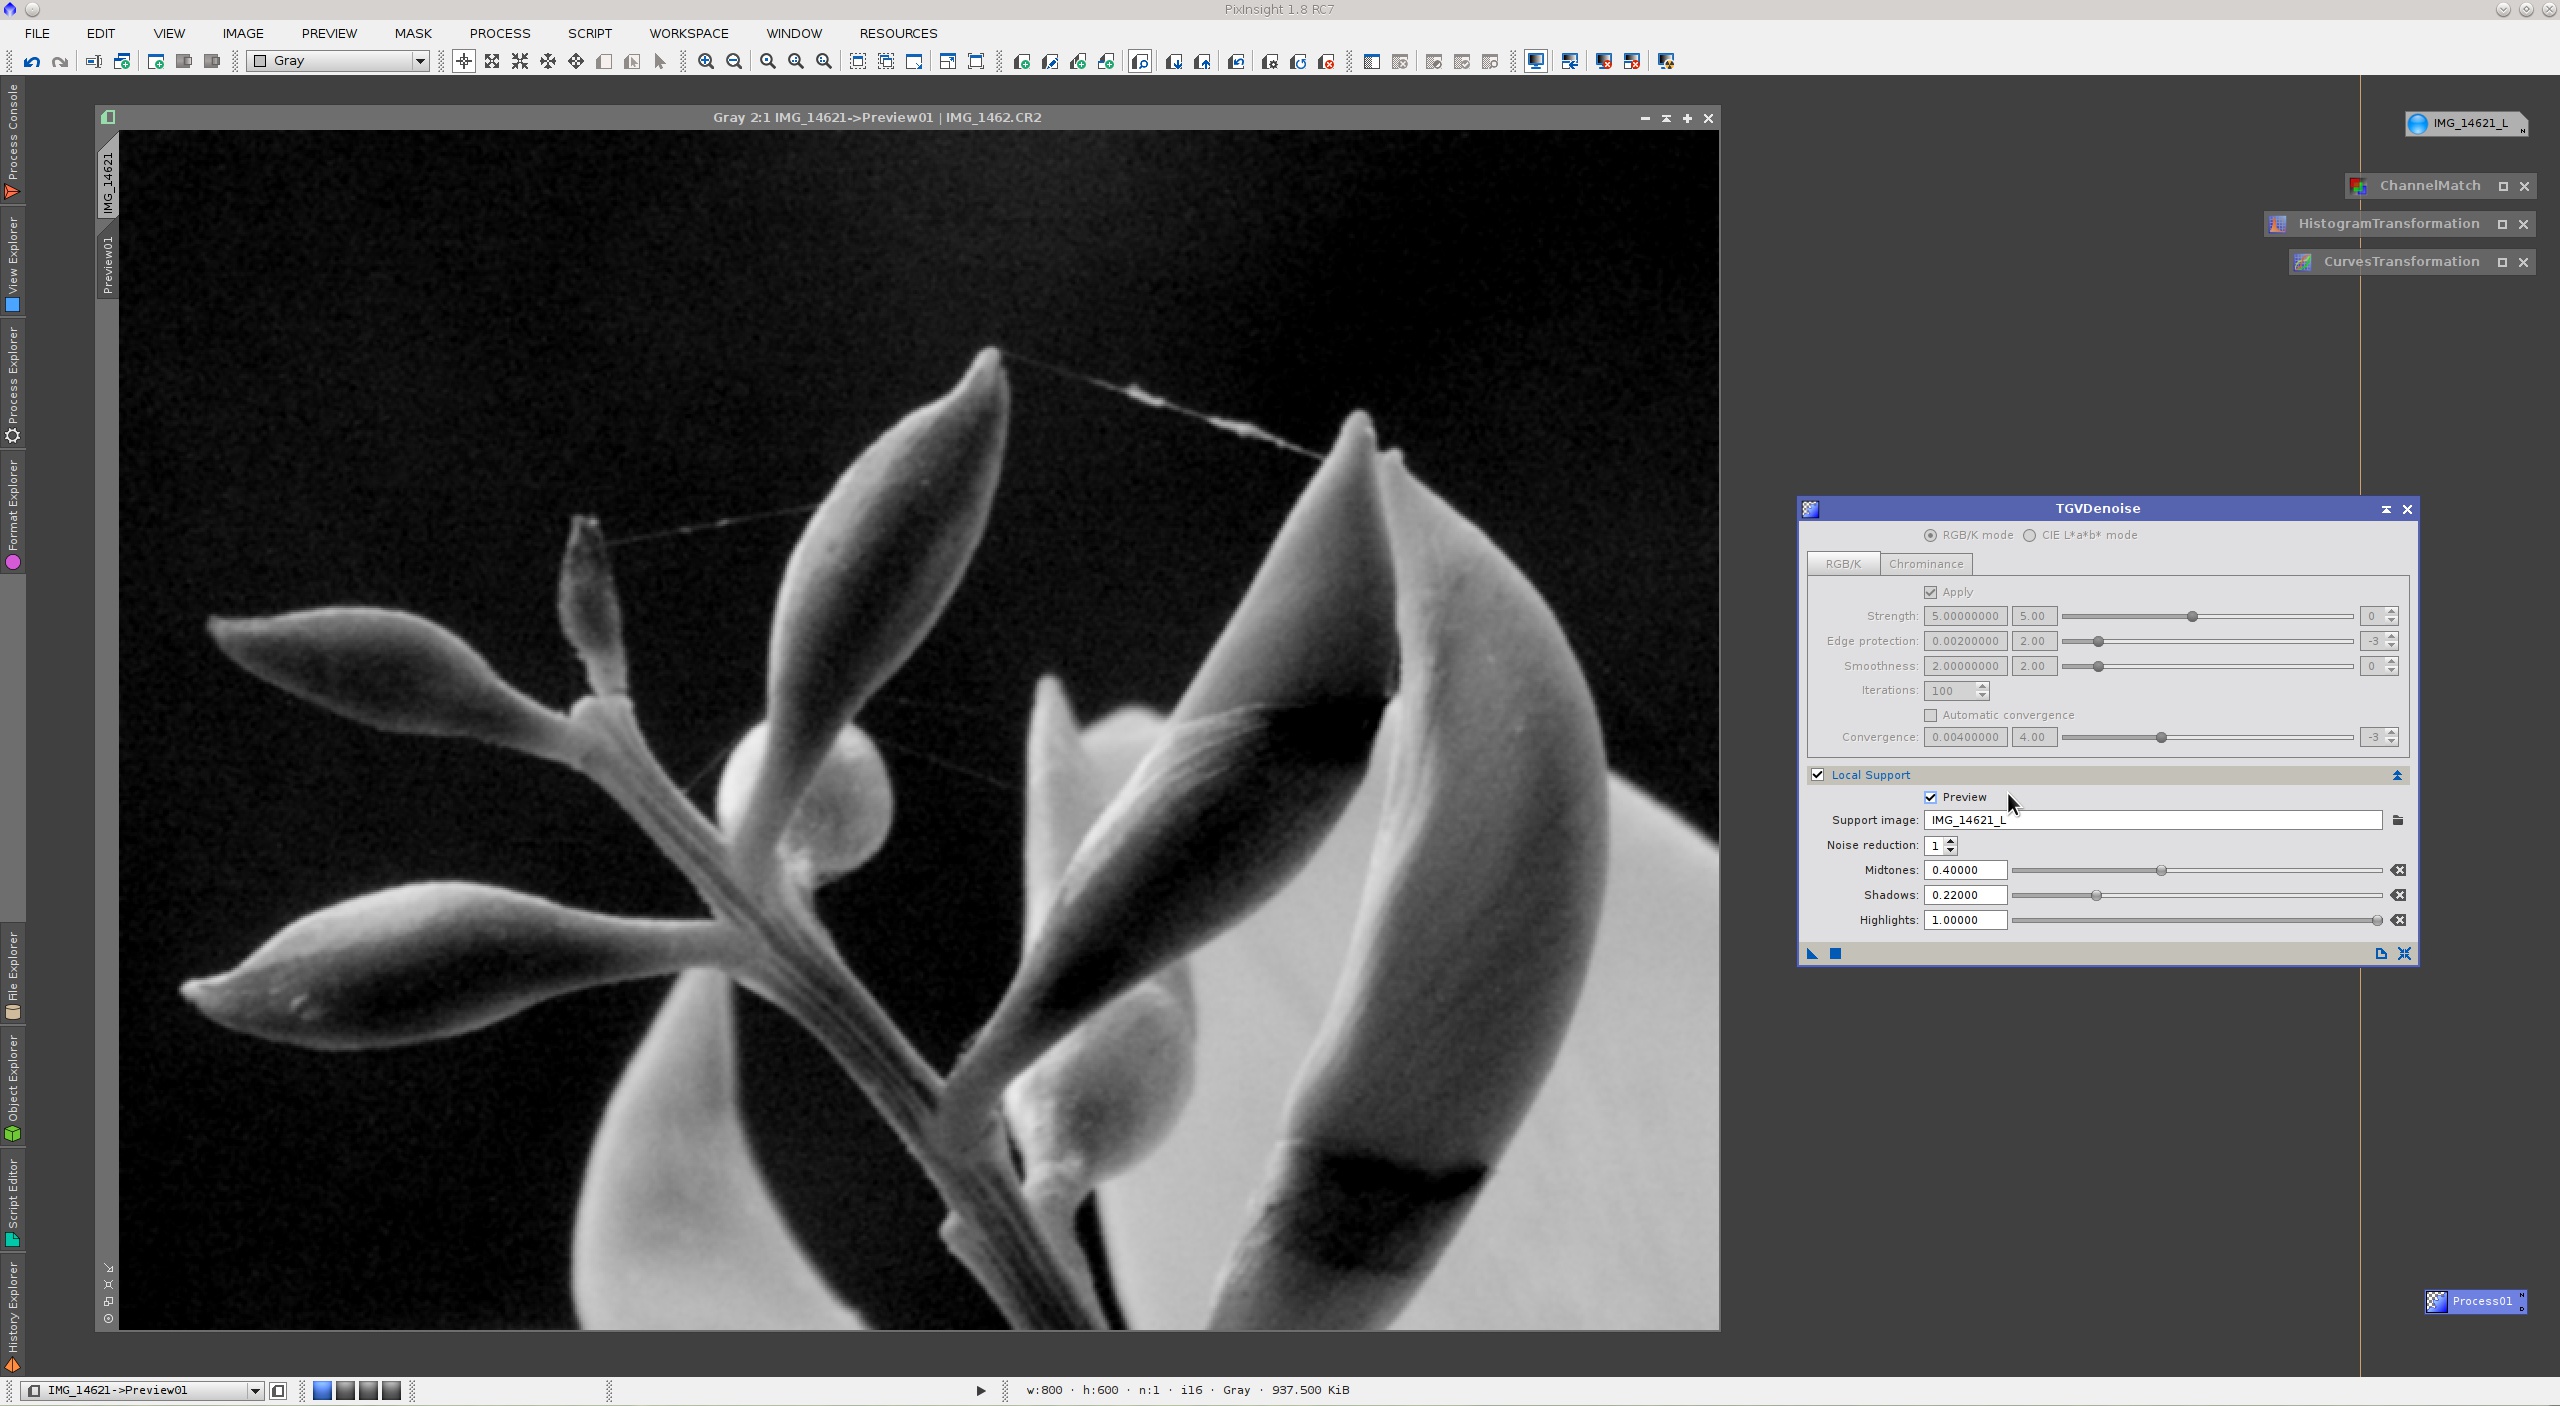
Our first step is building a local support image. By default, the TGVDenoise tool uses the intensity component (in the HSI system) of the target image. In this case, however, I prefer to work with the lightness component because it is much less noisy than intensity, due to the color noise problems that I have described. So we'll extract lightness (IMAGE > Extract > Lightness) as a new image and select it as a local support on the TGVDenoise tool.
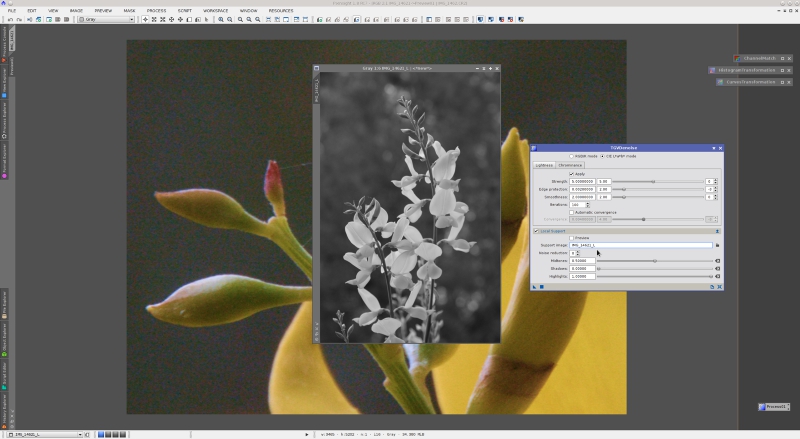
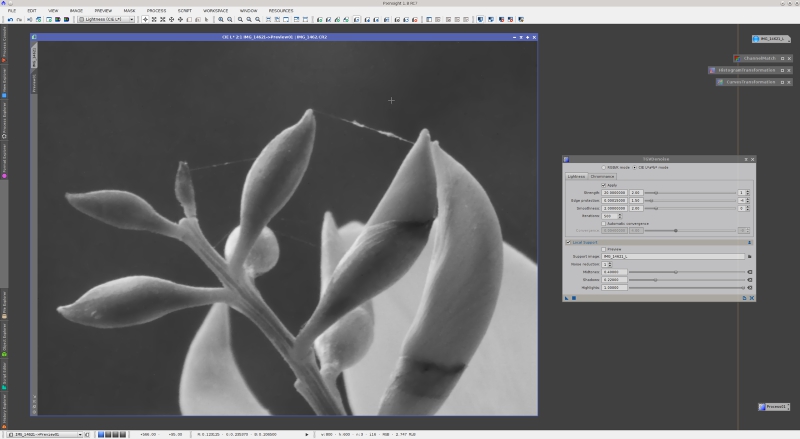
Recall that a local support is intended to represent the signal-to-noise ratio of the target image, with the purpose of conditioning the TGV noise reduction algorithm. So where the local support image is white we are saying 'this is signal, look but don't touch!', and where the support is black we say 'this is trash, remove it please'. To improve the support in this sense, we have several histogram controls. I have used the midtones balance and shadows clipping parameters to increase contrast, as shown in the next screenshot:
I have also removed the first wavelet layer to make the support slightly less noisy, and hence more accurate. Note that this does not alter the support image in any way; the transformations are applied to an internal working duplicate, never to the selected image.
On the screenshot above, note that I have selected the Preview mode in the Local Support section. In this mode, TGVDenoise replaces the target image with a copy of its internal working support image, which is useful to control the support. We have to disable this mode to perform an actual noise reduction procedure.
As I have said at the beginning of this post, we'll work in the CIE Lab color mode of TGVDenoise in this example. We'll start with lightness noise reduction, so we'll disable chrominance parameters and select the Lightness display mode for the target image. In this way we can concentrate on the lightness, without wasting time processing the chrominance components. This allows us to save a 67% of processing time during our initial testing steps.
After some trial-error work, this is my processed lightness:
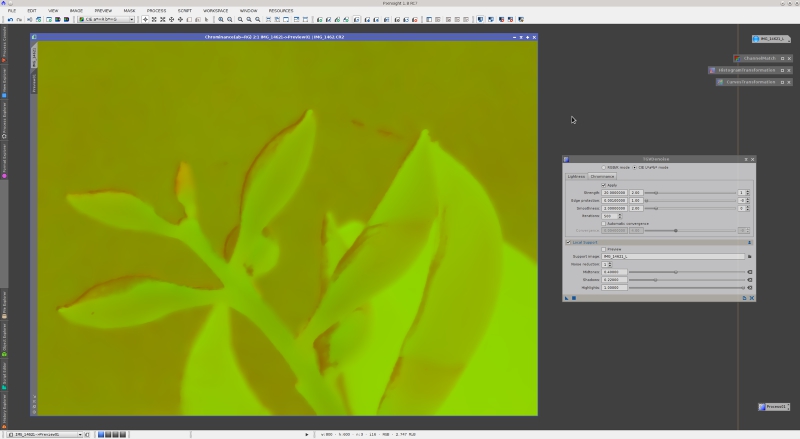
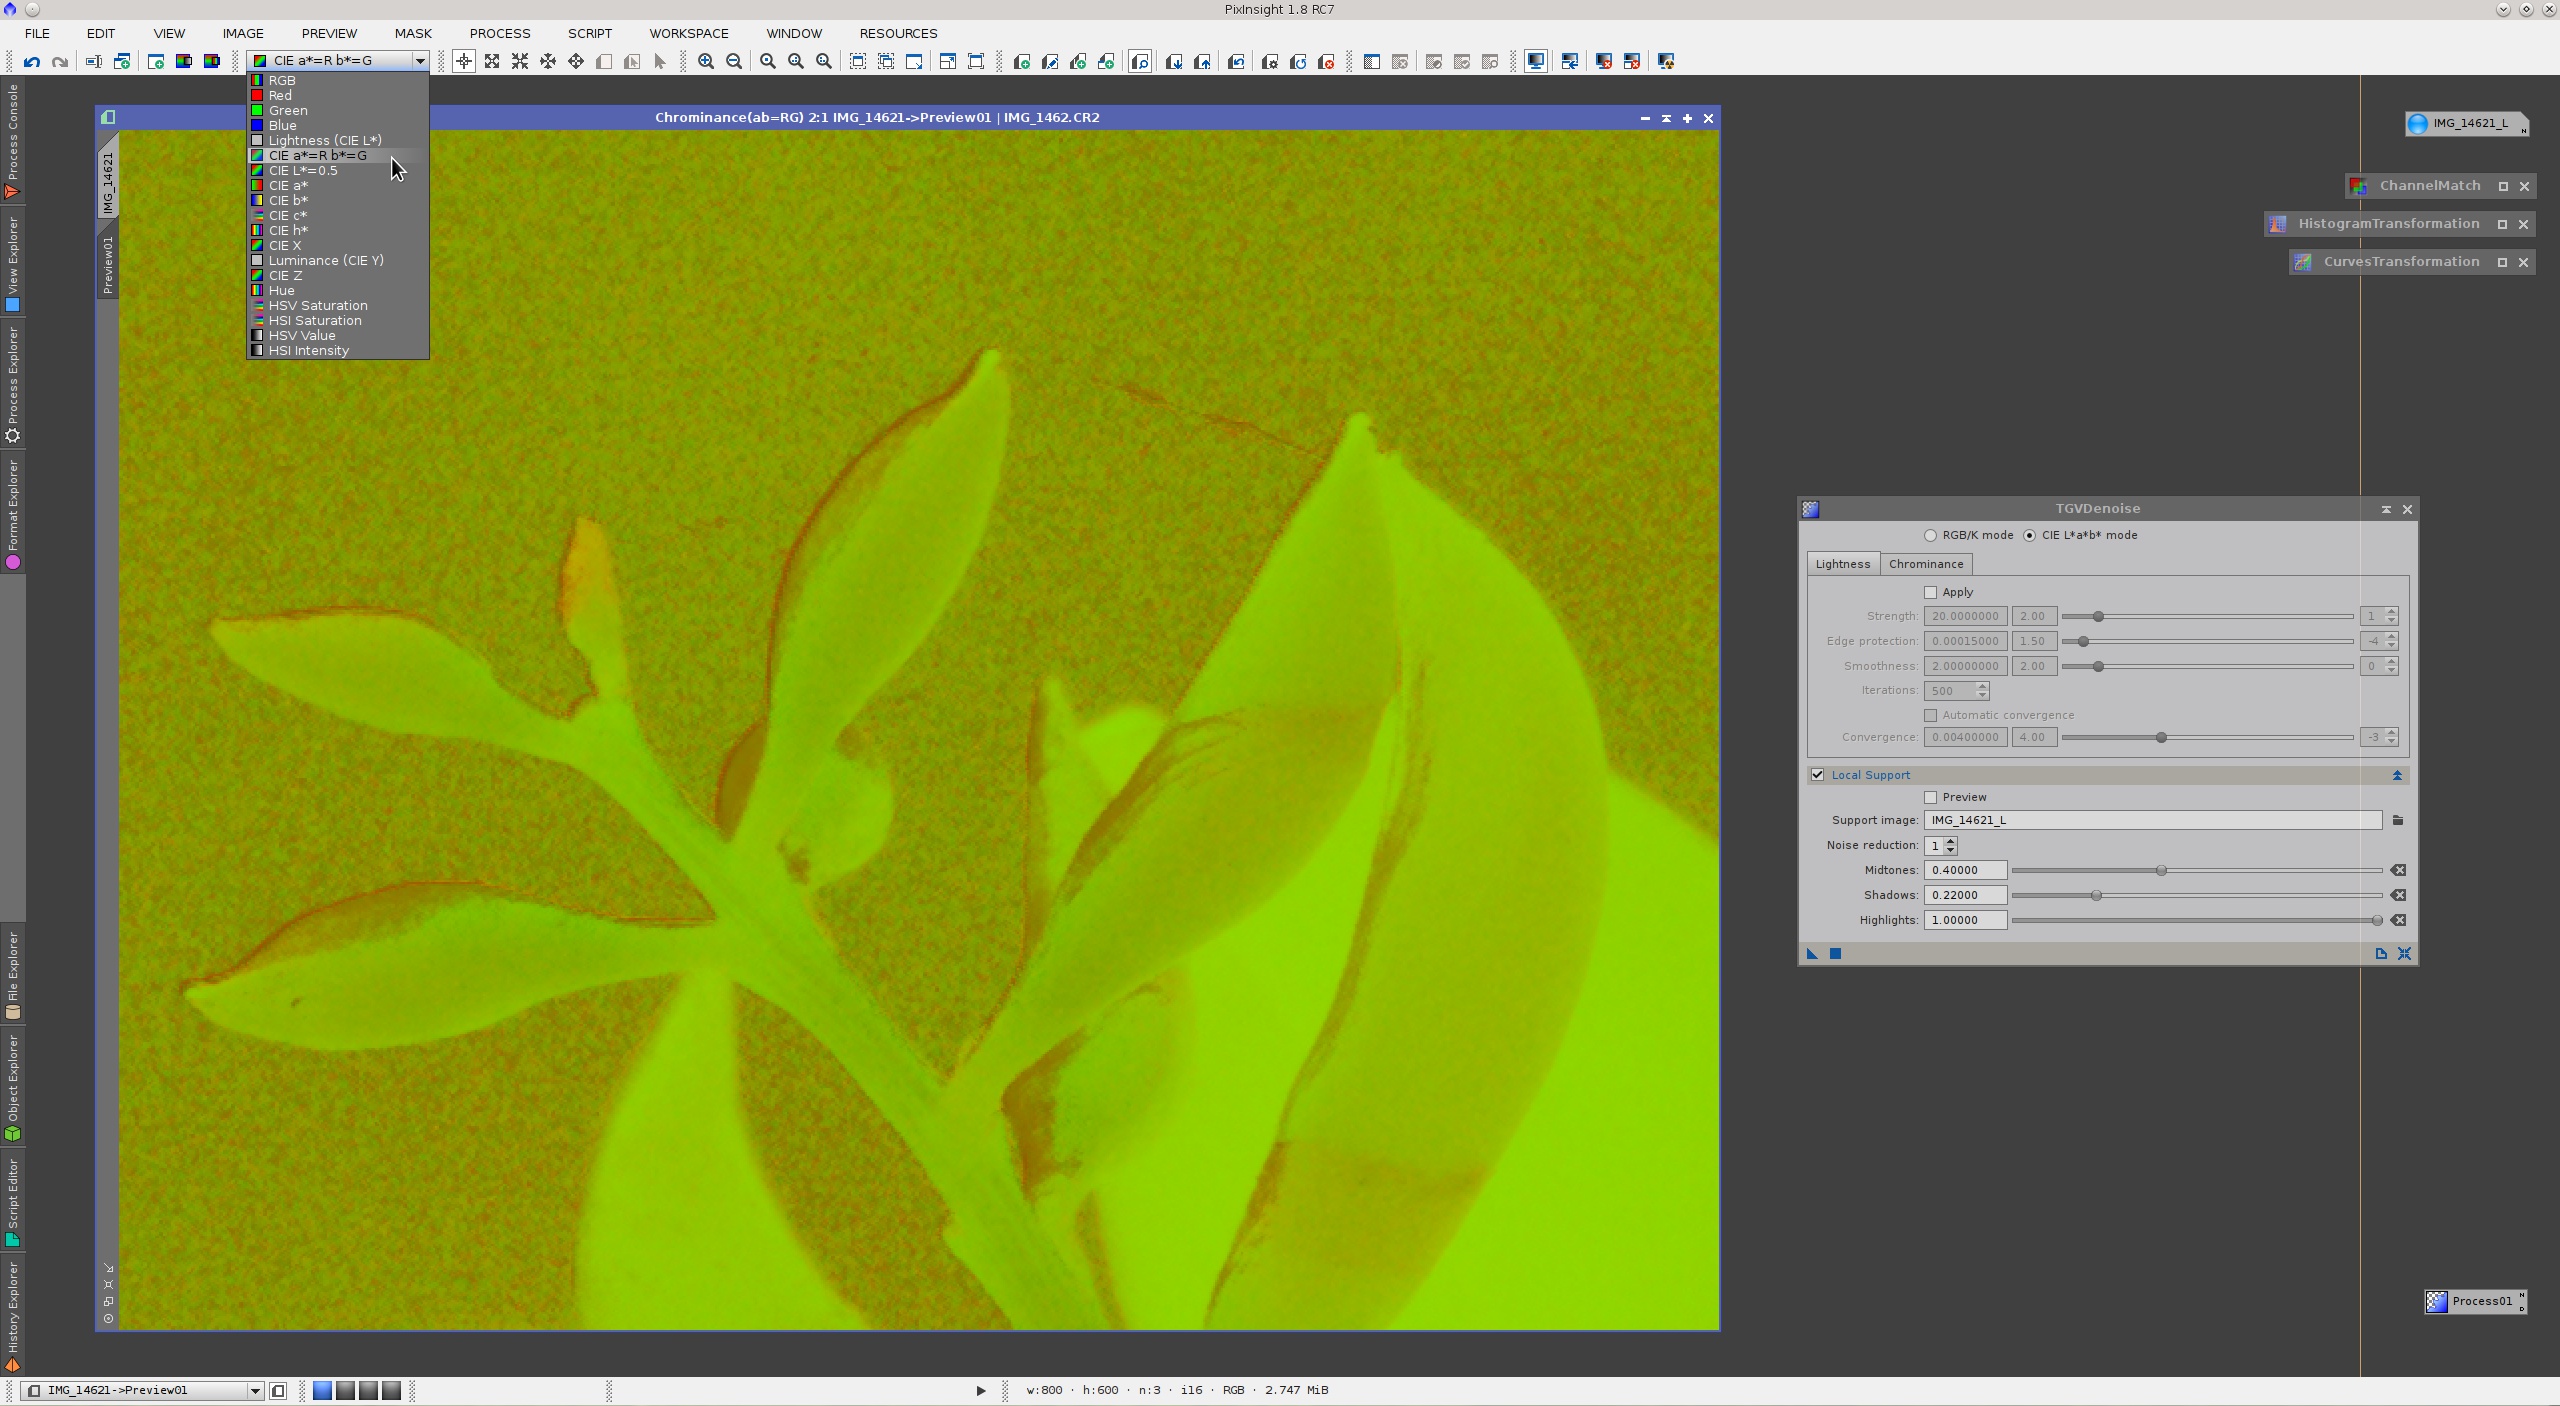
Let's repeat the same procedure for the chrominance. Disable lightness parameters and select the "a=R b=G" display mode:

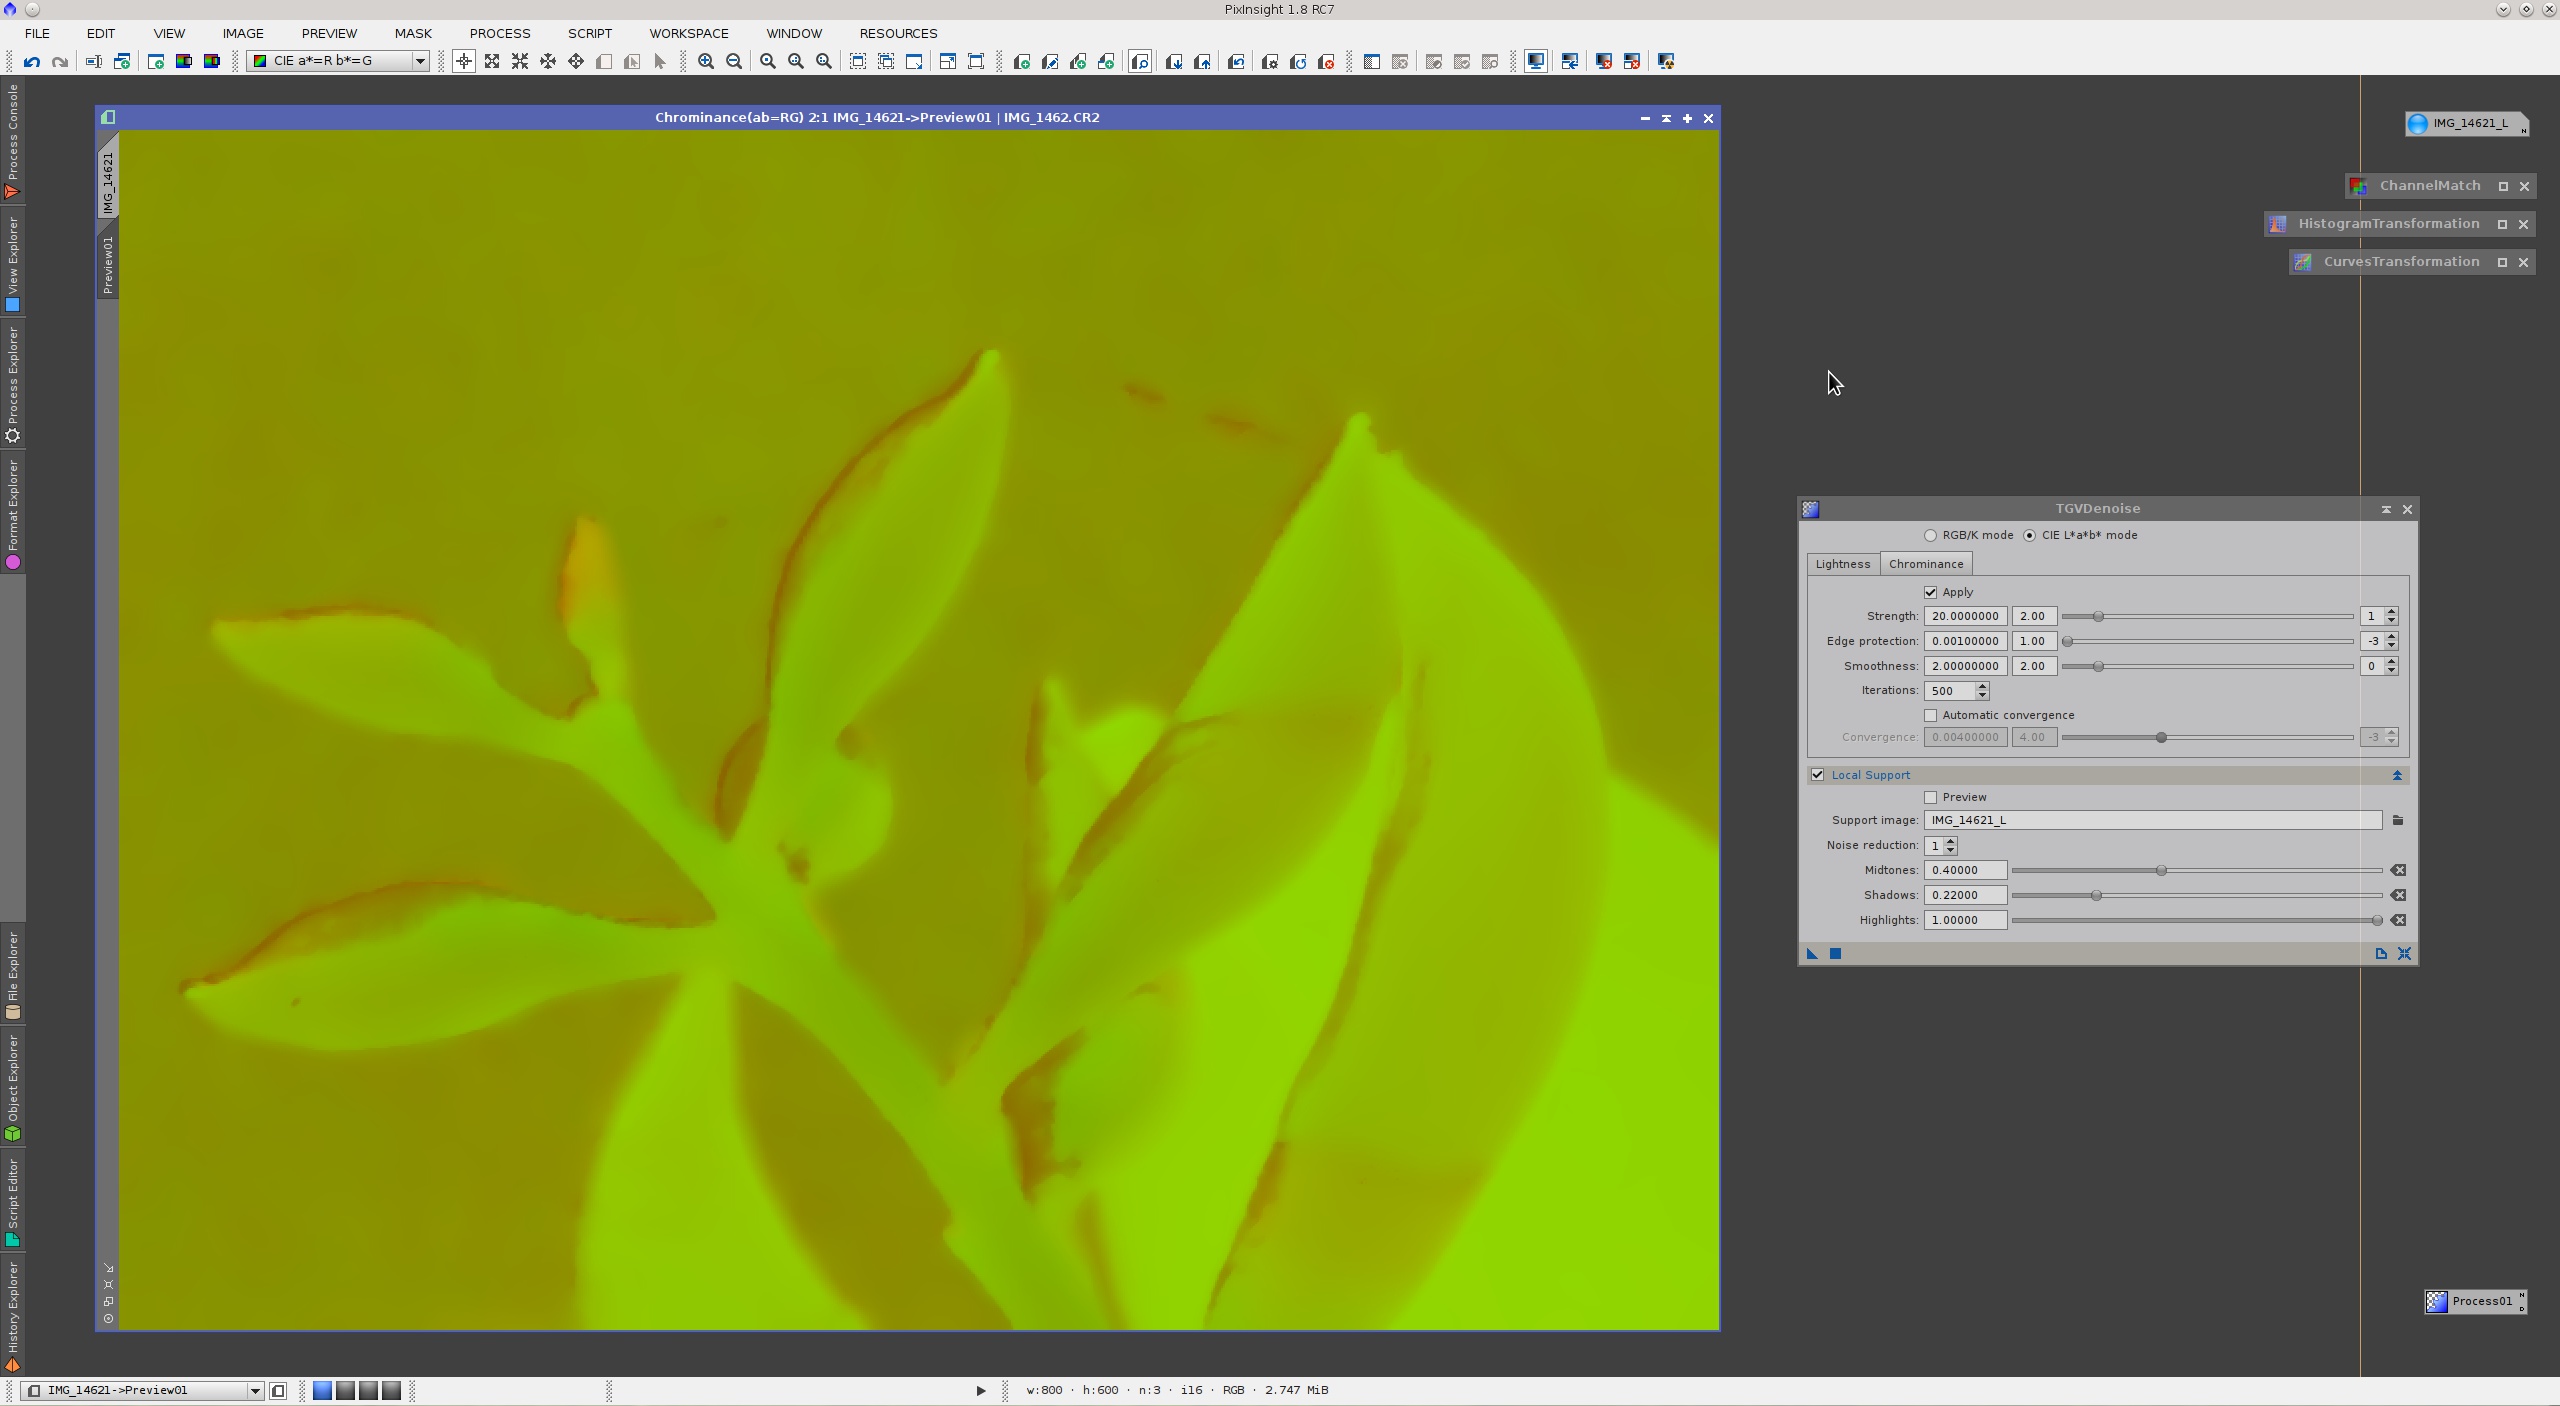
In this mode, the red and green channels show a representation of the CIE a* and CIE b* chrominance components, respectively. This allows you to visualize the color components of the image independently from lightness, that is, what you see on the screen is a special rendition of pure color contents. This mode is especially handy for noise reduction, as you can see in these screenshots. Below is my final processed chrominance.
Note that the chrominance parameters are much more aggressive than the lightness parameters. As you know, the human vision system is rather poor at detecting details defined by color variations. Most of the detail we perceive in an image comes from lightness variations. Thanks to this property of our vision, we usually can apply a comparatively strong noise reduction to the chrominance without damaging the perceived detail. In this example, I have used an edge protection parameter value that is about one order of magnitude larger for chrominance than for lightness.
This is my final denoised image:

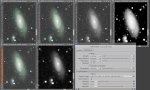
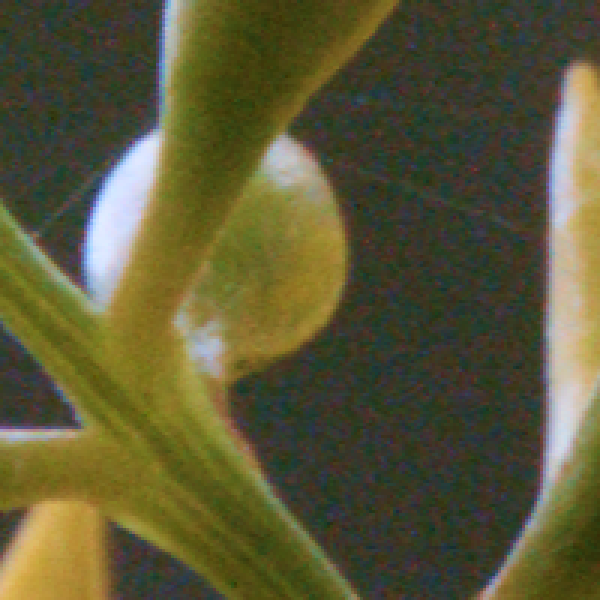
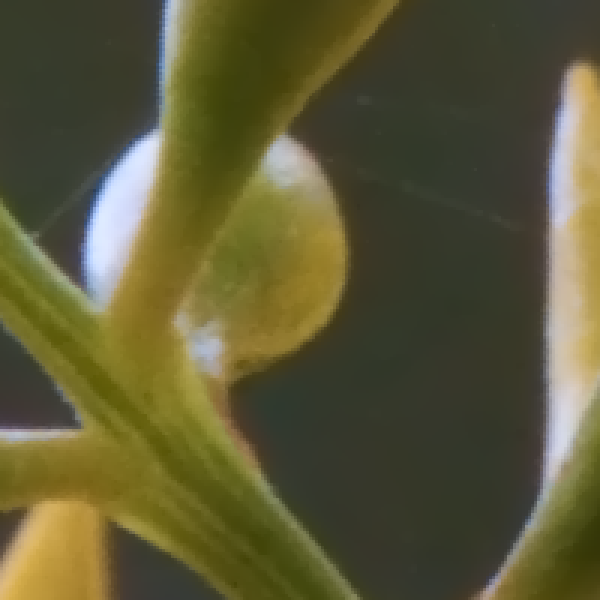
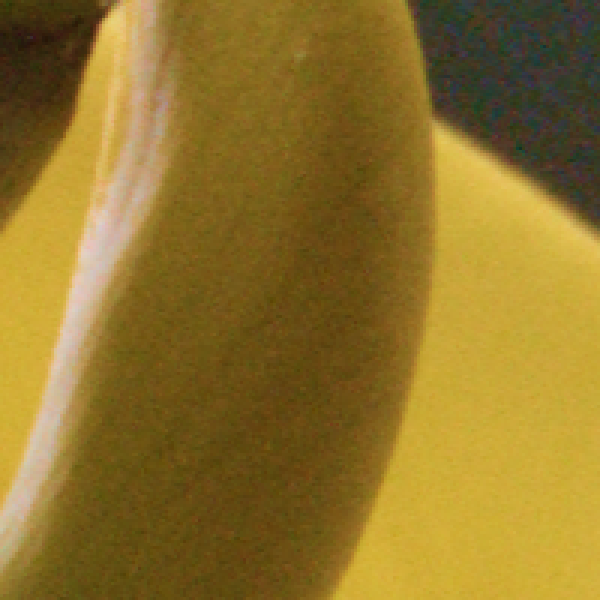
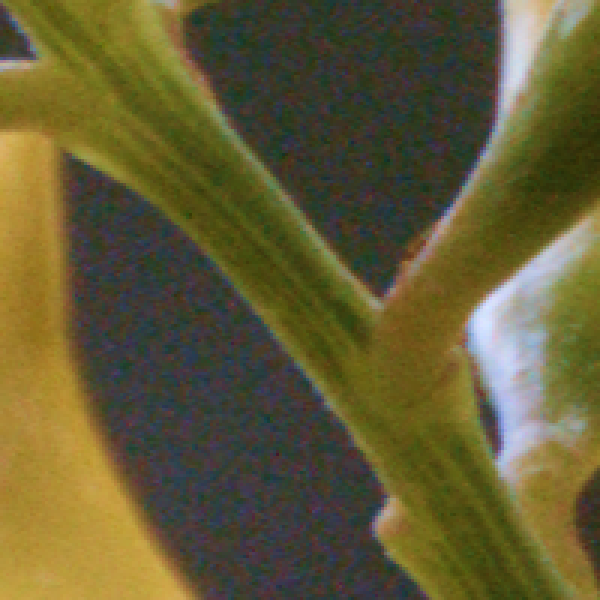
For better evaluation of the result, let's take a closer look at some regions of particular interest. Below are three crops of 200x200 pixels enlarged 3:1 without interpolation; original versus processed image.
The result is very good in my opinion, especially considering the severity of the noise in the original image. It is not perfect, of course, and we can easily find positive and negative aspects. For example, some low-contrast structures have been damaged in the green stem of the third crop, and we can find a number of small details that have lost some of their initial color support. On the other hand, low-contrast features have been preserved remarkably well on the shadowed yellow areas of the second crop, and the spider webs have been protected extremely well over a smooth background on the first crop. Overall, this kind of result is very difficult to achieve, if not impossible, with other noise reduction tools that we have implemented in PixInsight. More examples to come.
As promised, here is a first noise reduction example with the new TGVDenoise tool. To show a complete workflow with color data, I have chosen an image that poses a relatively difficult problem for noise reduction. It is a Canon EOS 7D raw image that has already been stretched and saturated with the HistogramTransformation and CurvesTransformation tools in PixInsight.
A strong color saturation curve has been applied directly after the initial stretch, which has been an obvious mistake: A side effect of this uncontrolled color saturation boost is generation of severe noise in the chrominance. We know that color saturation enhancements must be applied with some control (with protection masks, and/or after noise reduction, etc.), in order to prevent chrominance noise intensification. But this is just an example, where I have taken the liberty to make some things difficult on purpose.

The resulting image is an interesting noise reduction problem, mainly due to the following factors:
(1) Severe chrominance noise, for the reasons explained above.
(2) Fine details at scales dominated by the noise.
(3) Low-contrast structures that can be problematic for edge protection.
(4) Extended background areas with strong noise and no significant detail.
Reason (1) is why we have implemented a special CIE Lab working mode in the TGVDenoise tool. When the noise is very different (in its distribution and intensity) for the lightness and chroma components, applying two separate noise reductions seems the most logical option. Reasons (2) and (3), and the fact that they are plainly opposite to (4), suggest the need for a local support image to drive the TGV regularization algorithm.
As usual, we'll work on a small preview covering a region of special interest. Recall that as long as we don't enable its automatic convergence parameter, TGVDenoise is a fully previewable process, so what we'll get on the preview will be consistent with the result obtained on the whole image.
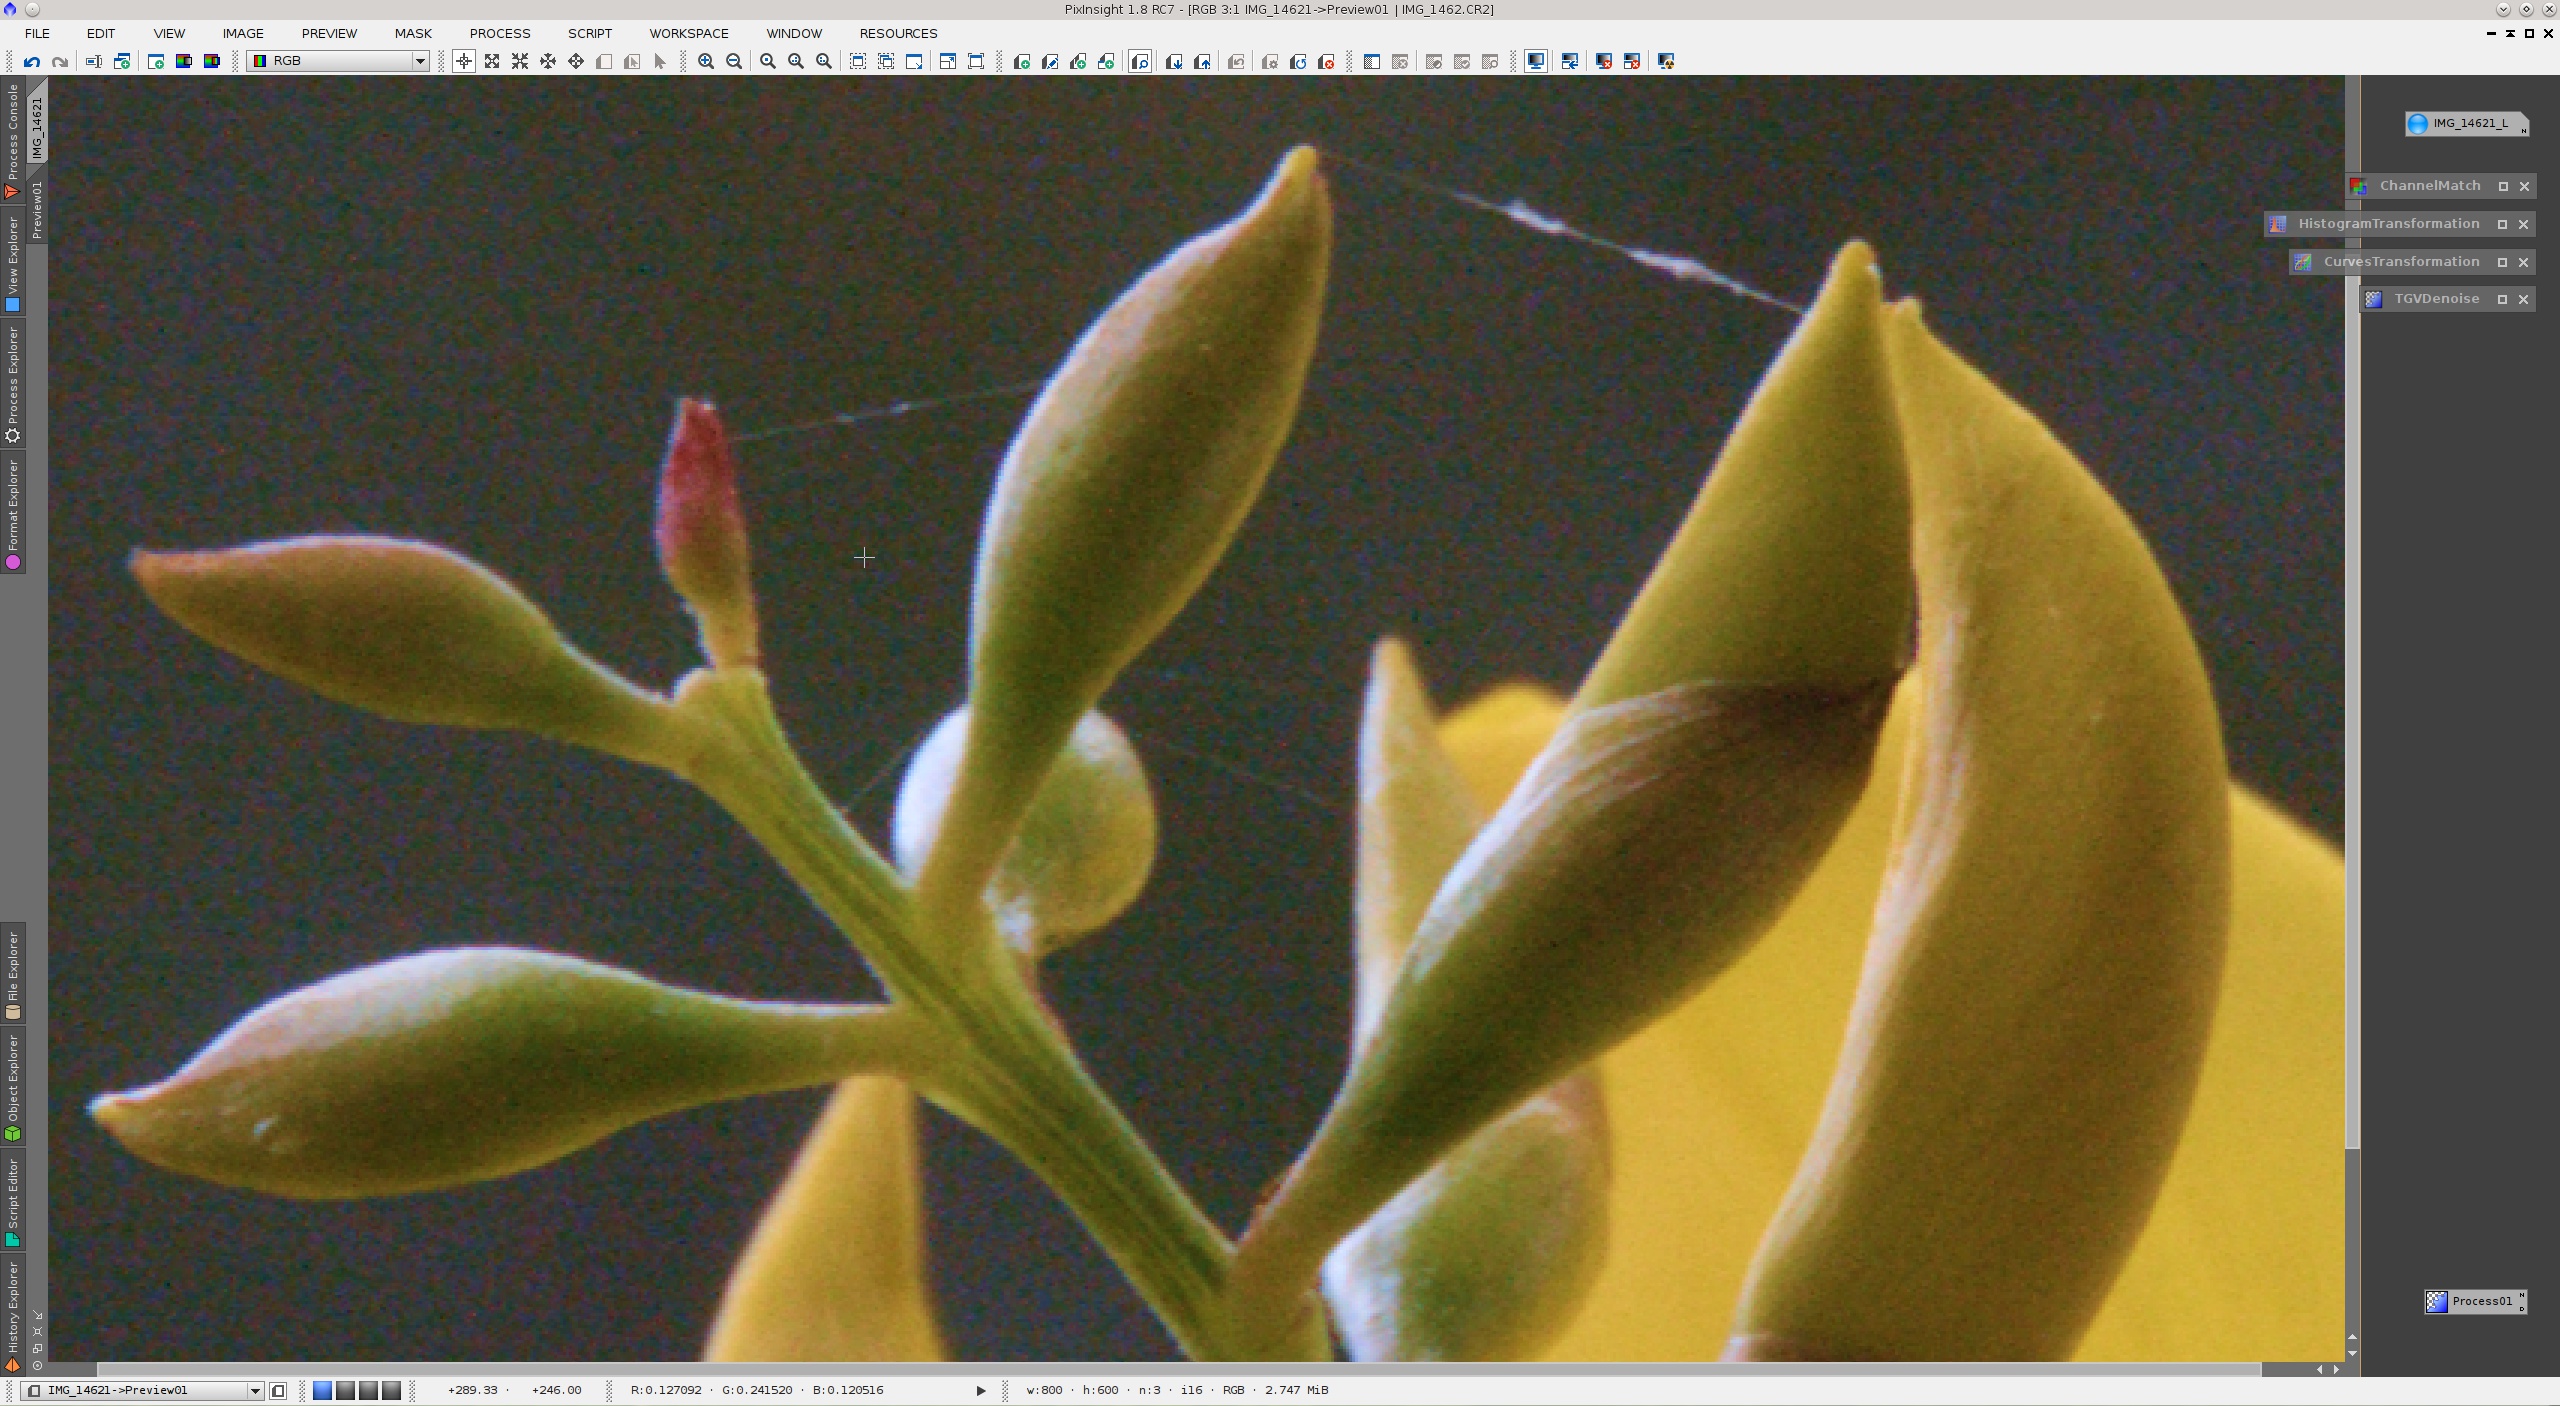
The screenshot above will give you an idea of the severity of the noise in our working image, especially color noise.
Our first step is building a local support image. By default, the TGVDenoise tool uses the intensity component (in the HSI system) of the target image. In this case, however, I prefer to work with the lightness component because it is much less noisy than intensity, due to the color noise problems that I have described. So we'll extract lightness (IMAGE > Extract > Lightness) as a new image and select it as a local support on the TGVDenoise tool.

Recall that a local support is intended to represent the signal-to-noise ratio of the target image, with the purpose of conditioning the TGV noise reduction algorithm. So where the local support image is white we are saying 'this is signal, look but don't touch!', and where the support is black we say 'this is trash, remove it please'. To improve the support in this sense, we have several histogram controls. I have used the midtones balance and shadows clipping parameters to increase contrast, as shown in the next screenshot:
I have also removed the first wavelet layer to make the support slightly less noisy, and hence more accurate. Note that this does not alter the support image in any way; the transformations are applied to an internal working duplicate, never to the selected image.
On the screenshot above, note that I have selected the Preview mode in the Local Support section. In this mode, TGVDenoise replaces the target image with a copy of its internal working support image, which is useful to control the support. We have to disable this mode to perform an actual noise reduction procedure.
As I have said at the beginning of this post, we'll work in the CIE Lab color mode of TGVDenoise in this example. We'll start with lightness noise reduction, so we'll disable chrominance parameters and select the Lightness display mode for the target image. In this way we can concentrate on the lightness, without wasting time processing the chrominance components. This allows us to save a 67% of processing time during our initial testing steps.

After some trial-error work, this is my processed lightness:

Let's repeat the same procedure for the chrominance. Disable lightness parameters and select the "a=R b=G" display mode:
In this mode, the red and green channels show a representation of the CIE a* and CIE b* chrominance components, respectively. This allows you to visualize the color components of the image independently from lightness, that is, what you see on the screen is a special rendition of pure color contents. This mode is especially handy for noise reduction, as you can see in these screenshots. Below is my final processed chrominance.
Note that the chrominance parameters are much more aggressive than the lightness parameters. As you know, the human vision system is rather poor at detecting details defined by color variations. Most of the detail we perceive in an image comes from lightness variations. Thanks to this property of our vision, we usually can apply a comparatively strong noise reduction to the chrominance without damaging the perceived detail. In this example, I have used an edge protection parameter value that is about one order of magnitude larger for chrominance than for lightness.
This is my final denoised image:
For better evaluation of the result, let's take a closer look at some regions of particular interest. Below are three crops of 200x200 pixels enlarged 3:1 without interpolation; original versus processed image.
| 
|
| 
|
| 
|
The result is very good in my opinion, especially considering the severity of the noise in the original image. It is not perfect, of course, and we can easily find positive and negative aspects. For example, some low-contrast structures have been damaged in the green stem of the third crop, and we can find a number of small details that have lost some of their initial color support. On the other hand, low-contrast features have been preserved remarkably well on the shadowed yellow areas of the second crop, and the spider webs have been protected extremely well over a smooth background on the first crop. Overall, this kind of result is very difficult to achieve, if not impossible, with other noise reduction tools that we have implemented in PixInsight. More examples to come.
")