Help with Calibration and Stacking

wrichards

Well-known member
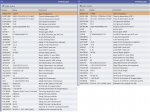
I recently switched from a DSLR to an ASI2600MC because I was tired of dealing with thermal sensor noise in my images. So this is my first attempt at stacking images with a cooled, dedicated astrocam. Unfortunately, the calibrated, stacked image has fine horizontal lines in it (see attached image, although I'm not sure the reduced resolution will show the effect very well).

It's likely that I'm doing something incorrect during the calibration and integration process, but I don't know what. These horizontal lines also appear in the stretched Master Dark and Master Dark Flat. Dithering was used for most of the Light frames used in the stacking process.

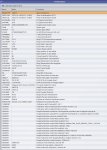
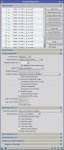
Bias, Darks, and Flats were used to calibrate this image, then a Dynamic Crop and DBE. I have a Master Dark Flat as well, but haven't used it yet. The Master Flat was calibrated using the Master Bias (but not the Master Dark). The Light frames were calibrated with the Master Dark and Master Flat (but not the Master Bias).

What am I doing wrong?

In case anyone wants to have a look at the actual images, there are all posted here for reference.

Neptune-DC-DBE.jpg
 
Hi,

it looks like either your dark frames don't match the light frames (regarding acquisition software, camera driver, gain, offset, temperature) or you chose wrong parameters for image calibration.

In order to check the first case, one would need a dark and a light frame, for the second case, your settings for image calibration are needed, or upload a calibrated light frame.

Bernd
 
Bernd,

Thanks so much for your assistance. I've uploaded a single Light, Dark, and Calibrated Light frame to that same Google Drive site, All images were taken using NINA running on the same laptop and were taken within 24 hours of each other.

I've attached the FITS Header info for all 3 files for convenience.

I also tried running the images through WBPP without bias frames and that made no difference.
 

Attachments

  • Light & Dark.jpg
    Light & Dark.jpg
    625.3 KB · Views: 47
  • Calibrated Light.JPG
    Calibrated Light.JPG
    382.2 KB · Views: 53
The calibrated light frame is slightly clipped in the low range. I don't know whether this causes the issue because the effect of horizontal banding is barely visible in the subframes.

So I recommend to apply a pedestal of 100 DN in the ImageCalibration process (in section 'Output Files'). Apply the calibration to all light frames, debayer, align and integrate (let the option 'Subtract pedestals' disabled, this is the default setting). Please let me know whether the new integration still suffers from horizontal bands.

Bernd
 
Bernd,

I did as you instructed (I believe), but the lines are still present. The file, "Neptune 2-ABE.xisf" is the result and is posted on the same Google Drive site. I also did screen shots of each processing step along the want and put them all in a PDF file ("PI Stacking Settings.pdf") so maybe you can see if I have some other setting that is incorrect or some processing step that I'm not doing right.

Bill
 
Maybe the LocalNormalization is causing this isue. Please try to omit this step in the workflow.

Please maintain the application of the output pedestal, i.e. you can start with the newly calibrated (output pedestal applied) light frames after debayering, approval by SFS and alignment.

In ImageIntegration, please select these frames (*_c_d_a_r.xisf) as input images and set the normalization as follows:

In section 'Image Integration':
Normalization: Additive with scaling

In section 'Pixel Rejection (1)'
Normalization: Scale + zero offset

I hope this will help.

Bernd
 
Bernd,

Using this approach, the results were a tiny bit better (see "Neptune 3-DBE.xisf" and compare it to "Neptune 2-ABE.xisf"), but the lines are still visible. I attached a screenshot of the ImageIntegration settings for reference.

After inspecting individual images (Darks, Dark Flats, and Masters of both), I'm seeing the lines in all of them and they differ from one image to another. This leads me to believe that the lines are probably related to read noise. I realize that these images have a low SNR since they were captured at Gain 0 and only 15 sec exposures but I was limited by windy conditions that night so short exposures were mandatory. And even at 15 seconds, the Stats window shows a small number of pixels are already saturated (something like 34) so I was trying not to saturate any more by using Gain 100 (on the ASI2600MC, those are the only 2 gains that make sense to use). So maybe this isn't a processing issue at all. Perhaps there is noise being introduced by the power supply I'm using, or perhaps I just need to achieve a better SNR. What do you think?
 

Attachments

  • Image Integration.jpg
    Image Integration.jpg
    337.5 KB · Views: 43
Maybe. Gain 0 and an exposure time only 15 s will result in very little signal. I own a ASI2600MC as well, but so far I had only one opportunity to use it. I applied gain 100 and an exposure time of 300 s since I used a Dual narrowband filter. My target was Sh2-157, the Lobster claw nebula. I could not detect horizontal bands in my calibrated, debayered subframes and not in the resulting integration either.

If you are confined to short exposures, I surely would use gain 100. Give it a try, I can imagine that it will help.

Bernd
 
Thanks again for all your help and advice, Bernd. I'll have to wait for the next new moon and clear skies to give it another try. Or maybe I'll attach my Optolong L-eXtreme filter to my Starizona focal reducer and see if I can get some good shots using long exposures in my light-polluted skies here in San Diego. :)
 
Back
Top