Experimenting with Pixels

Enzo De Bernardini

PixInsight Ambassador
Hi,

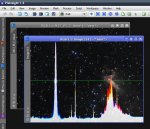
I experimented with reading and writing pixels values, and come to a graph (see attached) representing each pixel value vertically (color coded, RGB) from selected row (green horizontal line). The height of each column is normalized to the total height of the image (bottom = 0, top = saturated)

I have some questions:

1) Is there a name for this representation?.
2) Is it useful to have a script that generates this representation? (with settings, etc)

Anyway, it was interesting and fun  ;)

Regards,

Enzo.
 

Attachments

  • ExperimentalYPixels.jpg
    ExperimentalYPixels.jpg
    55.4 KB · Views: 66
Hi,

could you share your script with this forum ?
It could be useful i.e. for me in order to learn PI programming.

Thanks in advance !
 
Looks nice, although there may be problems if you use a clone of the image to draw this "intensity plot".
Yes, indeed this is useful. Both Sander and I wrote processing modules to perform this. A third implementation is welcome too ;)
 
Hi Enzo,

yes, this is what I call a Profile tool. As Carlos said we both wrote versions of that in PCL but I'm happy you wrote it in PJSR as it shows an interest in this functionality. When I get home later today I'll send my code to Juan and he can publish the module in all flavors if he likes to. I can only build windows. Well I could build Linux and FreeBSD if I installed those on VMs but I'm feeling a tad lazy :)
 
although there may be problems if you use a clone of the image to draw this "intensity plot"

Ah!, "intensity plot", that was a word I was looking for.  :D  Thanks Carlos!

The script reads each pixel from the Y-axis selected row, makes the graphic in a separate new image and then (after rotating 180 degrees and mirror horizontally, because it is drawn from top to down) sum the original image to the graph (optional, if BLEND = true). This method can bring problems?

I think the module you guys are doing will be much better  :p  Anyway, it was a good practice.

could you share your script with this forum ?

Of course! I hope this helps, although I am not an expert. Here it is. You can change the defined (#define) variables, and the Y value, which by default is half of the image (var y_values). It experiental, may have some error too.

Code:
// Hardcoded values, for testing purposes

#include <pjsr/UndoFlag.jsh>

#define  BLEND    true
#define  RED_X    true
#define  GRE_X    true
#define  BLU_X    true
#define  OPACITY  0.8

var window     = ImageWindow.activeWindow;
var view       = window.currentView;
var img        = window.currentView.image;

function sumPixelValues( img ) {

   var x, v;

   var x_r = 0;
   var x_g = 0;
   var x_b = 0;

   var width  = img.width;
   var height = img.height;

   var y_values = Math.round( height / 2 );  // the Y center...
   //var y_values = 100;                     // or any other Y value

   var window_graph = new ImageWindow( width, height, 3, 16, false, true );
   var view_graph   = window_graph.mainView;
   var img_graph    = window_graph.currentView.image;

   view_graph.beginProcess( UndoFlag_NoSwapFile );

   // X Values
   for (x = 0; x < width; x++) {

      x_r = img.sample(x, y_values, 0); // 0 = Red
      x_g = img.sample(x, y_values, 1); // 1 = Green
      x_b = img.sample(x, y_values, 2); // 2 = Blue

      // Red
      if( RED_X ) {
         x_r = Math.floor(x_r * height) - 1;
         for (v = 0; v <= x_r; v++) {
            img_graph.setSample(1, x, v, 0);
         };
      };
      // Green
      if( GRE_X ) {
         x_g = Math.floor(x_g * height) - 1;
         for (v = 0; v <= x_g; v++) {
            img_graph.setSample(1, x, v, 1);
         };
      };
      // Blue
      if( BLU_X ) {
         x_b = Math.floor(x_b * height) - 1;
         for (v = 0; v <= x_b; v++) {
            img_graph.setSample(1, x, v, 2);
         }
      };

      // Y axis of sample values
      // First goto black...
      img_graph.setSample(0, x, (height - y_values - 1), 0);
      img_graph.setSample(0, x, (height - y_values - 1), 1);
      img_graph.setSample(0, x, (height - y_values - 1), 2);
      // then, green line
      img_graph.setSample(1, x, (height - y_values - 1), 1);

   }

   // Trick to match views
   img_graph.rotate180();
   img_graph.mirrorHorizontal();
   //

   if( BLEND ) {
      PixelMathActions( view, view_graph );
      window_graph.forceClose();
   } else {
      view_graph.endProcess();
      window_graph.bringToFront();
   }

}

function PixelMathActions(img_1, img_2) {

   var pm = new PixelMath;

   with ( pm ) {

      expression = img_1.id + "+" + "(" + img_2.id + " * " + OPACITY + ")";

      useSingleExpression  = true;
      symbols              = "";
      use64BitWorkingImage = false;
      rescale              = false;
      rescaleLower         = 0.0000000000;
      rescaleUpper         = 1.0000000000;
      truncate             = true;
      truncateLower        = 0.0000000000;
      truncateUpper        = 1.0000000000;
      createNewImage       = true;
      newImageWidth        = SameAsTarget;
      newImageHeight       = SameAsTarget;
      newImageAlpha        = false;
      newImageColorSpace   = SameAsTarget;
      newImageSampleFormat = SameAsTarget;

   }
   pm.executeOn( img_1, false );
}

sumPixelValues( img );

 
Back
Top