Jeff,
Thank you for uploading your data. This is a brief tutorial with your image. I have tried to follow a systematic step-by-step procedure to apply our deconvolution tools in a way that can yield consistent results for most deep-sky images.
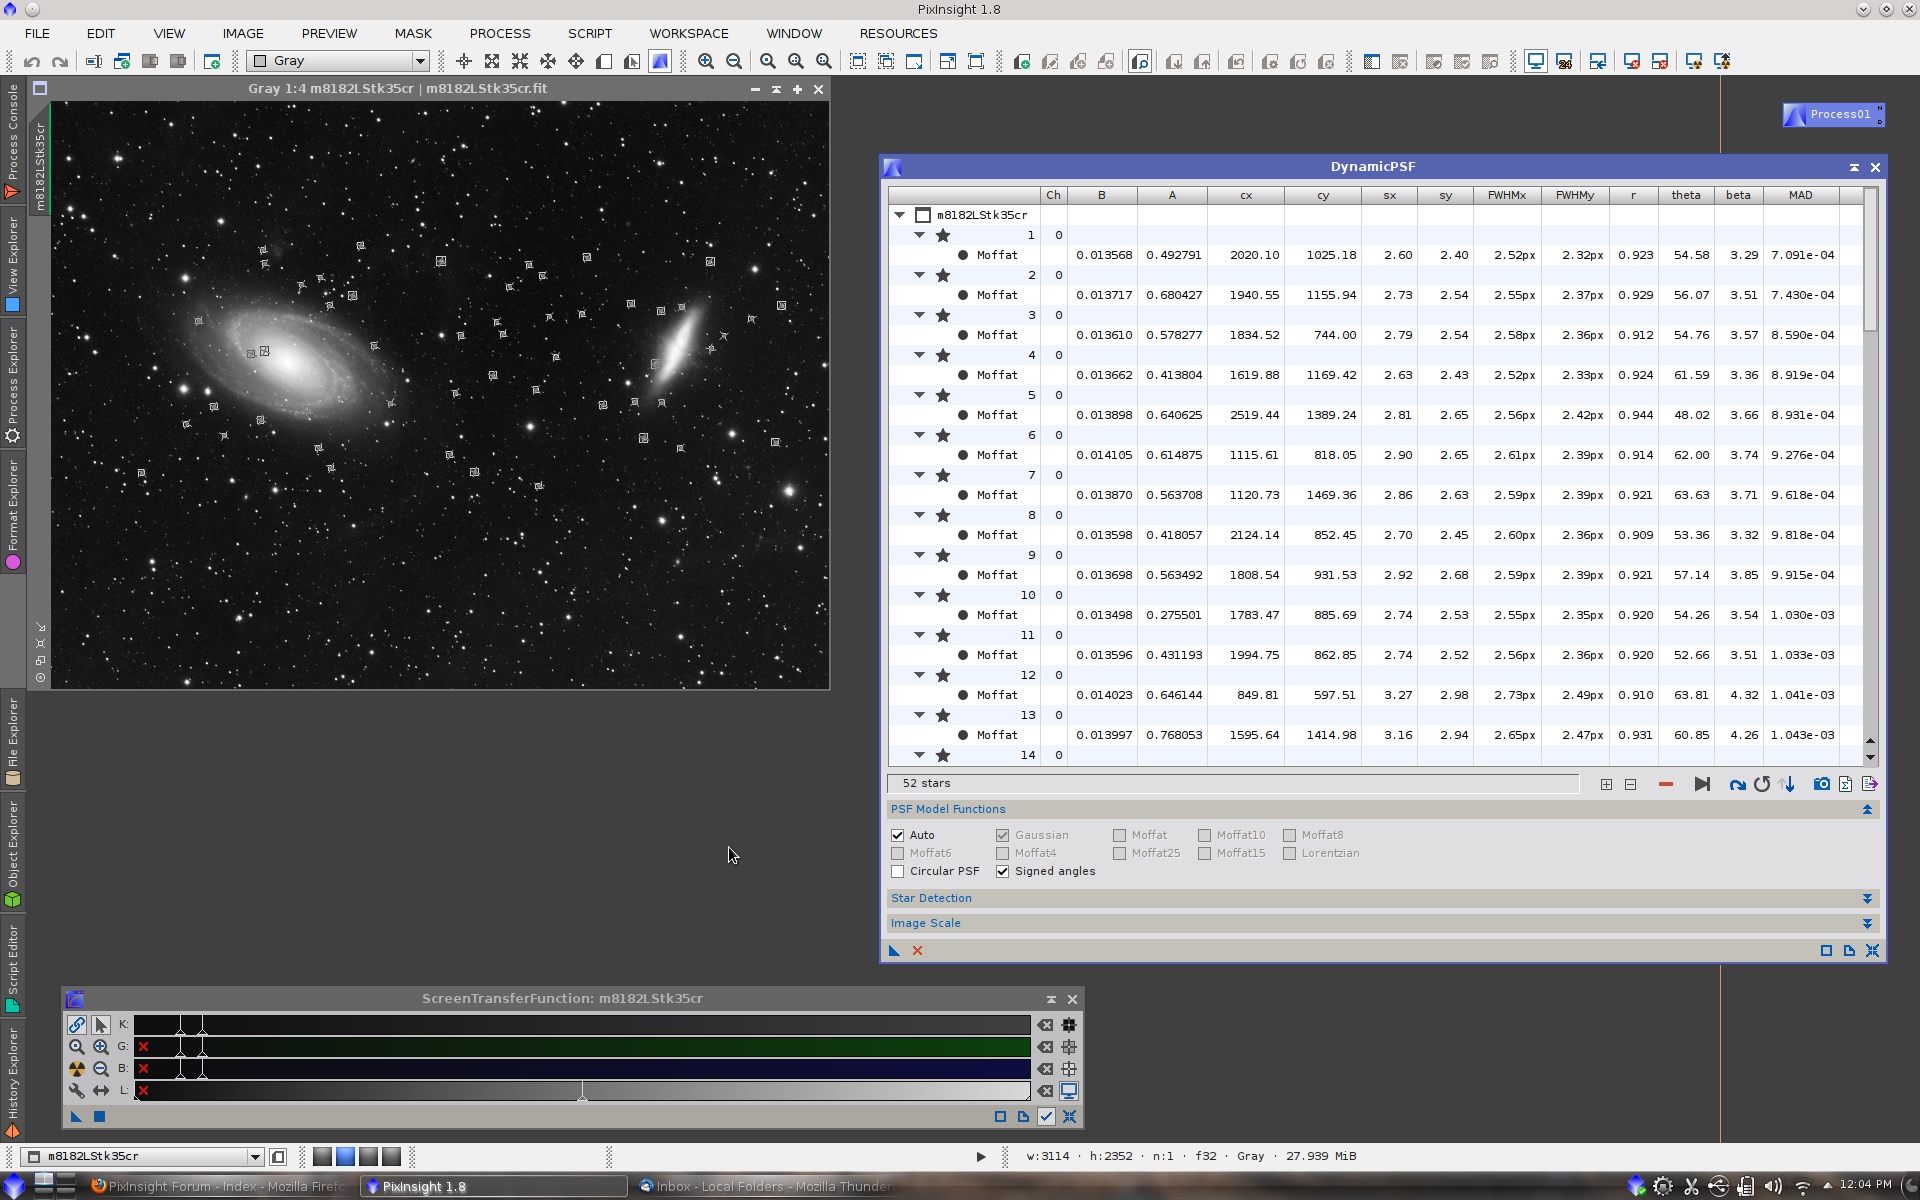
Step 1: PSF Estimation
Our deconvolution tools (including the incoming TGVRestoration tool) don't implement blind deconvolution algorithms. This means that an accurate estimate of the PSF of the image is crucial to perform a meaningful deconvolution. Of course, I don't need to say that these processes, PSF measurement and deconvolution, only make sense with linear data.
DynamicPSF is the tool of choice for PSF estimation in PixInsight:
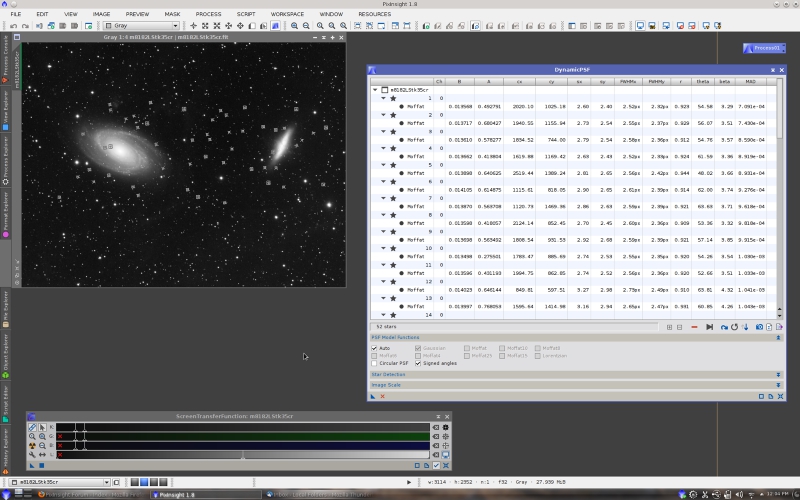
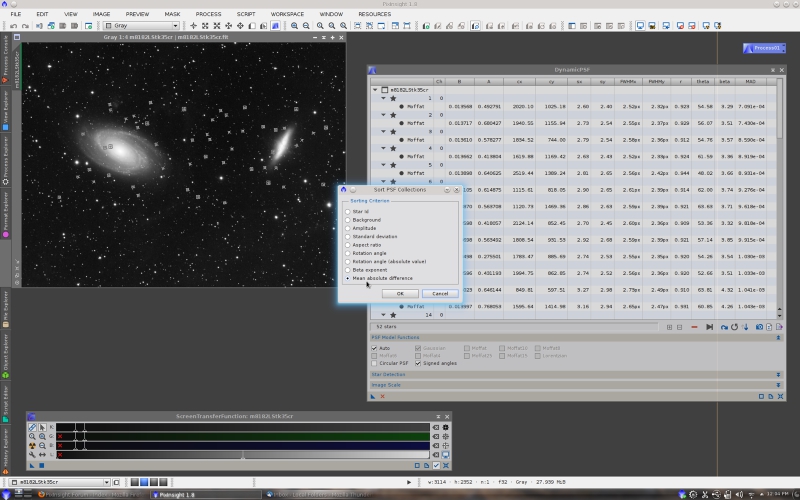
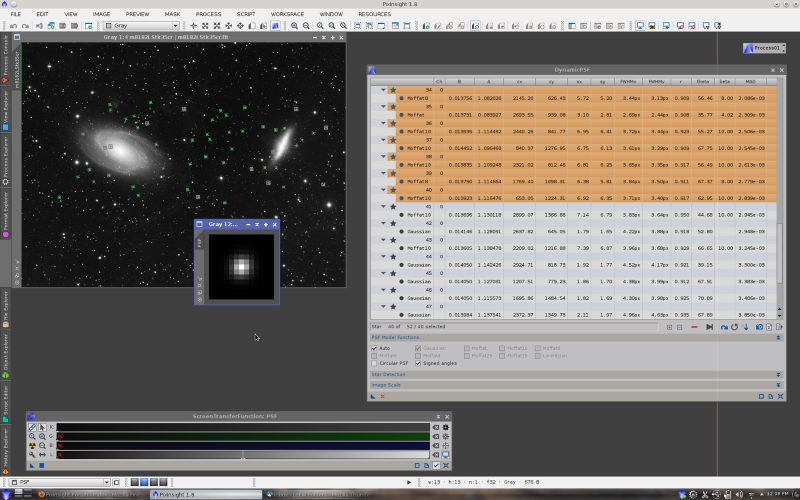
I have selected a total of 52 stars. As you know, we normally don't need hundreds of stars to get a good PSF estimate. Just a few tens of carefully chosen stars (unsaturated, neither too bright nor too dim stars) are sufficient. From the 52 stars I have selected the best 40, after sorting the list by mean absolute difference.
Then I have obtained the PSF estimate as a new image with DynamicPSF's
Export synthetic PSF option.
Deconvolution must only be applied to high-signal areas of the image. This clearly excludes the sky background and dim structures such as IFNs in this case. These
marginal data components can be protected with a suitable mask. Normally this step is not necessary with our Deconvolution tool, since regularized algorithms are already very efficient at preserving nonsignificant structures, preventing noise amplification on these regions. However, I prefer to include a mask generation task in this case to provide you with a more complete example.
Typically, background protection masks are generated by applying nonlinear transformations, such as a histogram transformation with a non-neutral midtones balance, or a gamma stretch. This generates a nonlinear stretched version of the image that tends to protect dark regions. Actually, this is a conceptual error: If we want to protect image structures as a function of the noise-to-signal ratio, we need a mask where pixel values are a function of the signal, but with a nonlinear mask generated as described above, this cannot be guaranteed in general.
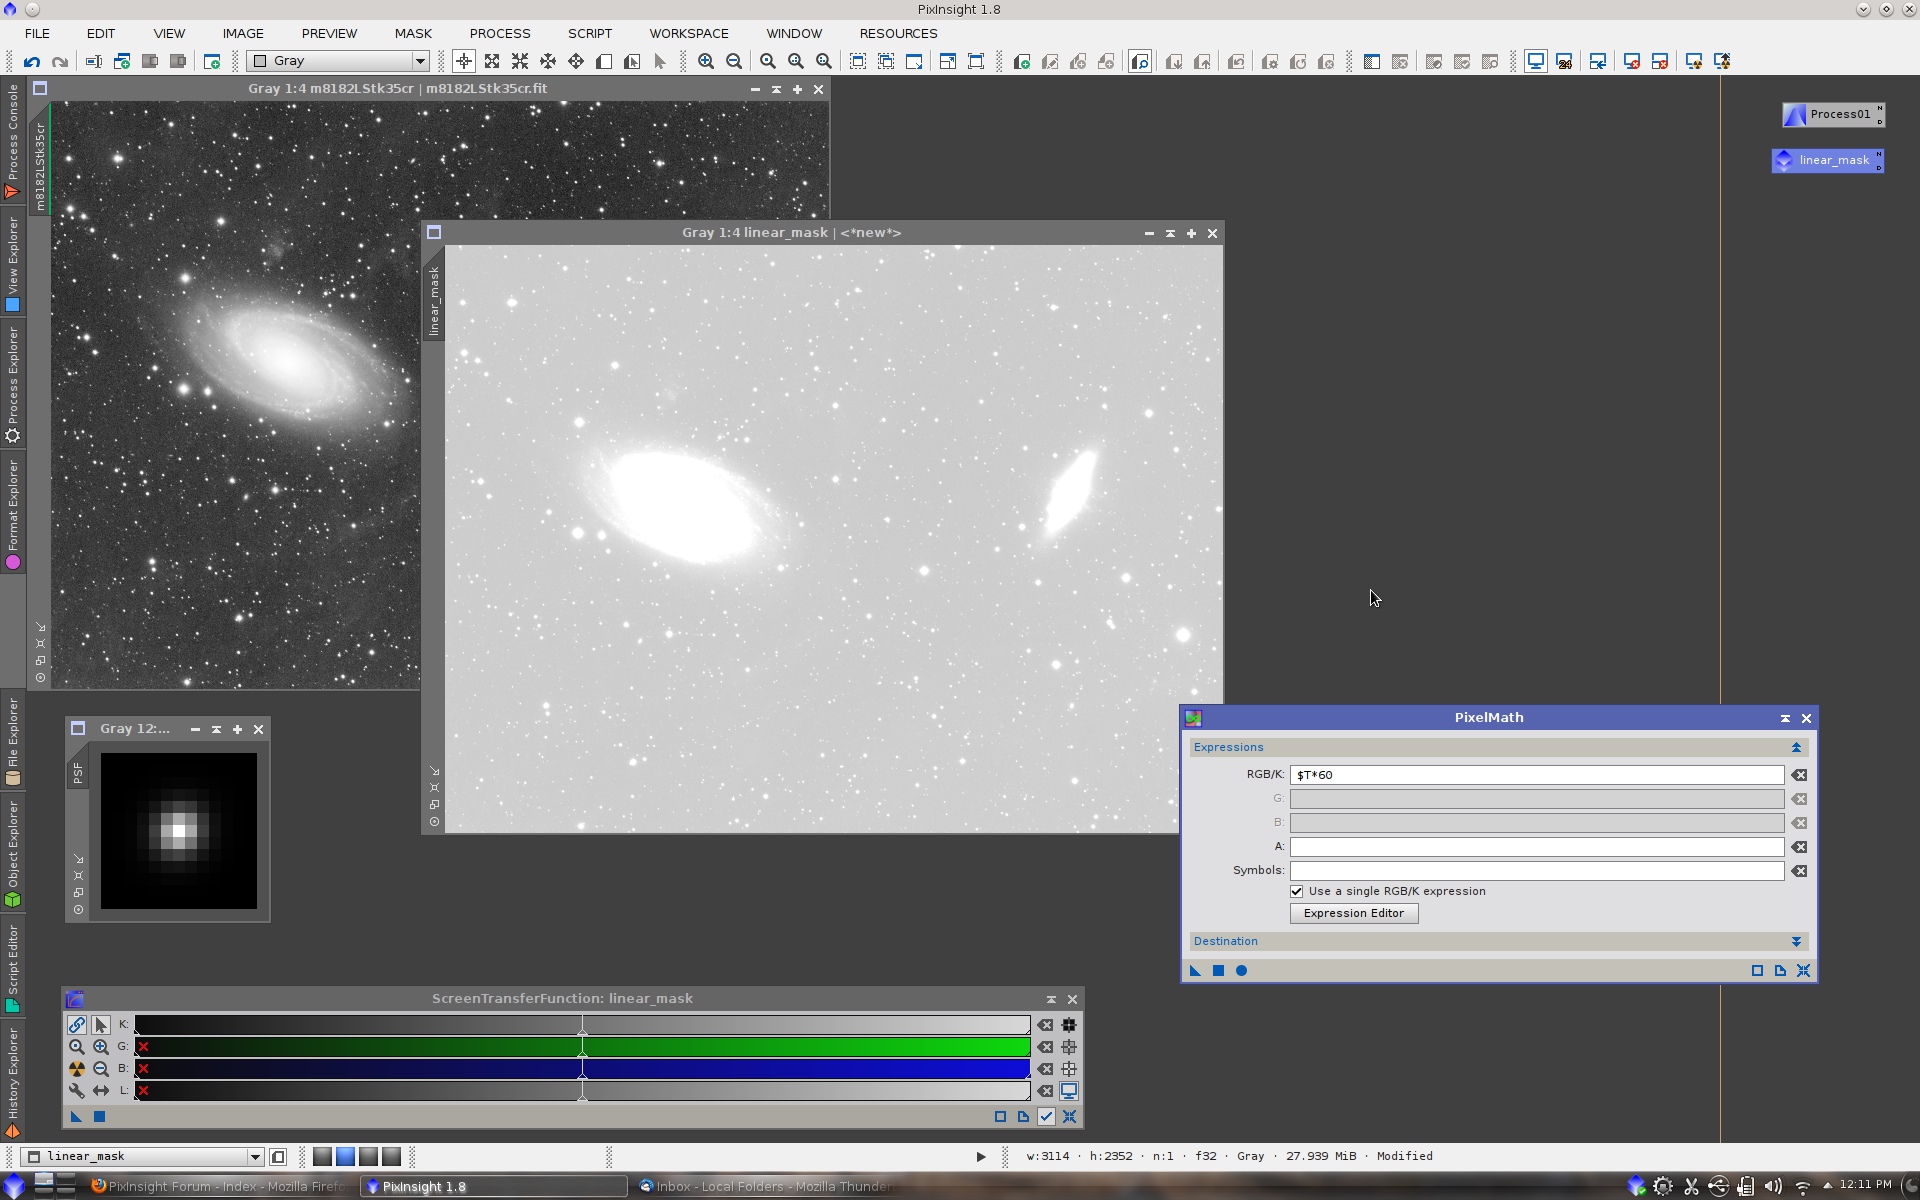
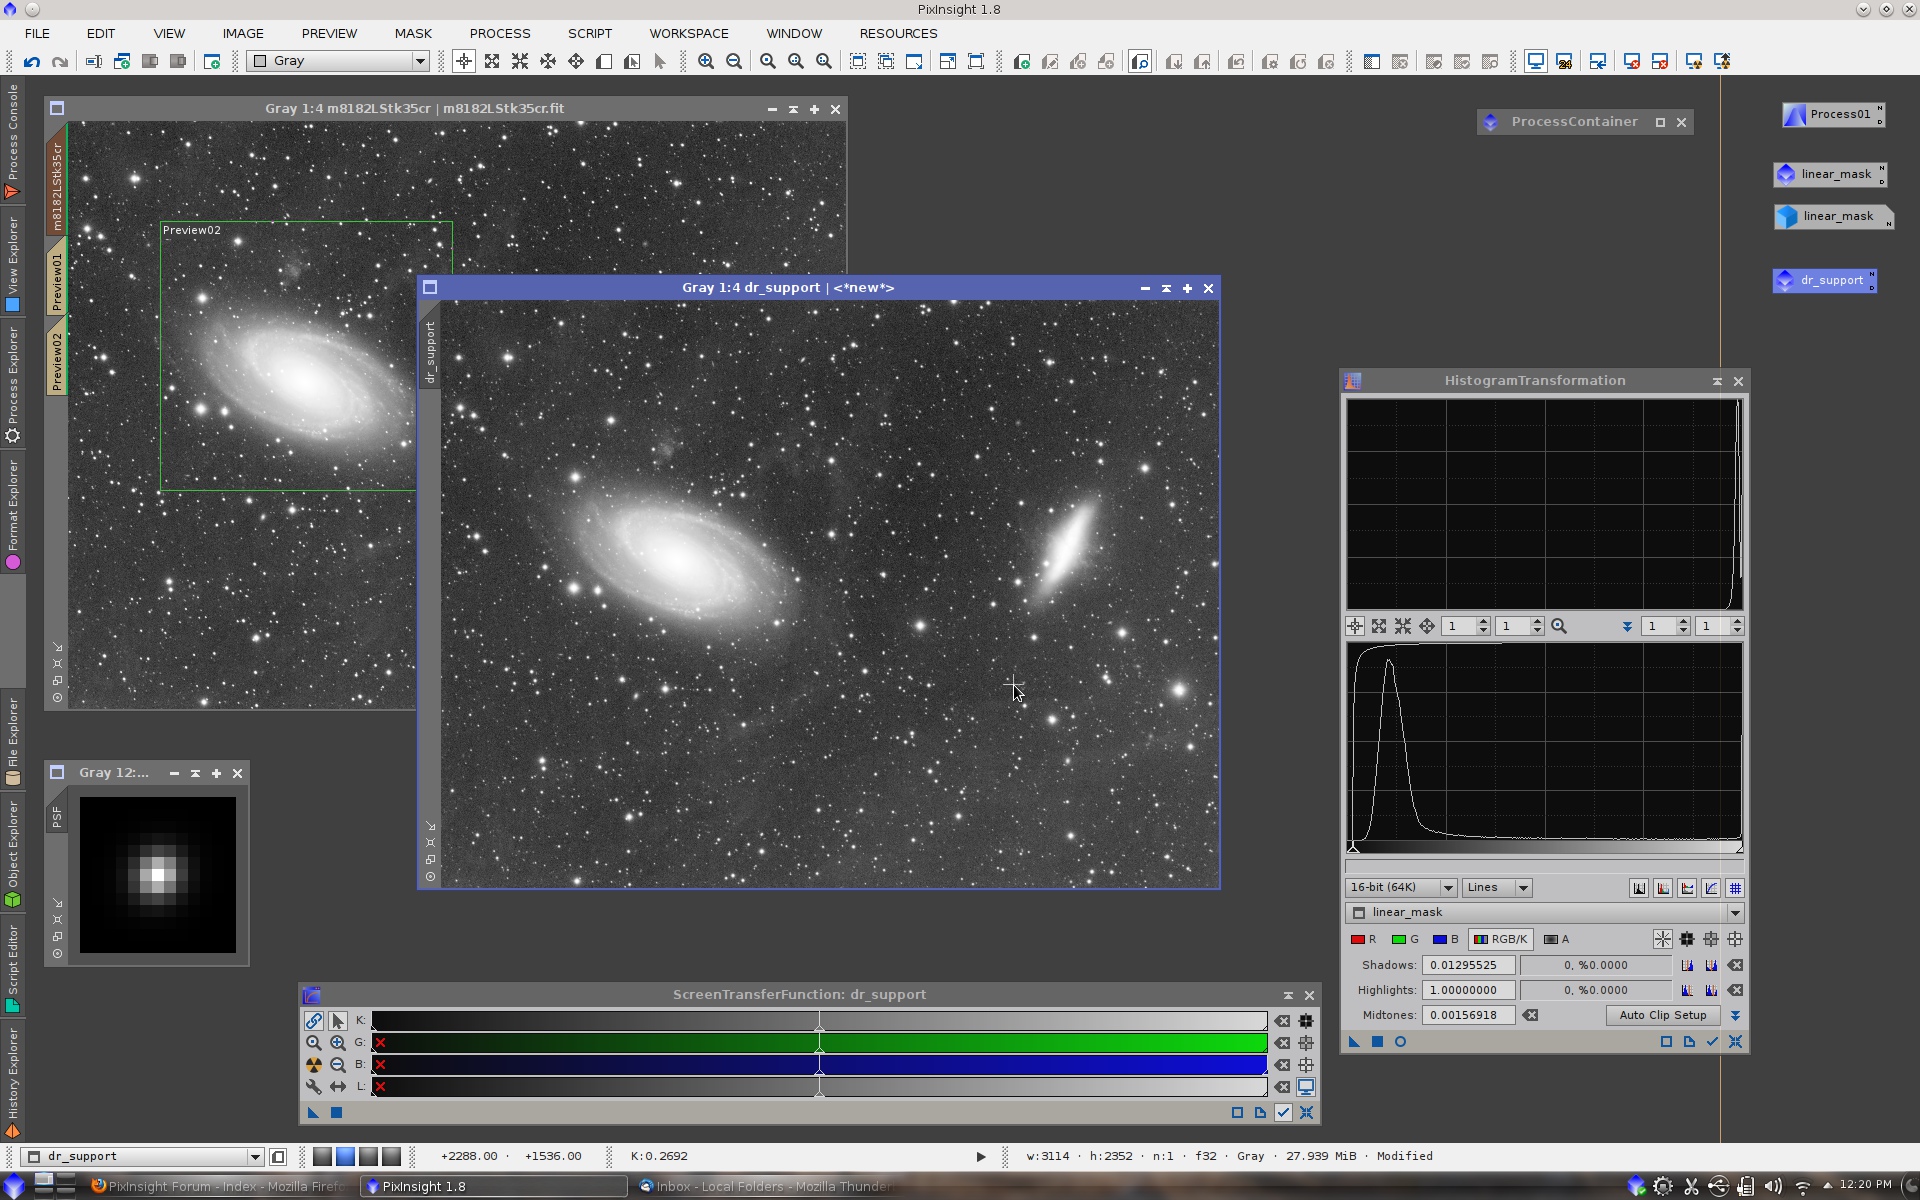
A linear mask, that is a mask where linearity of the original data is preserved, is an accurate and easy-to-build protection mask for this purpose. Linearity means that only linear operations must be applied to a duplicate of the image. We begin with a straight multiplication:
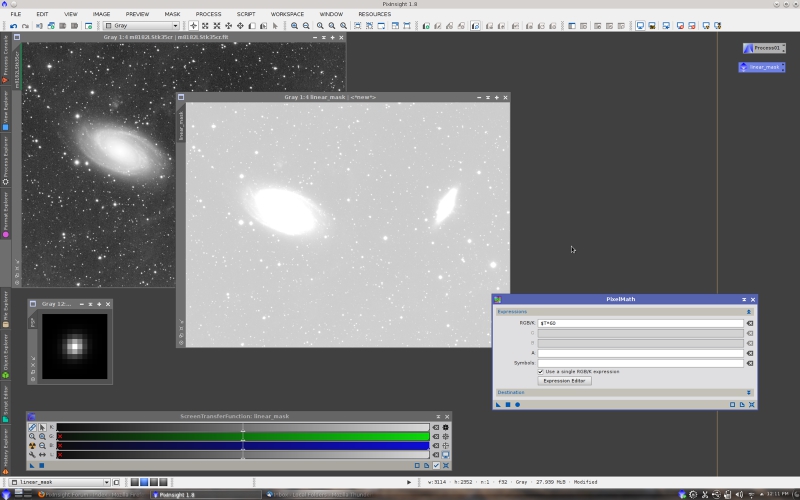
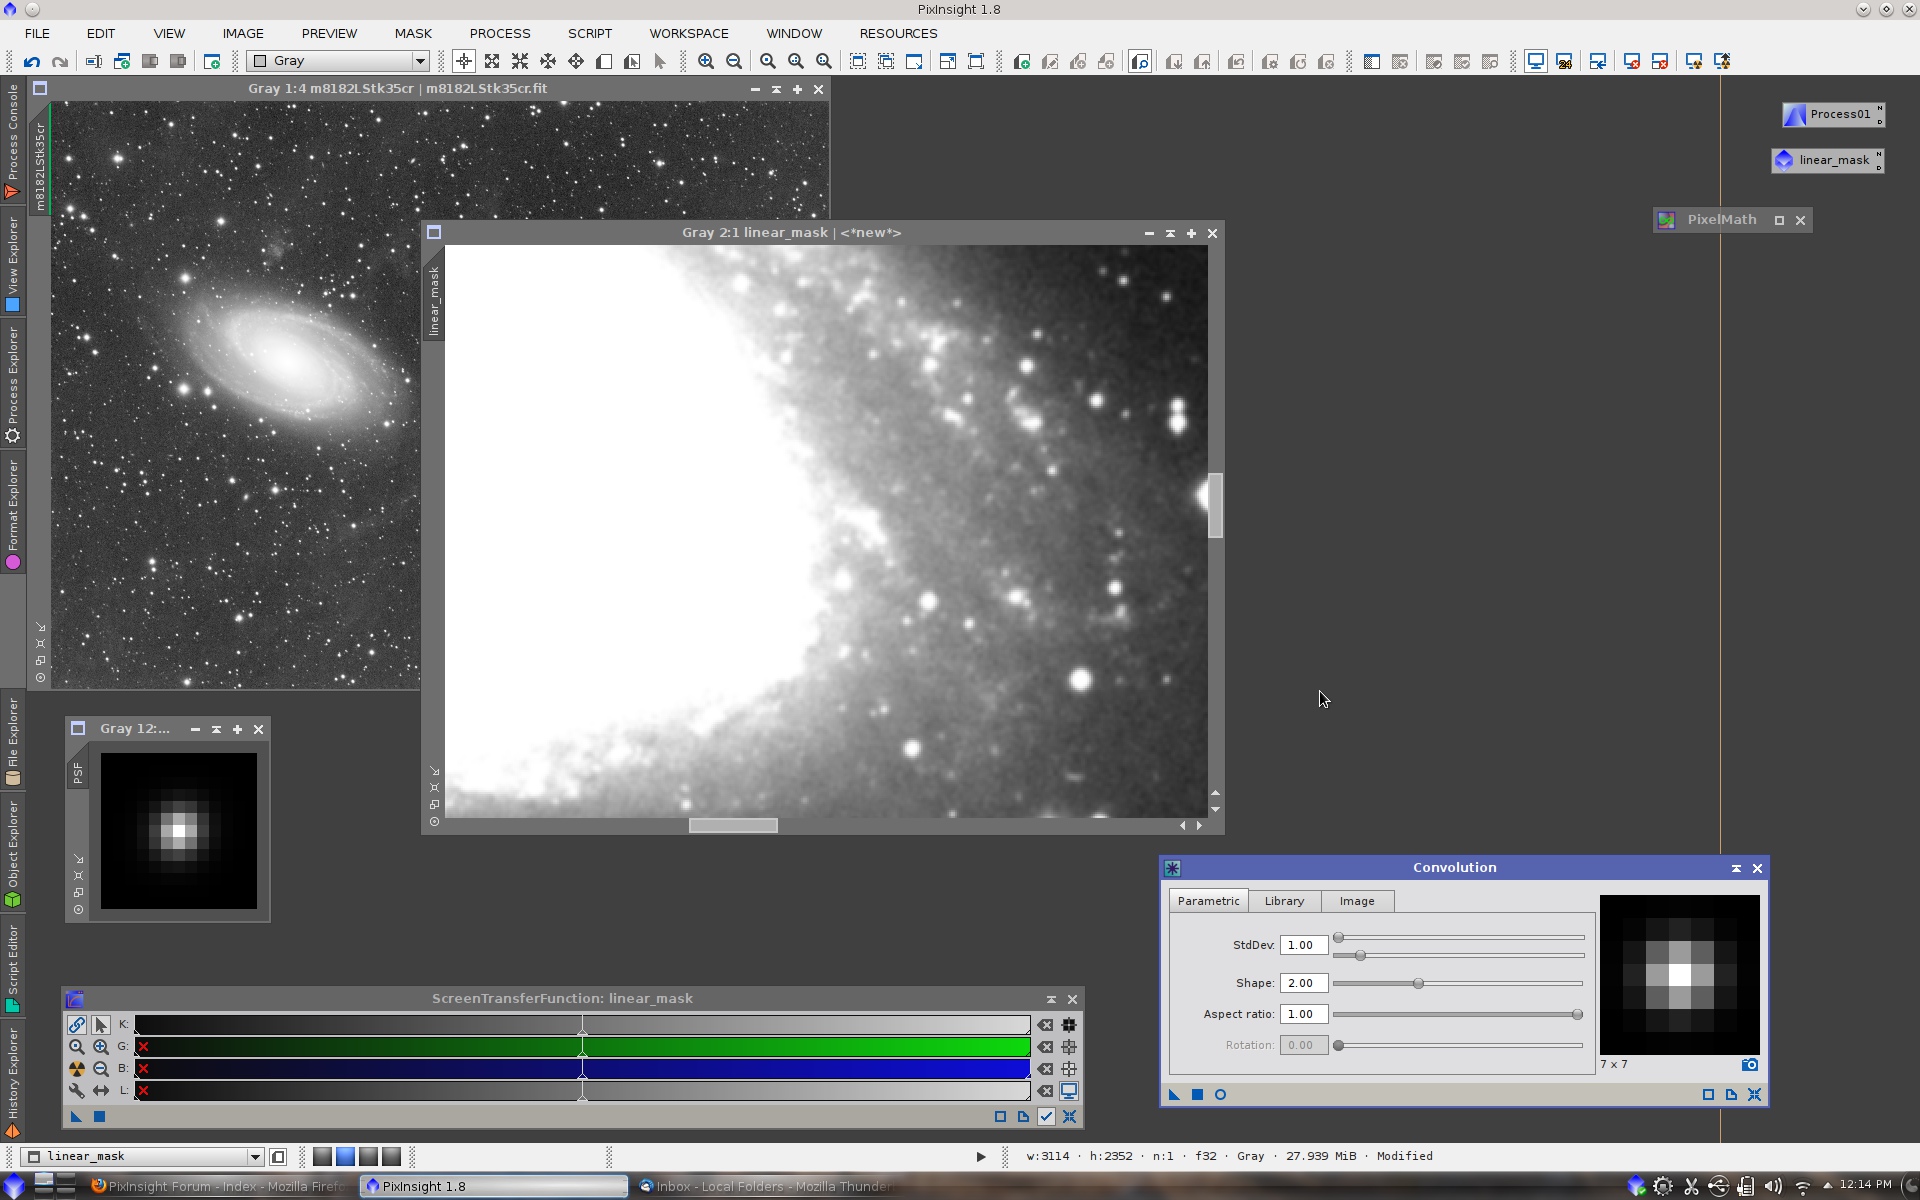
The constant 60 acts like an amplification factor. The brightest areas of the image become completely saturated (white), which means that they will be fuly deconvolved. The next step is a linear histogram clip at the shadows:
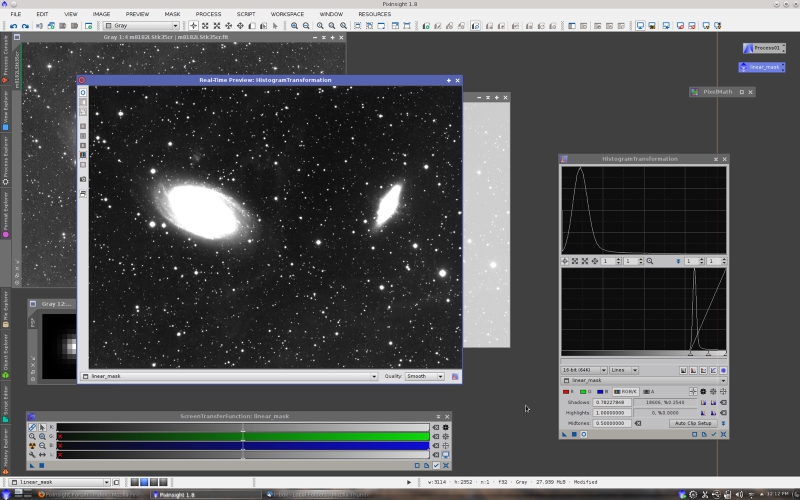
and a convolution with a small Gaussian filter. This makes the mask more robust to local noise variations. The smoothing applied must not be too strong, or the mask will become inaccurate (for example, dim stars can become wrongly protected if the mask is too smooth).

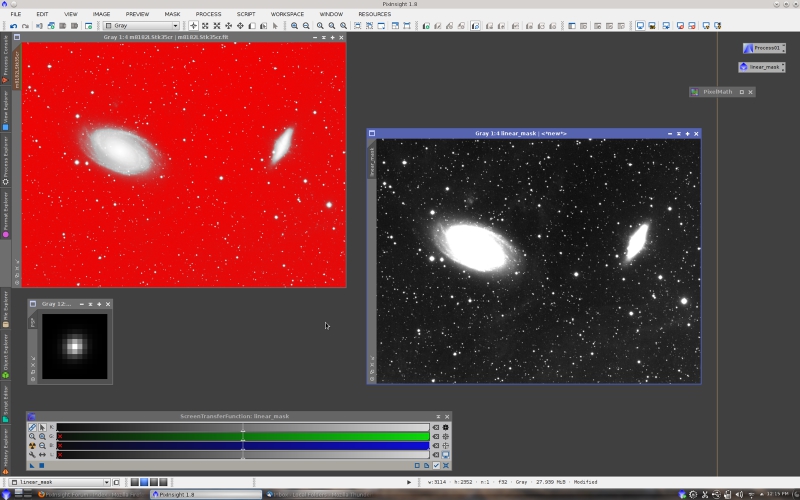
Finally, the mask has to be activated for the target image:
As I have said, a protection mask is normally not necessary with our Deconvolution tool, since regularization of deconvolution algorithms already does the same job very efficiently. So this step is optional. Linear masks are however very efficient for noise reduction of linear images. In fact, I have implemented an integrated linear mask generation feature in the MultiscaleLinearTransform and MultiscaleMedianTransform tools that we have recently released. But let's stay on topic.
Step 3: Local Deringing Support
A local deringing support is a special image used by the Deconvolution tool to drive a deringing routine that works at each deconvolution iteration to limit the growth of ringing artifacts. Although a deringing support image looks and is built like a mask, it is important to point out that it is
not a mask and does not work as such.
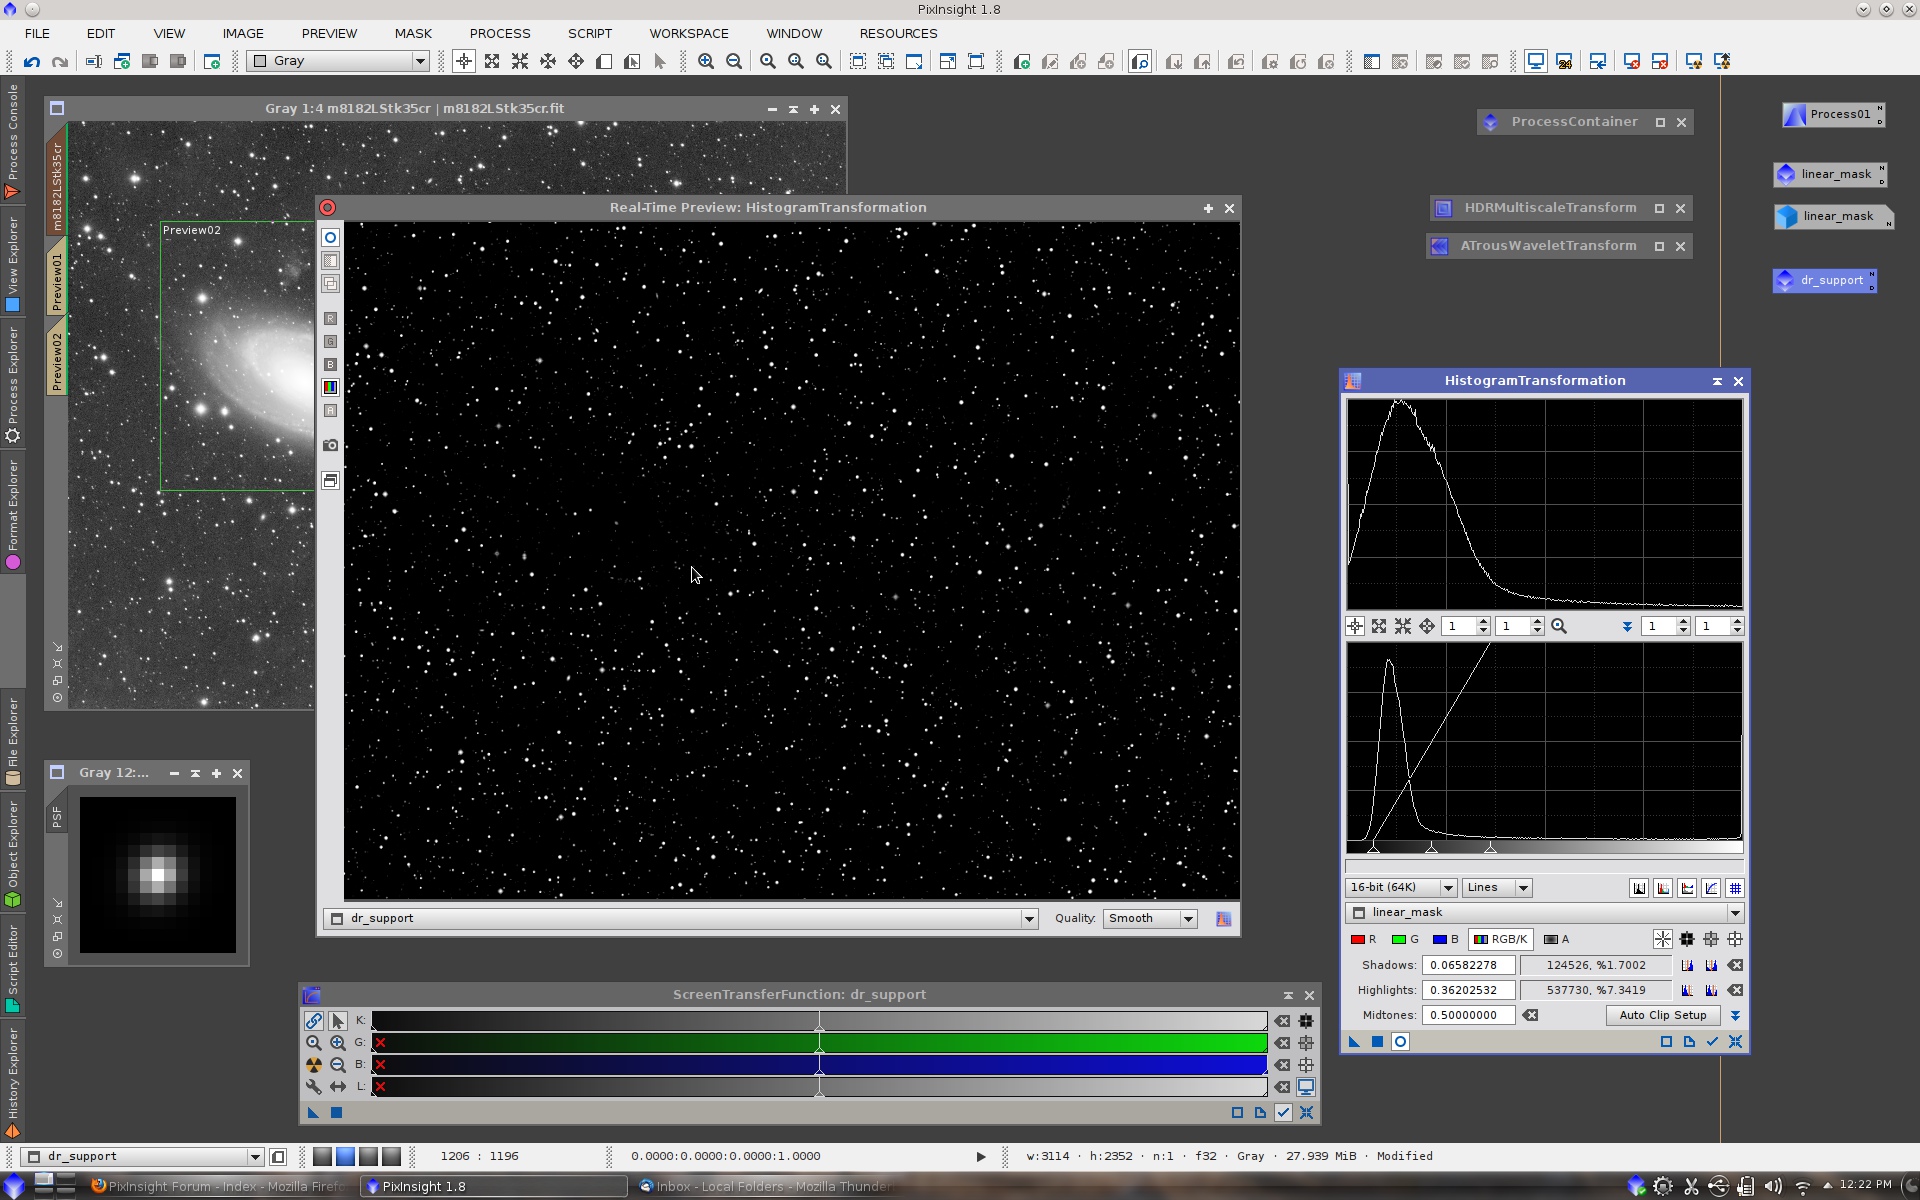
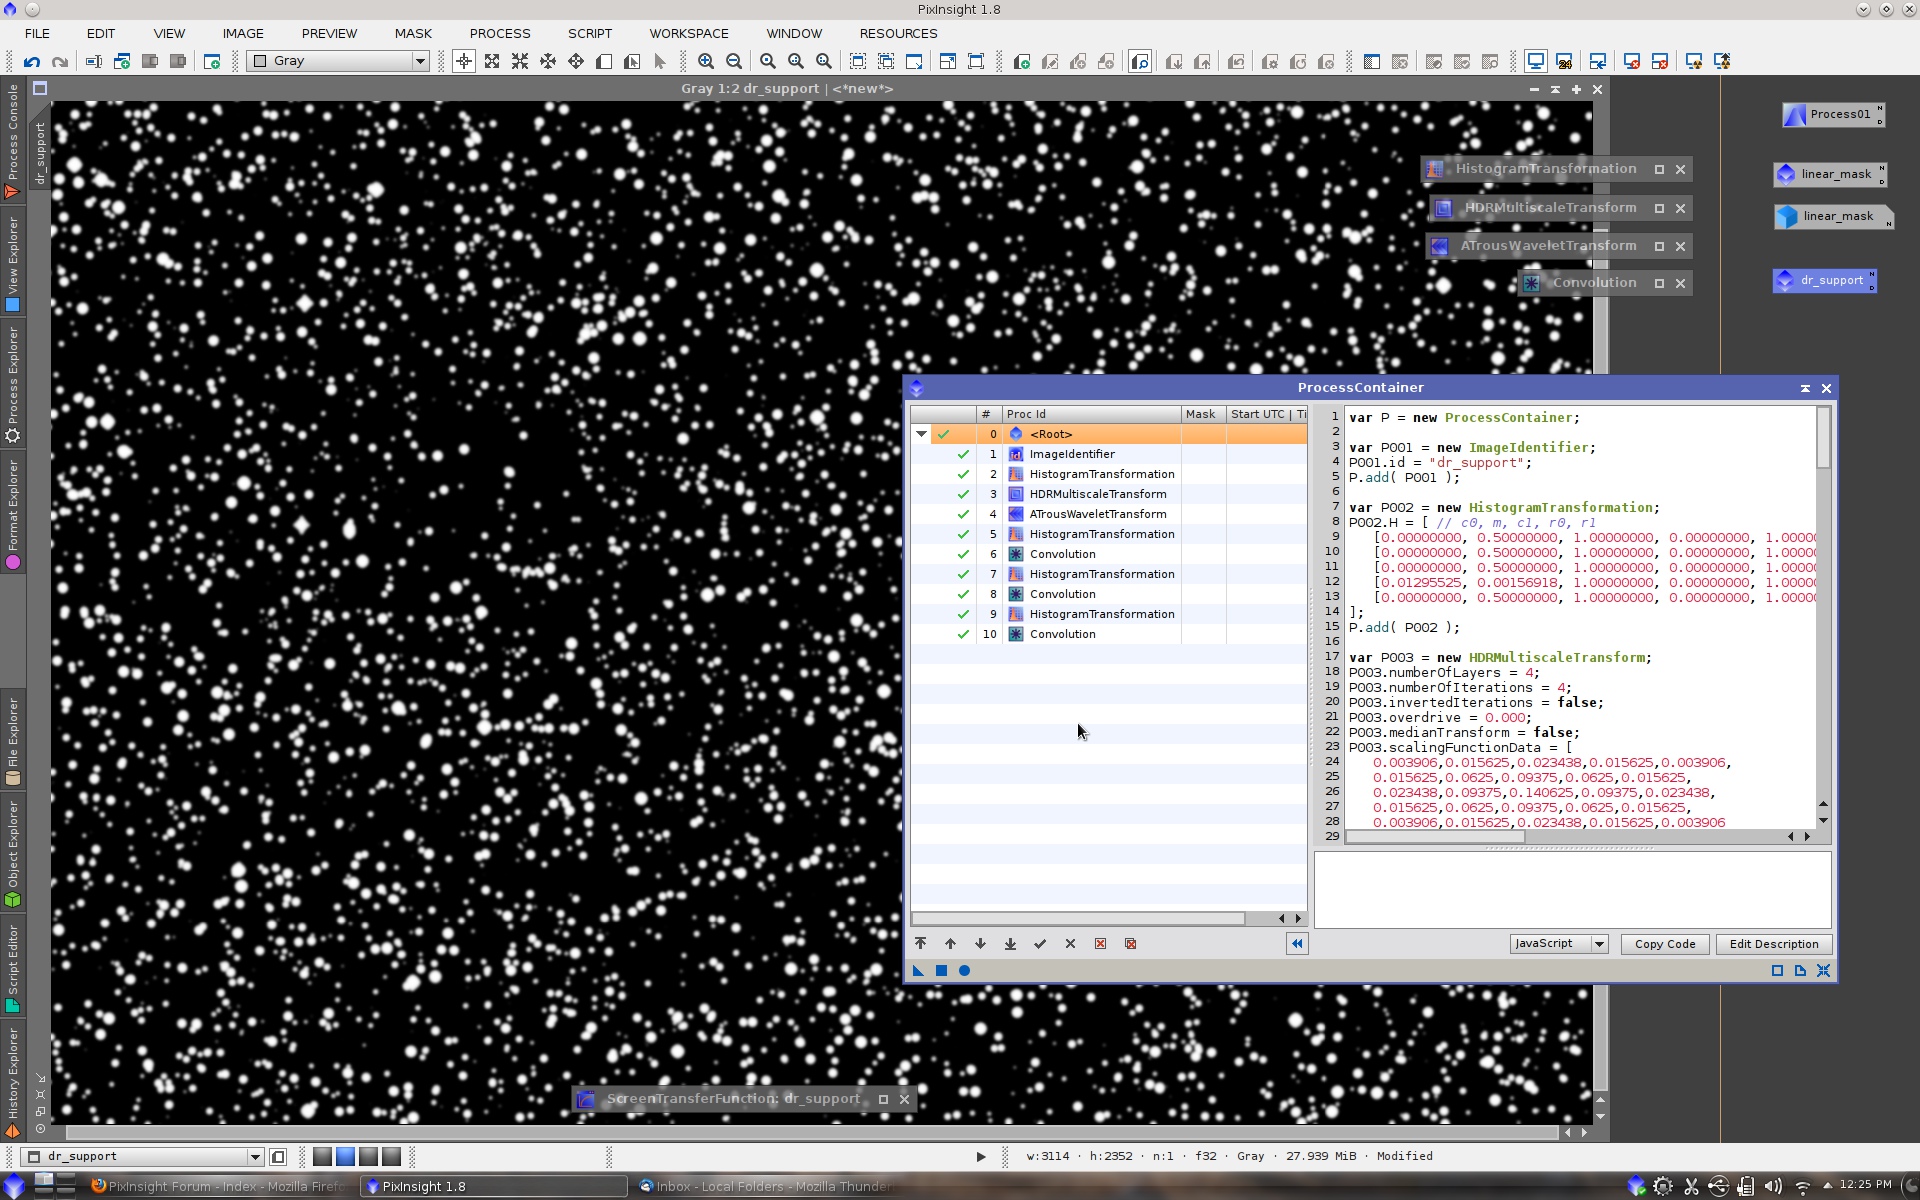
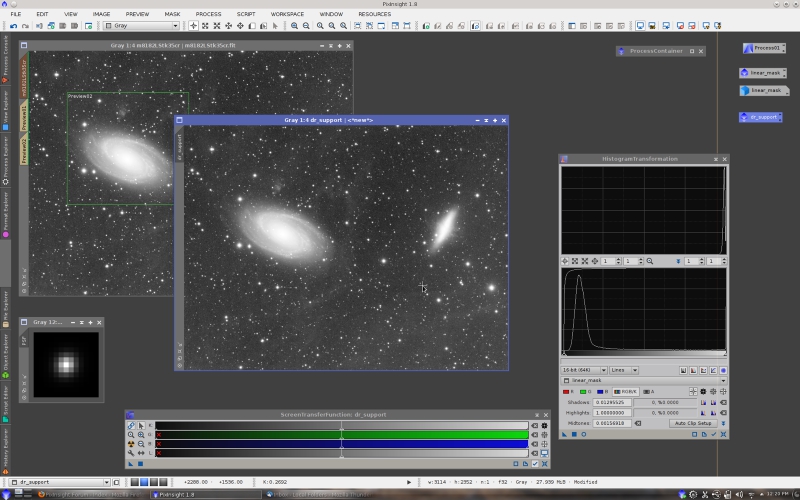
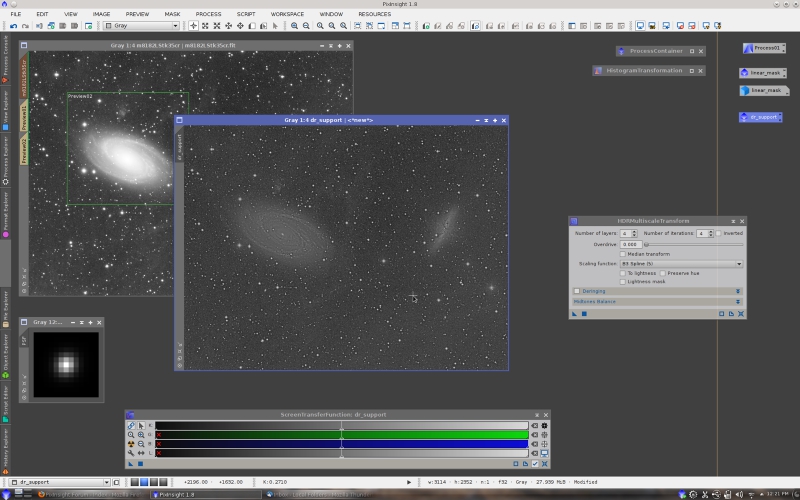
For a deep-sky image, a local deringing support image can be built just as a star mask. In this case, instead of the StarMask tool (which is currently subject to a deep revision), I'll implement a step-by-step procedure based on multiscale analysis. We begin with a stretched duplicate of the image. I have just transferred STF parameters to HistogramTransformation.
The next step is a strong instance of HDRMultiscaleTransform. The purpose of this process is to flatten the image, so jump discontinuities (e.g., stars) can be isolated more easily in subsequent steps.
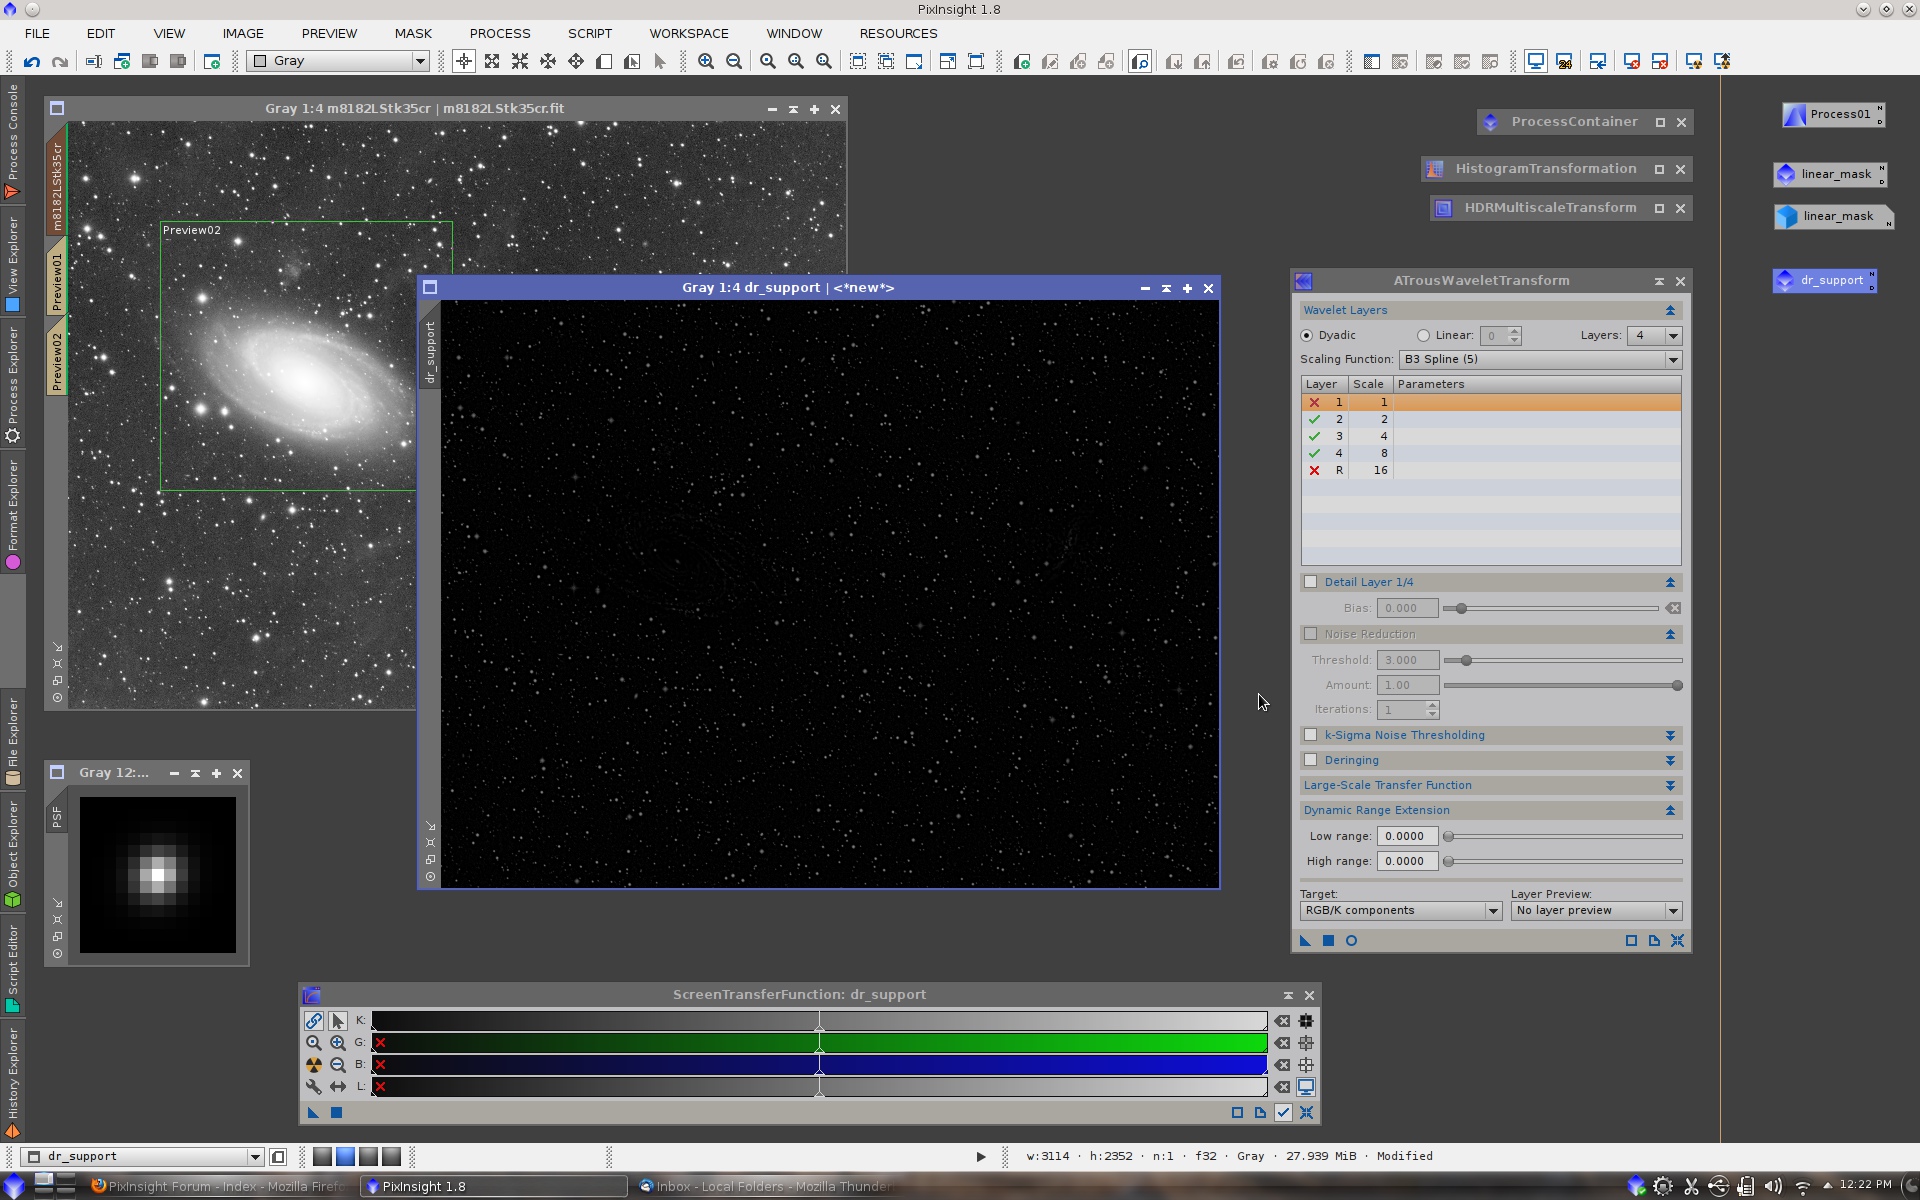
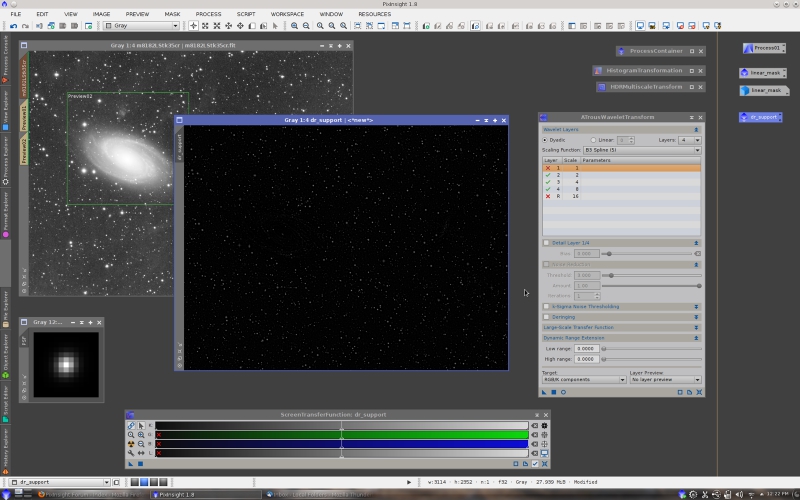
The starlet transform can be used to remove all large scale structures and high-frequency noise. This is achieved by disabling the residual and first layers, respectively.
A histogram stretch will intensify deringing support structures:

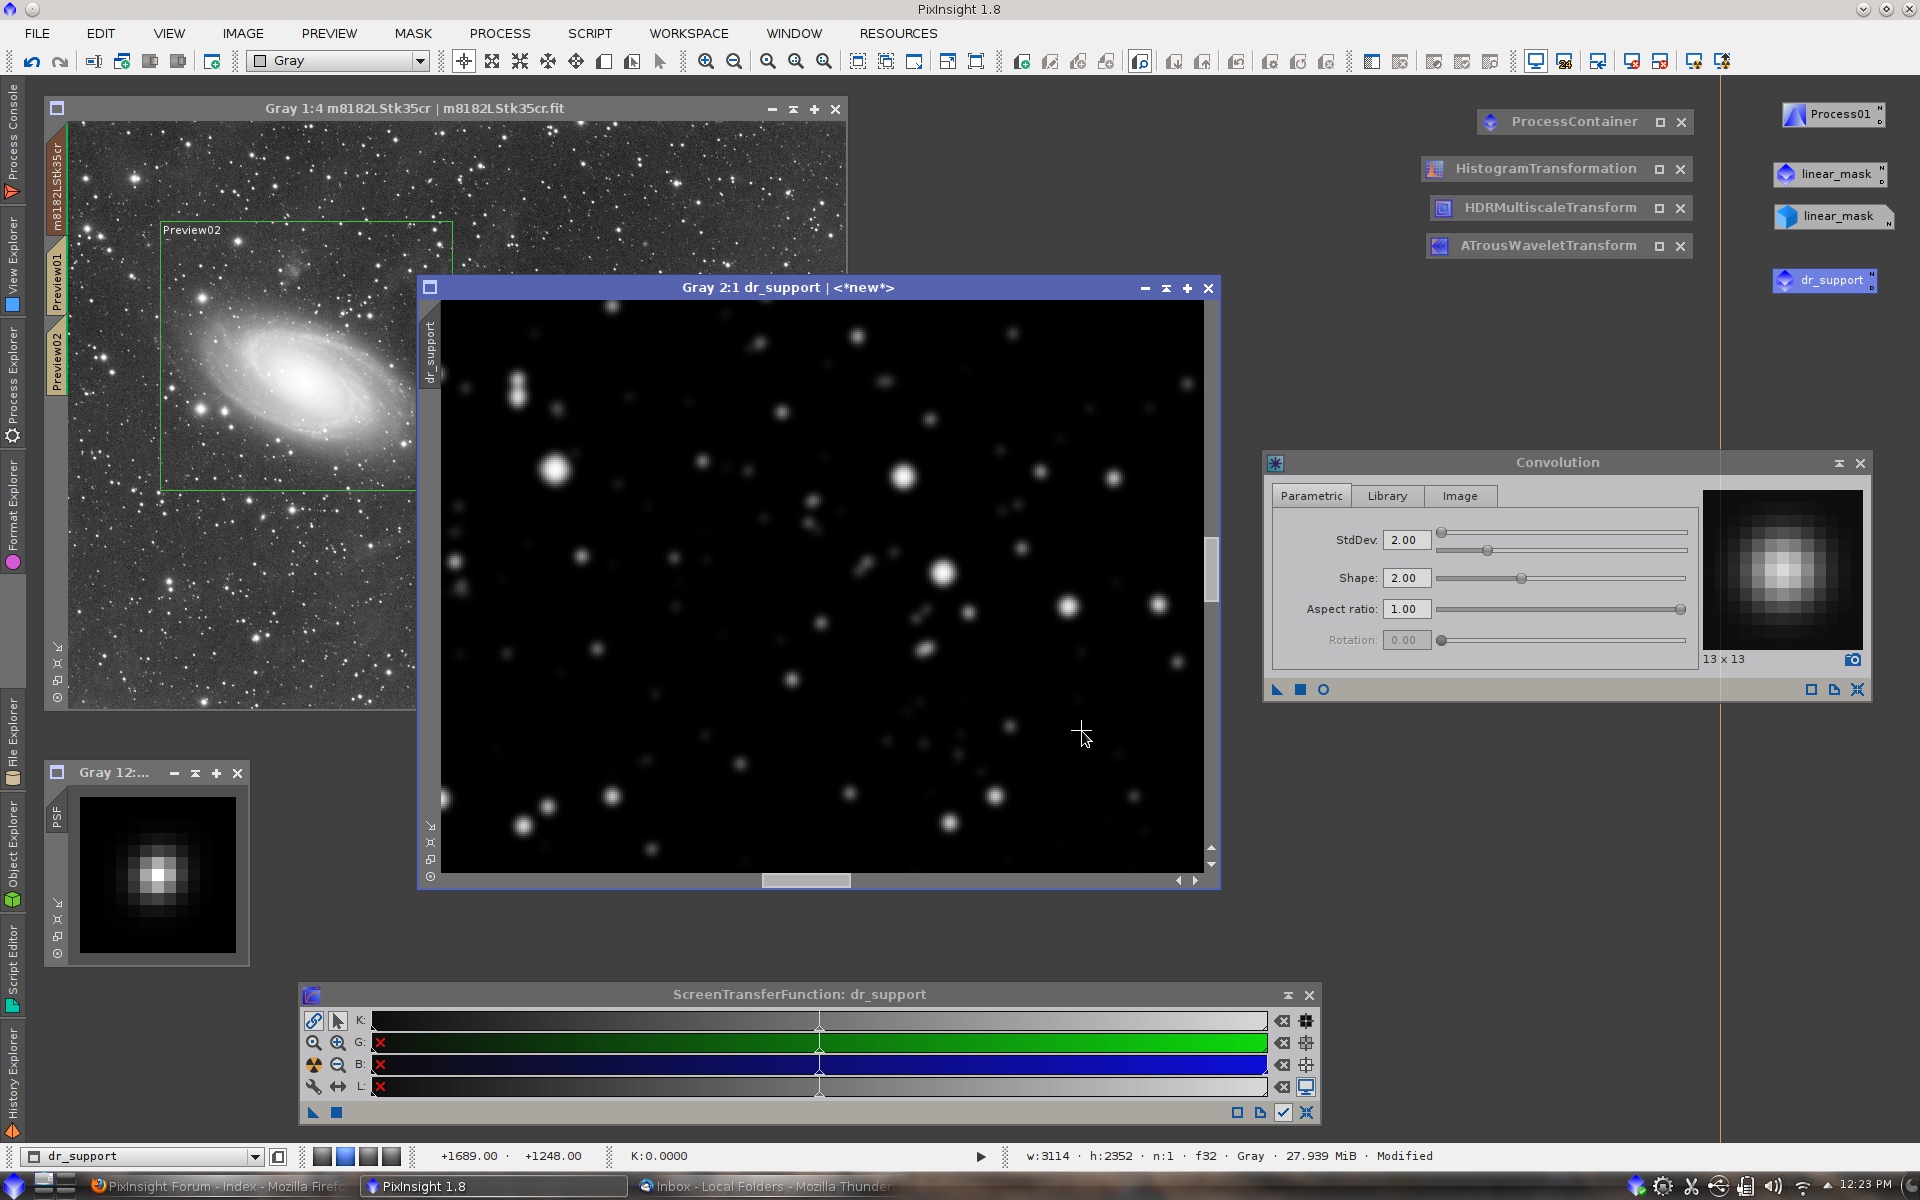
followed by a convolution to make them larger:
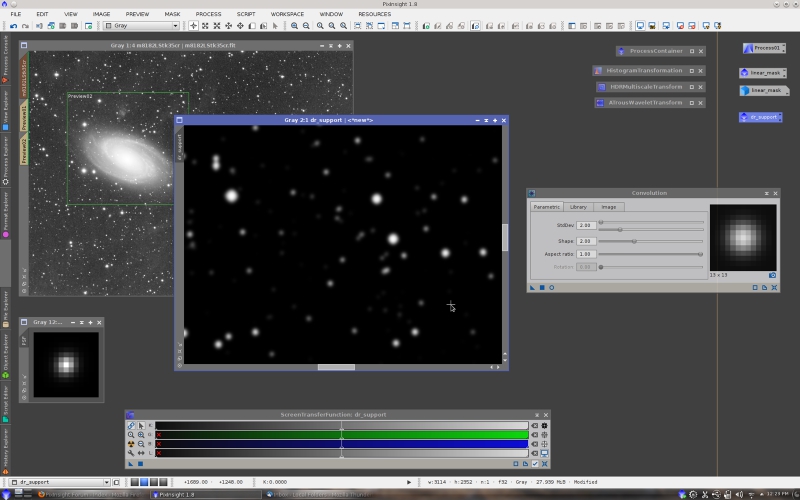
Finally, a sequence of histogram stretches and convolutions allows us to achieve the degree of protection required:
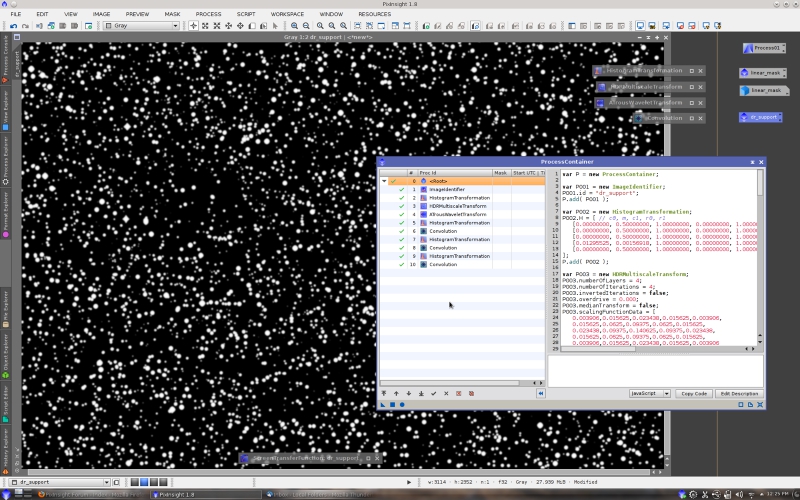
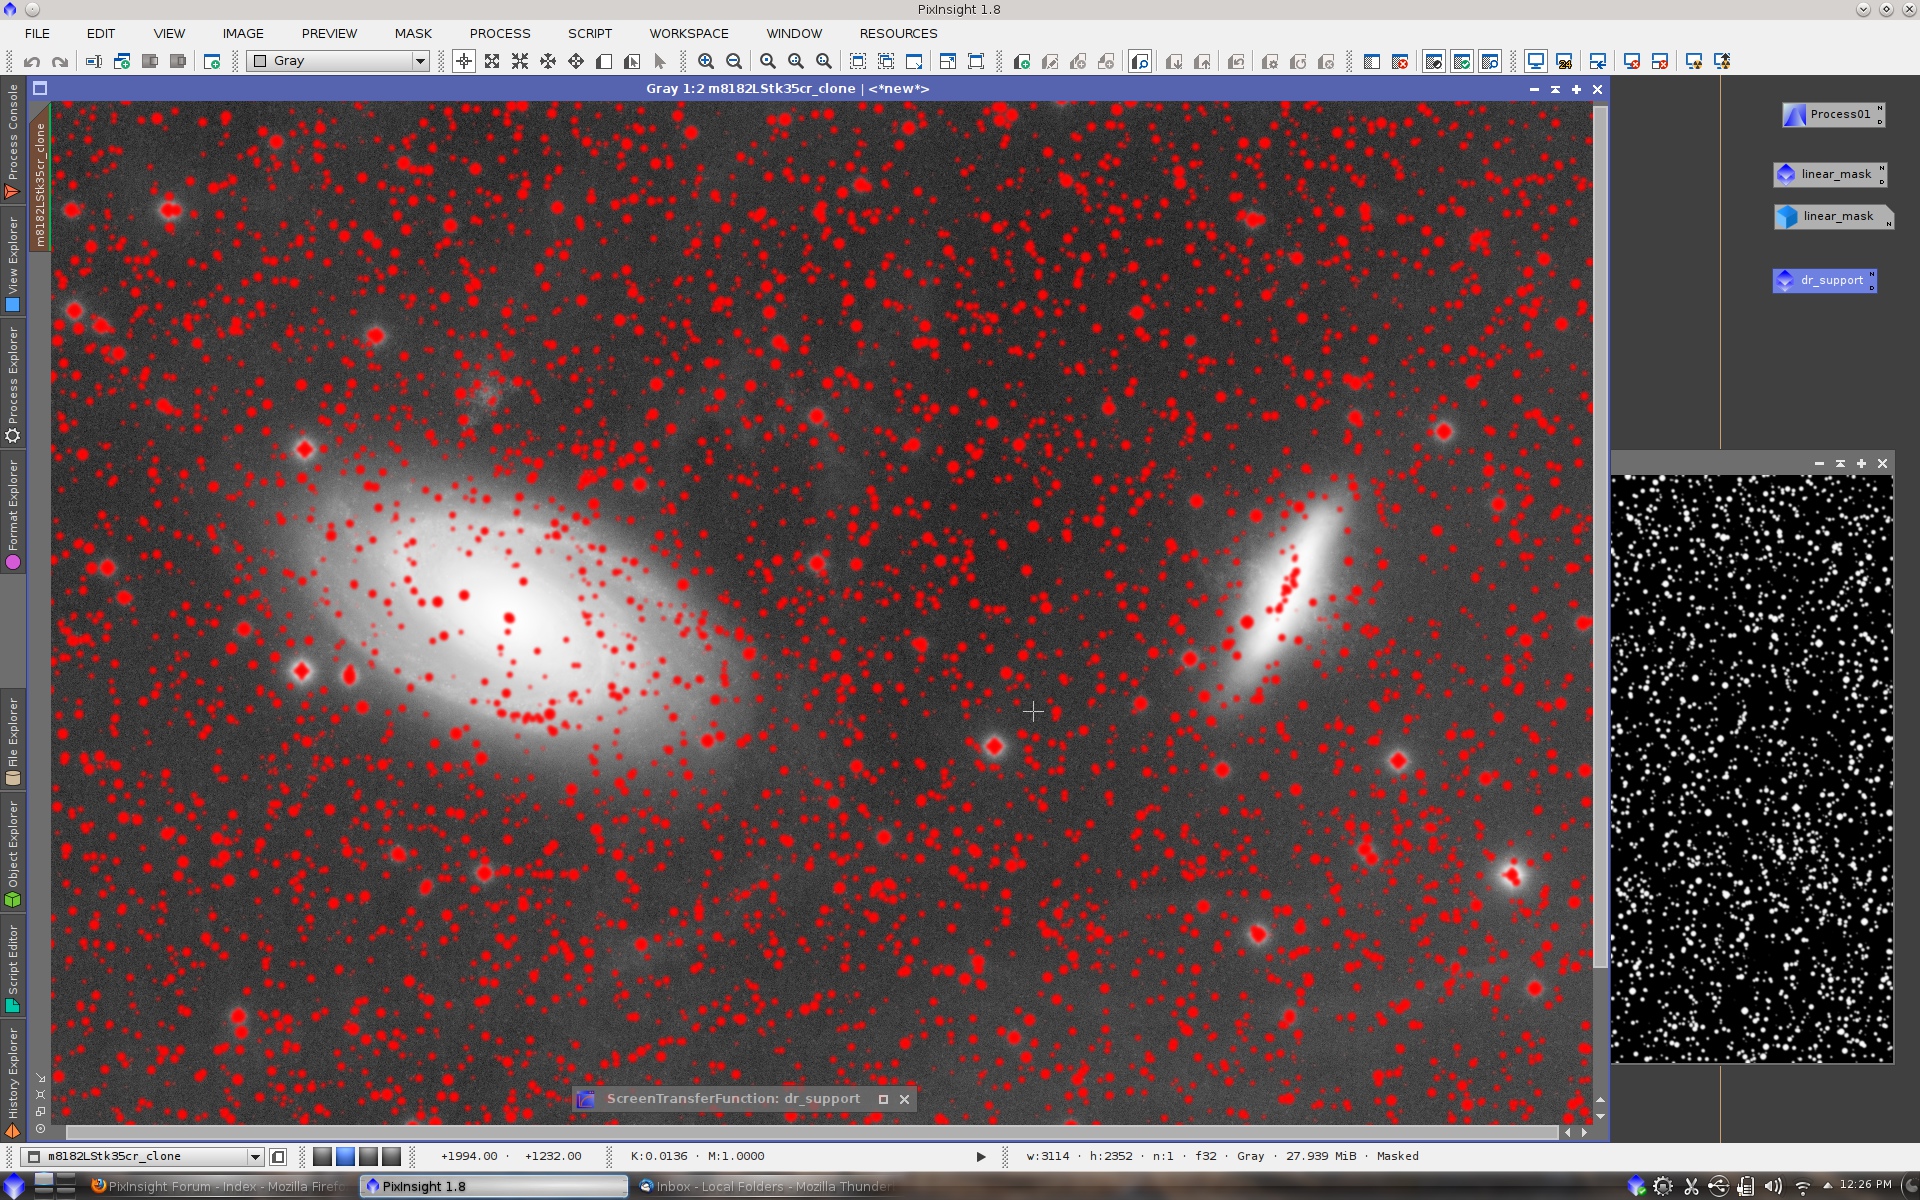
Basically, we want to protect bright stars and other high-contrast, small-scale structures, which are the structures where ringing becomes particularly problematic. To control deringing support generation, we can duplicate the image and activate the deringing support as a mask.
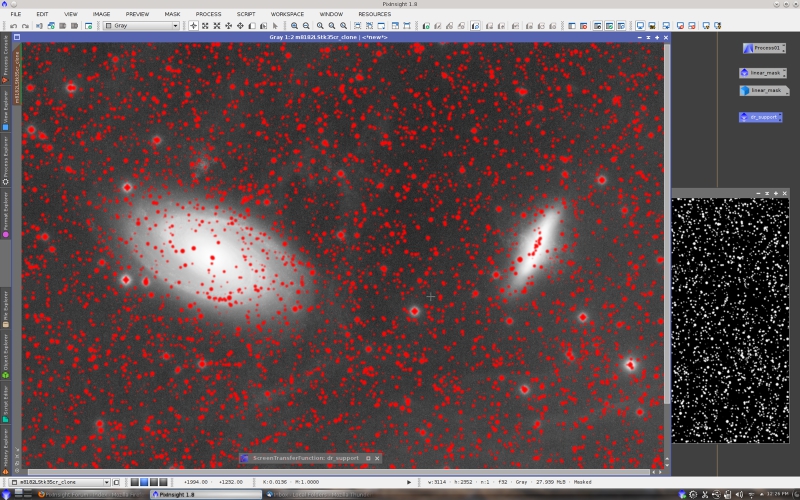
We have now everything we need for deconvolution: a linear image with a reasonable amount of signal, a good local deringing support and, as an option, a linear mask that will provide additional protection to low-signal regions.
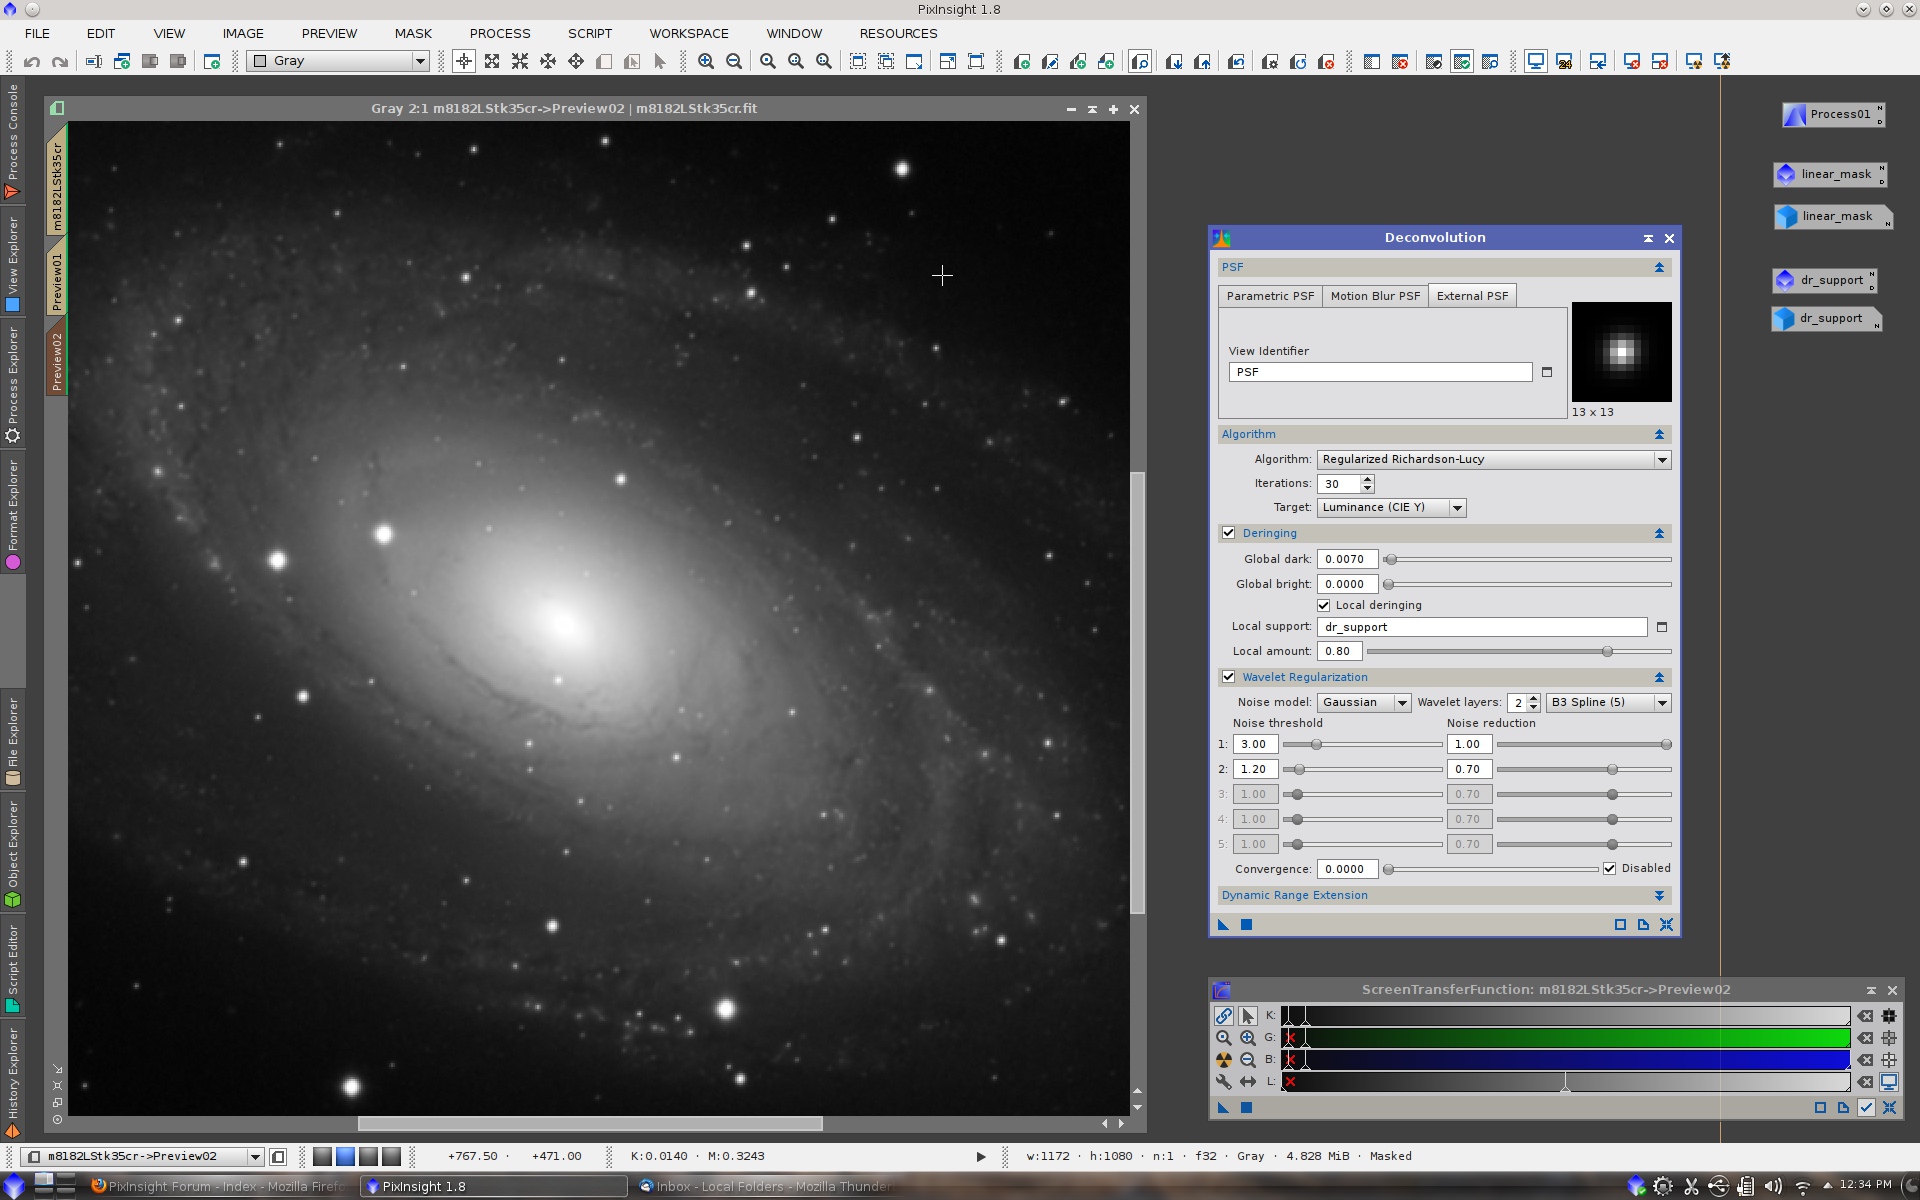
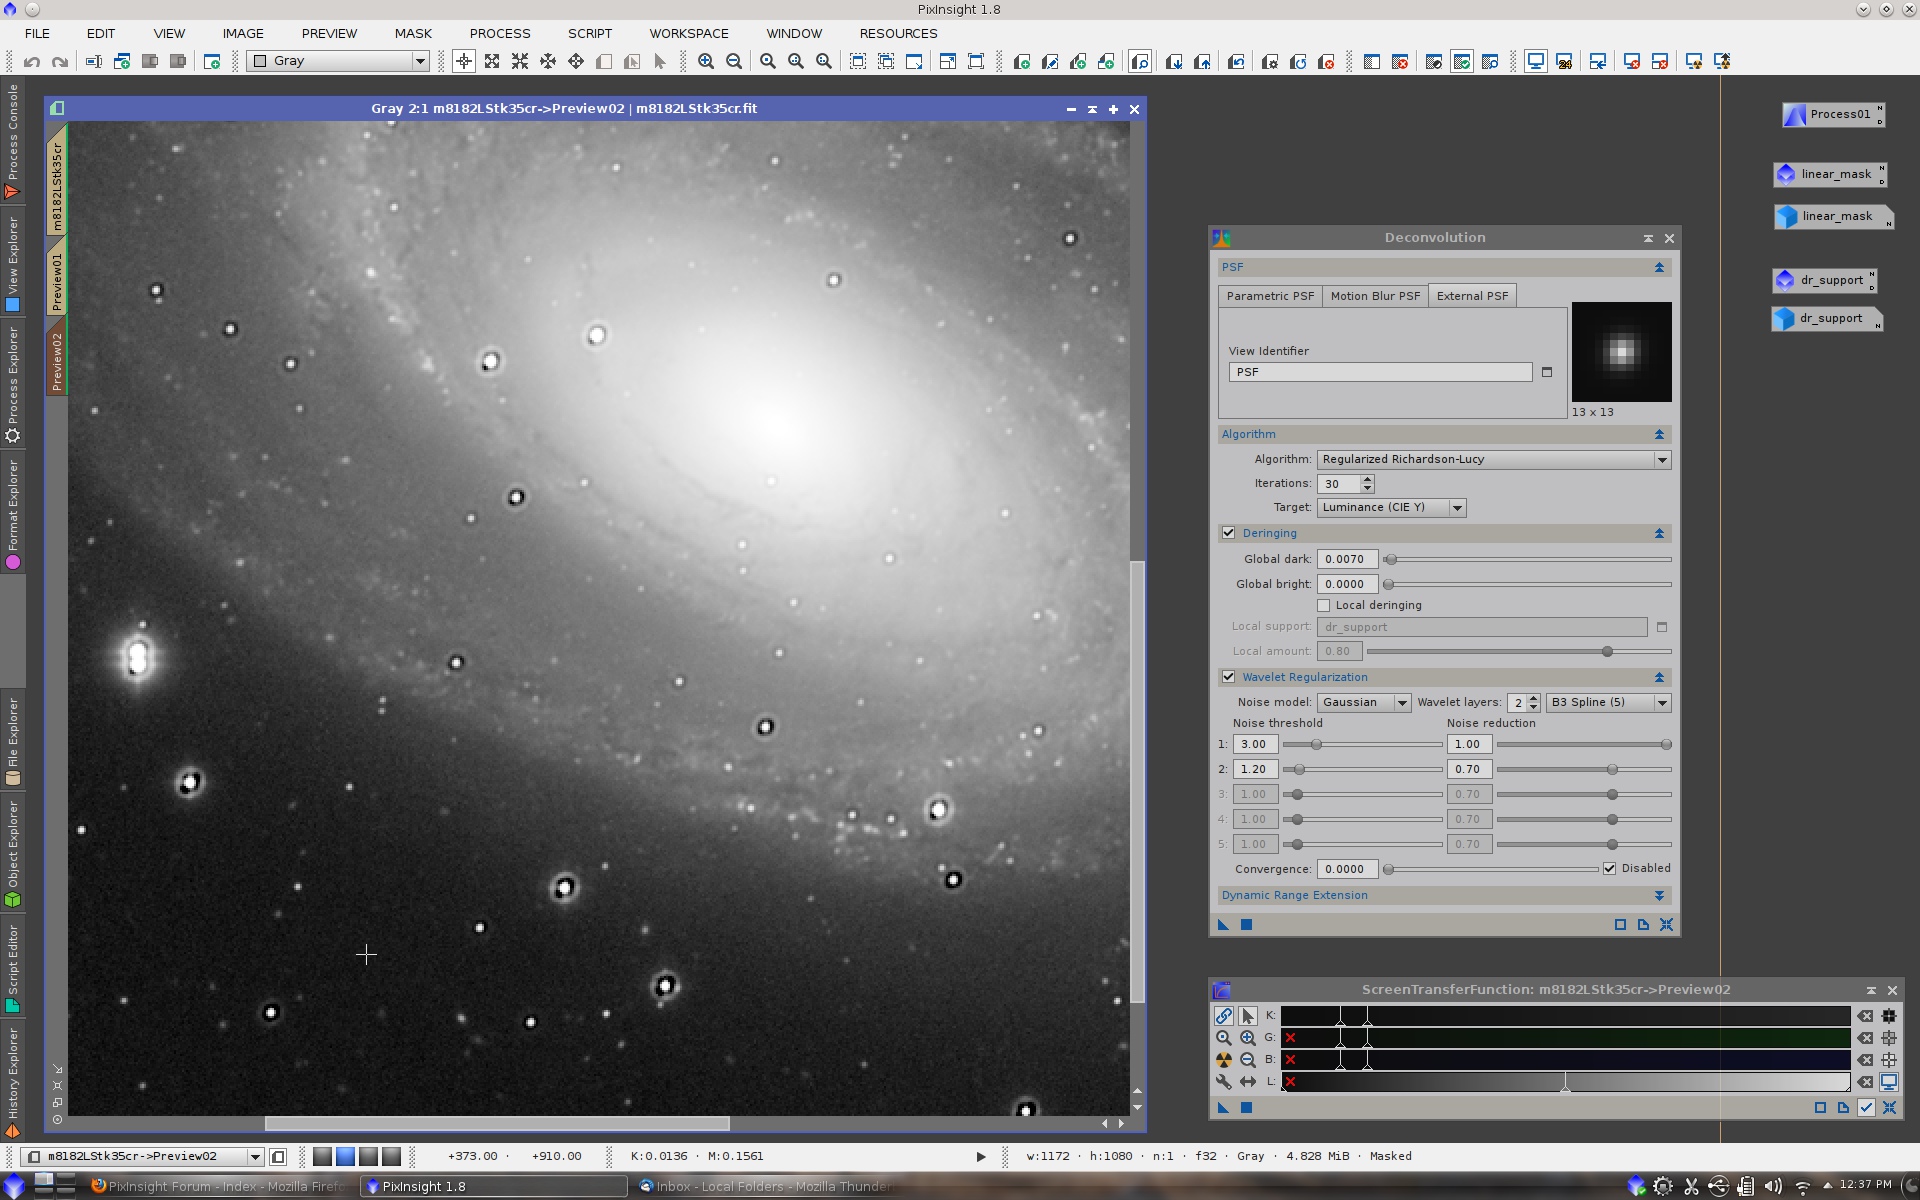
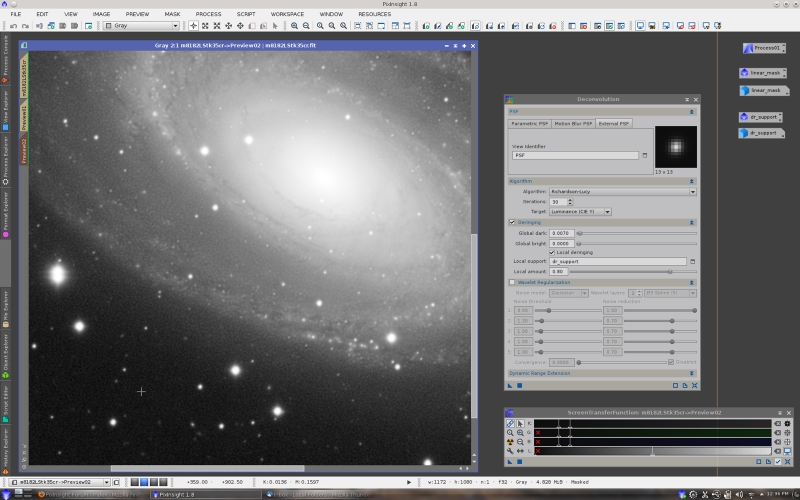
This is a preview on M82 before deconvolution:

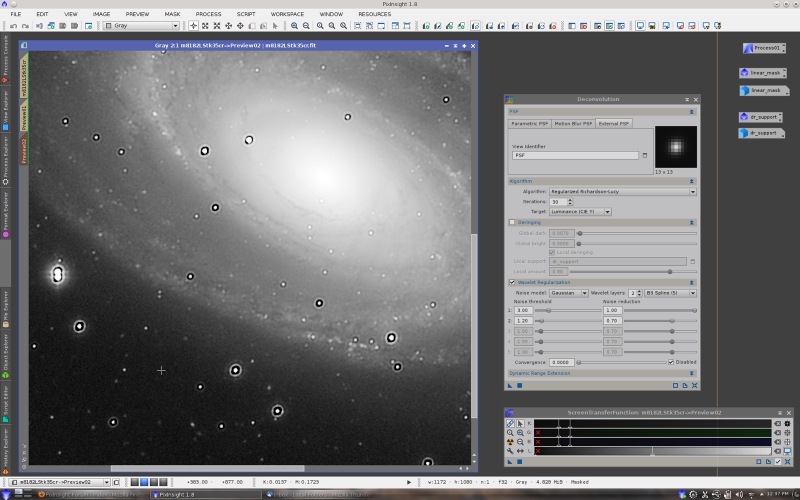
and after deconvolution:
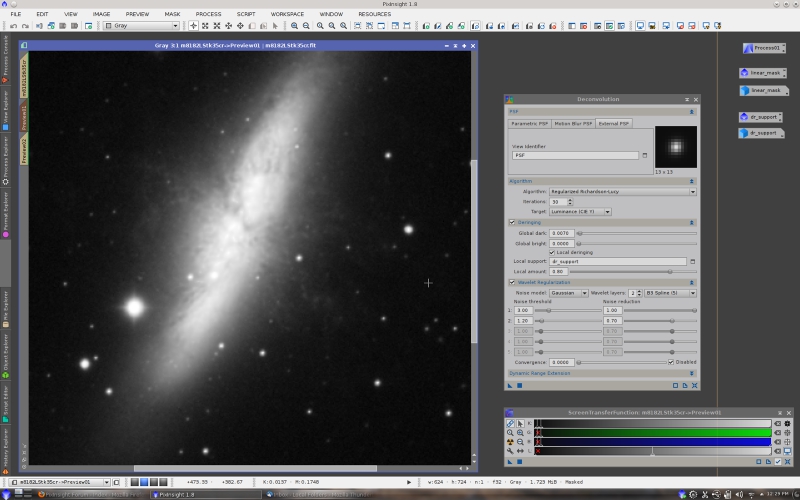
Note that ScreenTransferFunction has to be used to reveal significant structures within the brightest areas of the image, where we want to control how deconvolution is doing its work. This is the same comparison for M81, before deconvolution:

and after deconvolution:
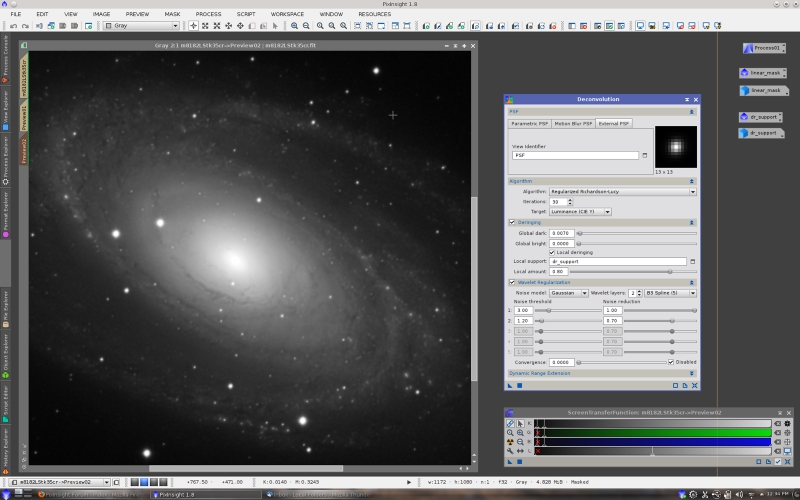
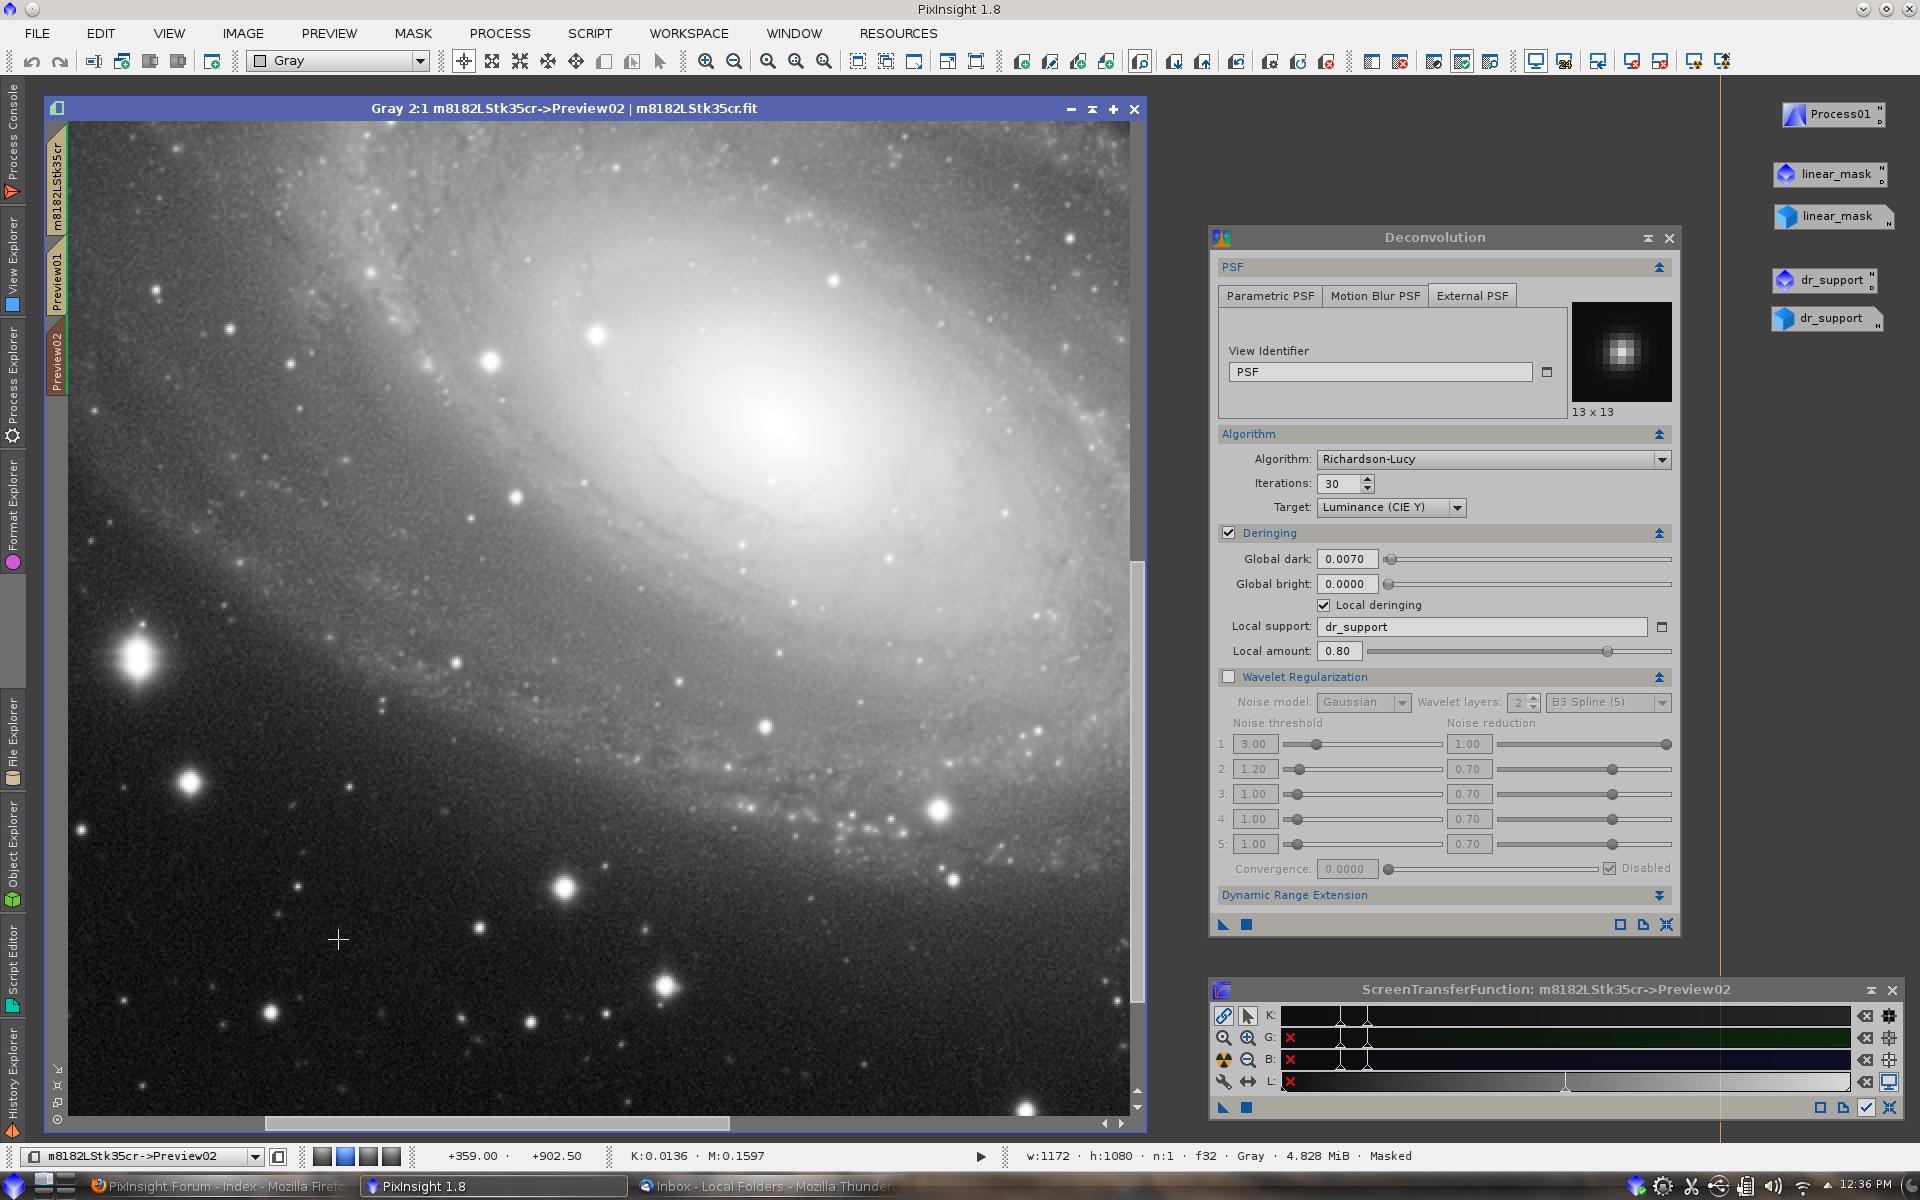
The best way to learn how the most critical deconvolution parameters work is by comparing the results with and without them. This is a more stretched view of the deconvolved M81 preview with regularization:
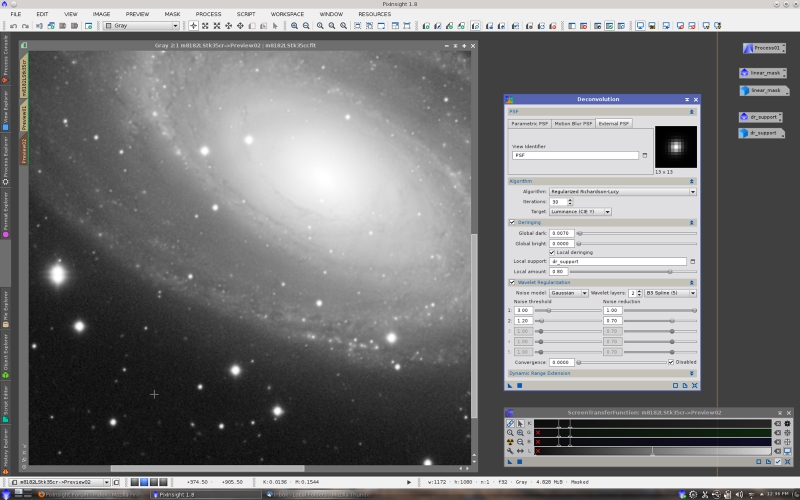
and without regularization:
Note the noise intensification when we disable deconvolution regularization. In this case I have lowered the regularization threshold for the second wavelet layer; perhaps this has been an error.
This is what happens if we disable deringing:
and this is the result without local deringing:

Global deringing always degrades the result of deconvolution to some degree, so we always must try to find the smallest value of the
global dark parameter that prevents ringing. If we use a good local deringing support, we can use an even smaller global dark value because local deringing is very effective to prevent ringing around the brightest stars. The optimal values, as always, depend on the image.
Also take into account that a very small amount of ringing can actually be beneficial because it increases acutance, which leads to a higher visual perception of detail.
Step 5: Nonlinear Stretch
The next processing steps should include some noise reduction on the linear image after deconvolution. For this purpose MultiscaleLinearTransform, MultiscaleMedianTransform (especially the new median-wavelet algorithm) and TGVDenoise are the tools of choice. I'll skip these tasks and will go directly to the nonlinear stretch step. In this case I have just transferred STF to HistogramTransformation.
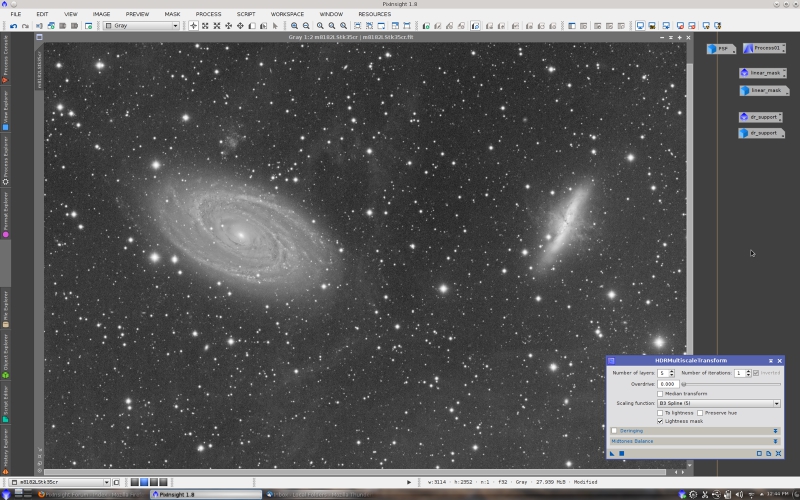
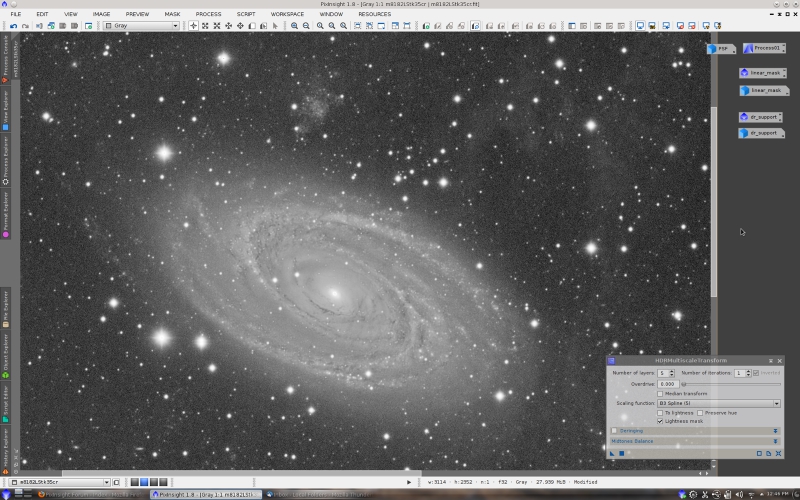
Step 6: HDR Compression
Some HDR compression will allow us to reveal the result of deconvolution on high signal areas. The HDRMultiscaleTransform tool yields a very nice result for this M81/M82 image:
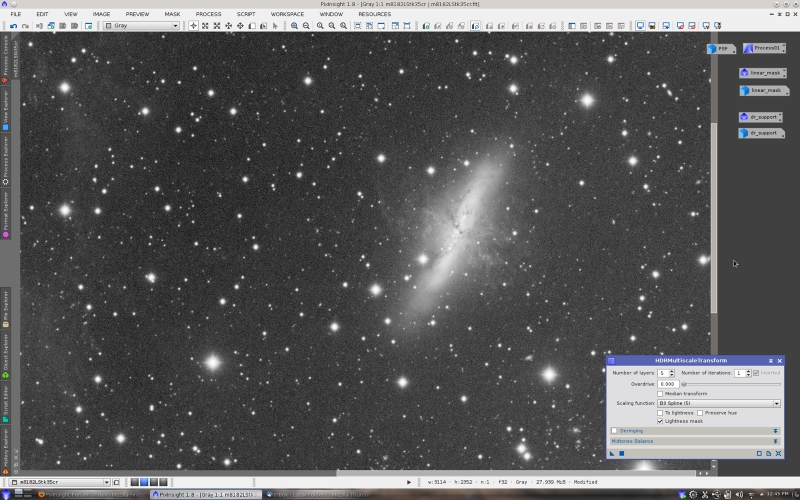
This is a 1:1 view on M82:
and M81:
I hope this brief tutorial will help you to achieve better results with our deconvolution tools from now on. Let me know if you want more information on the applied processes, or more detailed descriptions of some processing steps.