I would be very interested to learn more about that if you would like to explain what you mentioned above.
So here we go. The first icon is 'initial_crop_and_stretch'. This is a ProcessContainer with four processes:
- ImageIdentifier. This changes the image's name to 'M101', just to ease identification during the rest of the process.
- DynamicCrop. To crop black/noisy borders that might generate edge artifacts later. Now I see that I cropped the image too much at the top edge; as I said this was just a quick and (rather)dirty test.
- SampleFormatConversion. To convert the original 16-bit image to 32-bit floating point format. This is always advisable when one has to apply strong histogram transformations and other heavy tortures to the data.
- HistogramTransformation. This is the initial nonlinear stretch, which is necessary to compress the dynamic range of the image (mainly because the HDRMultiscaleTransform tool does not work with linear data). I did nothing fancy here: just STF AutoStretch applied through the HistogramTransformation tool.
The second icon is a RangeSelection instance, which is used here to generate a simple mask that will allow us to recover saturated stars at the end of the process. Some of the stars in the image are completely saturated (obviously the brightest ones). This includes also the core of the galaxy nucleus, which we'll isolate as a 'star' thanks to HDR compression.
Saturated stars are very problematic because they are treated as high-dynamic range objects by the HDR wavelet transform algorithm, which tries to find a valid solution for them, as for the rest of the image. Obviously, there is no solution at all for a saturated star, and hence the resulting 'solution' is just an artifact. Non-saturated stars pose no problem, in general, with the HDRWT algorithm. In the case of this image we have an additional problem: some of the saturated stars are
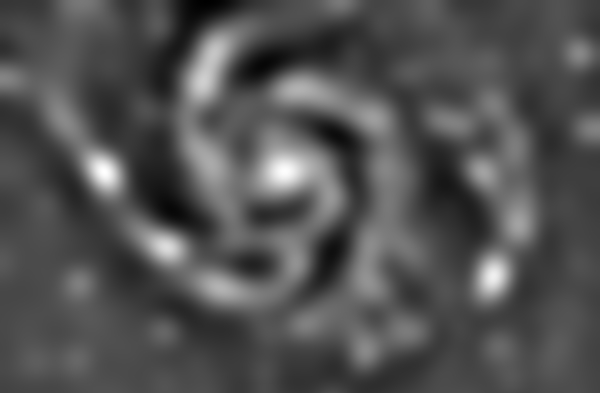
concave. This is a 3-D representation of one of the saturated stars in the original image (the bright one at 11 o'clock from the nucleus), generated with the 3DPlot script in PixInsight:
Note that the saturated region doesn't have a flat profile, but a concave shape where the maximum brightness values are located on a ring around the center. The result of this object after nonlinear stretching and HDR compression with the HDRWT algorithm is as follows:
As you can see, HDRWT has found a very good solution to this HDR problem. The result is not very appealing though, as it would be a better representation of a black hole ...

The best way to fix these problems is simple: don't let star saturation happen to your image. This can be achieved with short exposures integrated with the HDRComposition tool. The second (and only!) best solution is protecting saturated stars during HDR compression. This can be done with a star mask (StarMask tool). In this case, however, I have opted for a simpler and faster solution: isolate all saturated pixels by thresholding them, and use the resulting mask to repair the damaged stars after HDR processing.
RangeSelection is the tool of choice in these cases. I have set the lower limit parameter to 0.99 and upper limit to its default 1.0 value. This effectively isolates all saturated regions. I have also set smoothness to 2.0 in order to soften mask edges, which is necessary to prevent hard transitions when we use the mask.
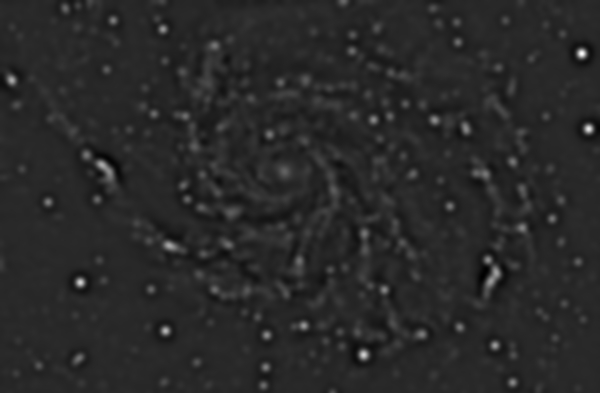
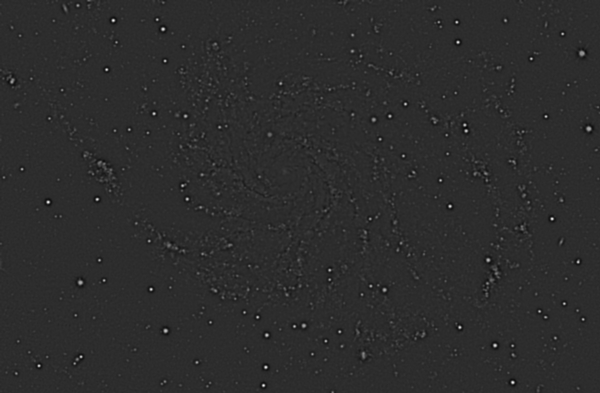
The third icon is where the fun starts. It is a ProcessContainer instance with three HDRMultiscaleTransform instances and one CurvesTransformation instance. Instead of compressing the dynamic range in a single step, I have compressed it in three successive steps working at different dimensional scales. The three instances of HDRMT work with 8, 6 and 4 wavelet layers, respectively. To understand how these steps transform the image, take a look at the 8th, 6th and 4th layers of the wavelet decomposition of the stretched image (you can get these images with the ExtractWaveletLayers script):
The 8th layer supports large scale image structures, especially the spiral arms and the dark gaps between them. By compressing the dynamic range of the image up to 8 layers, we can preserve the representations of these structures in the final image. Without doing this (i.e., by applying HDRMT just to small-scale structures), the resulting image would be too 'flat', with small objects well represented but lacking an appropriate representation of the main subject of the image, which is the whole M101 galaxy.
The 6th layer supports what we can describe as medium-scale structures. It represents the largest structures within the spiral arms, such as HII regions and stellar clusters, and the nucleus of the galaxy. We also want to represent these structures appropriately in the final image, since they transport an essential part of the information that we want to communicate.
Finally, the 4th layer allows us to represent and enhance small-scale structures, as high-contrast edges and substructures within HII regions and the spiral arms.
The
divide and conquer paradigm is a basic algorithm design tool that gives raise to powerful data analysis and processing algorithms and techniques. By separating HDR compression into three steps as I have described above, we can solve the dynamic range problem posed by this image thoroughly, while the object is represented correctly in a wide range of dimensional scales.
Other details of the HDRMT instances applied include:
- Two iterations of HDRMT (see the iterations parameter) have been applied with 8 and 6 wavelet layers. This has been done simply to increase the strength of the HDR compression operation. This is of course optional; one decides the amount of compression based on one's own experience and taste.
- HDRMT has been applied with the lightness mask option enabled. This applies dynamic range compression just where it is actually needed: on the brightest areas of the image. This option protects the background from excessive noise amplification and prevents most small-scale ringing problems.
- Large-scale deringing has been applied working at 8 and 6 layers. When multiscale algorithms are applied at large dimensional scales, the risk of generating large-scale ringing problems must always be taken into account. Small-scale ringing artifacts are self-evident and easy to detect in general. For example, a black ring around a star is difficult to overlook. However, large-scale ringing problems can be difficult to discover, basically because they are mixed---sometimes in quite subtle ways---with true image structures. Ringing can be judged from a detailed comparison between the original and final images. You can also subtract them (or compute the absolute value of the difference) to perform a more quantitative analysis. IMO, in this example we have not introduced any significant ringing in the image, or in other words, we have not generated any ringing that can give raise to false structures.
To evaluate the effects of HDR compression and ringing problems more objectively, let's compare the relevant scales of the original and processed images:
8th wavelet layer (scale of 256 pixels), original/processed:
6th wavelet layer (scale of 64 pixels), original/processed:
4th wavelet layer (scale of 16 pixels), original/processed:
As you can see, the large-scale contents of the image have not changed a lot. Basically, only the gaps between spiral arms have been slightly darkened, which increases contrast of these structures. The core of the galaxy has also been reduced in brightness, since here is where more dynamic range compression has been applied (actually, the core is the only structure that poses a true HDR problem in this image). We have applied HDRMT with 8 layers mainly to protect these large scale structures, in order to avoid a flat result.
The medium-scale structures (6th layer) have changed more, and the small-scale structures (4th layer) have been significantly enhanced, as you can see in the comparisons above.
The final process in the 'HDR' ProcessContainer is a CurvesTransformation instance. This is essentially an S-shaped contrast enhancement curve, with additional control points to protect the background and enhance the midtones. This curve is an important step that determines the general shape of our final processed image. It is perhaps the most creative component of the whole workflow, but also where we need more experience to judge what is an optimal result in terms of the equilibrium among the different image structures.
The 'CLAHE' icon is a ProcessContainer with a single LocalHistogramEqualization instance, which has been applied masked with a duplicate of the image. The LocalHistogramEqualization tool has been written by Czech developer and PixInsight user Zbynek Vrastil, and is an excellent implementation of the
Contrast-Limited Adaptive Histogram Equalization algorithm (CLAHE). This tool is really excellent to control the local contrast of medium- and small-scale image structures. I have applied it masked to avoid noise intensification on low-SNR areas, such as the sky background and other dark structures. The result of this tool has been outstanding for this image IMO.
The 'star_repair' icon transports a PixelMath instance. This instance applies the following PixelMath expression:
range_mask + $T*(1 - range_mask)
where
range_mask is the thresholded mask that we generated after the initial nonlinear stretch, with the 'star_repair_mask' RangeSelection icon. The above expression replaces all saturated regions (saturated stars and the brightest part of the galaxy nucleus) with a Gaussian profile whose intensity attempts to be proportional to the original brightness of each (unsaturated) structure. We know that we are working with Gaussian profiles because we convolved (smoothed) the mask with the RangeSelection tool (we applied a smoothness parameter of 2 sigma). The operation applied is just the standard masking operation:
x' = m*f(x) + (1 - m)*x
where x is the input image, m is the mask, f() is any transformation, and x' is the output image. This operation performs a proportional mix of the original and processed images: where the mask is white (m=1), the result is f(x); where the mask is black (m=0), the result is the original image x. Where the mask has any intermediate value 0 < m < 1, the result is a proportional mix of the transformed and input images. In our case, f(x) is the identity (f(x)=1) so what we get is the RangeSelection mask itself.
Finally, the 'final_stretch' icon applies a HistogramTransformation instance to cut a small part of the unused dynamic range at the shadows. I haven't cut it completely because too dark a background makes it more difficult to see dim objects, such as distant galaxies and background nebulae. I usually leave the mean background with a value around 0.1.
Hope this helps.


