Hi Nigel,
I took the liberty of having a look at your original posted image with a view to seeing if the colour adjustment could be achieved entirely in PixInsight.
So, here is a quick synopsis of the procedure I used, starting with your original image
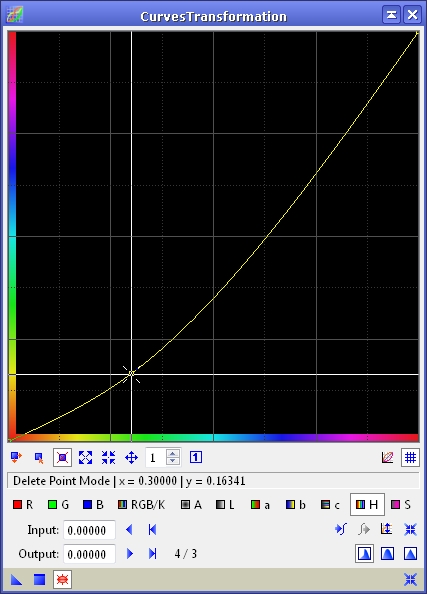
The first thing I wanted to do was to look at your 'greeny-yellow' tints, and get them to appear more 'yellow'. So, using the Hue adjustment panel in the Curves transform, I tried the following curve (whilst monitoring the result using the RealTimePreview window). Here you can see that I am trying to change 'greens' down to 'yellows'.
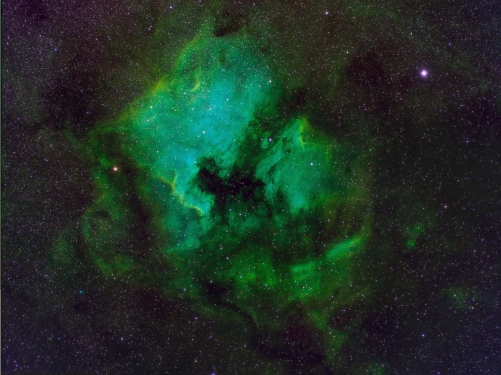
If this single-point Hue Adjustment Curve is applied to the original image, the result is
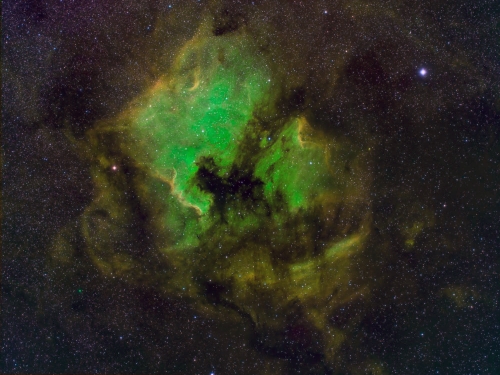
However, the 'cyan' tint that you are after in the centre of the image is still way off. So, I tweaked the original single-point Hue Adjustment Curve to become
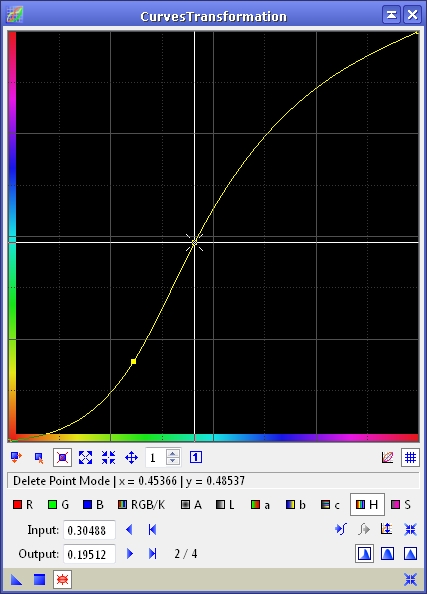
And, if you inspect this curve, you can see that the 'original hues' (as seen along the horizontal axis) will be modified to become the 'new hues' as seen along the vertical axis. This is done by, for example, putting the cursor over any point on the curve and seeing which colour on the 'source' axis becomes which colour on the 'destination' axis. In the example above, the cursor is sitting over the second point placed on the curve, and the 'greenish' hue on the horizontal axis can now be seen to be changed to a more 'cyanish' hue on the vertical axis.
More important is that the curve is reasonably 'smooth' so all colours get shifted 'gently', and that it is therefore not just the colours AT the inserted points that get shifted - the colour shift will affect ALL hues.
For this curve, it could even be argued that the upper section (into the top right-hand corner) should really have had a third, maybe even a fourth, adjustment point inserted to help bring the curve back onto the original 'corner-to-corner straight line'. Had this been done, then there would have been little change to red and magenta hues, whereas the curve I have actually used (generated VERY quickly) does have the effect of pushing magenta hues up towards the reds. However, I didn't see any 'negative effect' in the thirty or so seconds that I played with the sliders, so I stopped worrying!!
So,
starting with the original image once more, I applied the two-point Hue Adjustment Curve shown above and the result was as follows:-
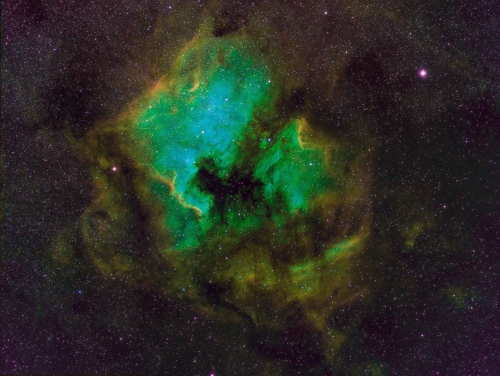
Perhaps because I didn't take enough time defining the Hue Curve, I felt that the image had too much green, so I applied the following SCNR adjustment to eliminate a Green cast in the brighter sections of the image
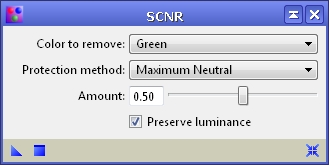
This gave the following result

Now I felt that the image had an excess of Red, so a second SCNR process was applied, this time targetting the Red cast I felt I could see in the dimmest parts of the image
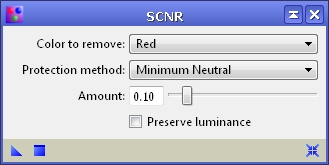
Applying this gave the following result - which is certainly 'getting there'
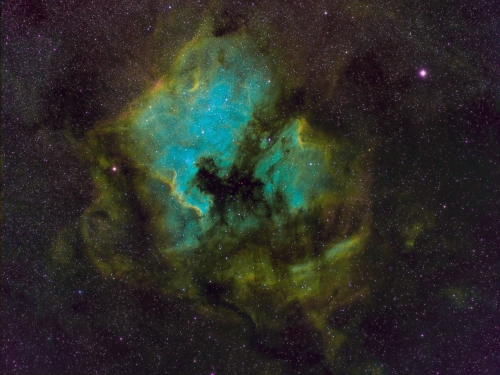
What I now wanted to do was to push up the saturation and brightness levels, to make the colours 'pop', but I found that my first trial was not too pleasant because it 'popped' all the low-level murk as well. So, I grabbed a Luminance version of the current state of the image using the following ChannelExtraction process

which resulted in this image
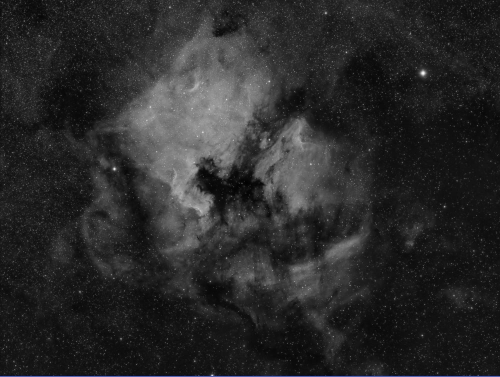
I then applied this to the current state of the image as a normal Mask:-
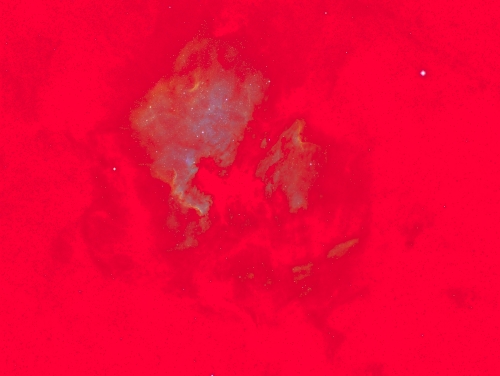
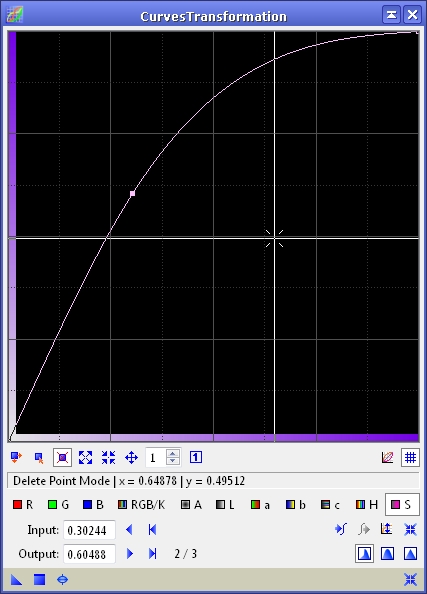
As I said, I wanted to enhance both the Saturation and the Luminance of the brighter (and now un-masked) parts of the image, so I defined the following two curves:-
Saturation
and Luminance (or 'brightness')
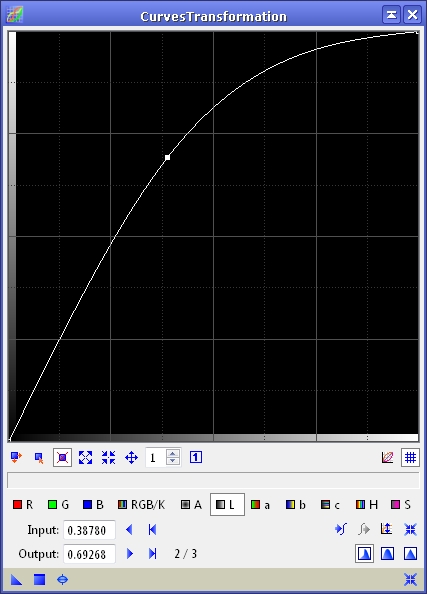
I applied these together, as a single -MASKED- CurveTransformation, as follows (bearing in mind that neither of these curves took more than ONE SECOND to define)
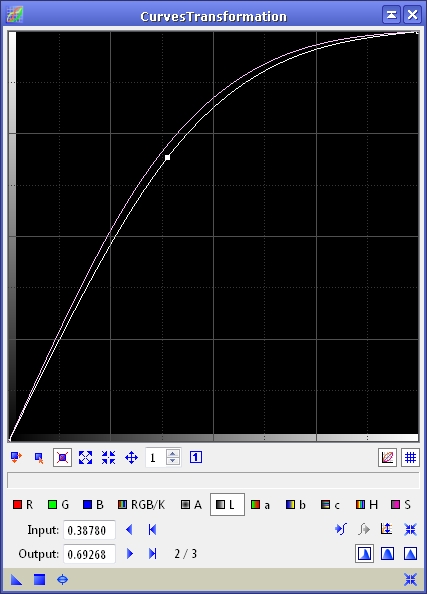
The result was as follows
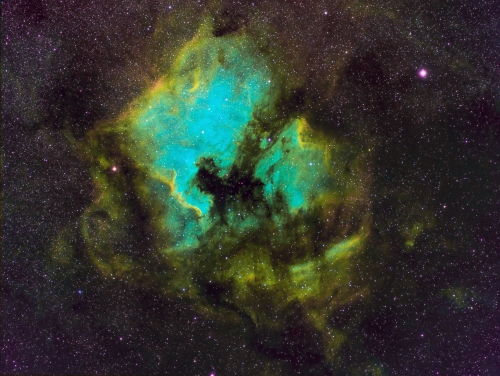
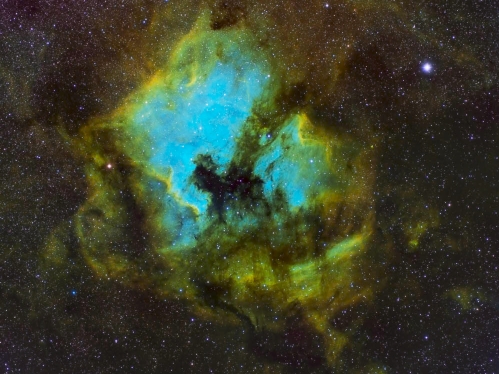
which can be compared with the result you obtained using Photoshop
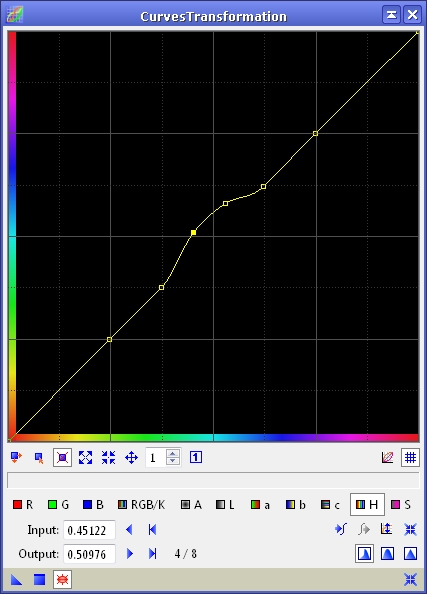
I felt that one possible final Hue Adjustment might have helped the 'blues' in the centre, shifting them more to the 'cyan' end of the spectrum. A slightly more complicated curve, only because I used several points on the curve to help keep all hues except the blues from shifting (by maintaining the curve as a 45-degree 'straight-line' everywhere else, other than in the region of interest). This is the curve I used, un-masked, and I will leave you to see the result for yourself:-
If you want to try using my procedure, the following links will give you the ProcessIcons that I used:-
Main Process (as a process container, double-click to open it, and then apply the processes individually)
http://pixinsight.com/nsaunders/HueAdjustment_Tutorial/MainProcess.xpsmExtraction of the LuminanceMask
http://pixinsight.com/nsaunders/HueAdjustment_Tutorial/LuminanceMaskExtraction.xpsmHope you find this useful.